Quick answer. If a lash applicator lifts a cluster when you open it, do not assume the tool is defective. The applicator may be touching a tacky section of the cluster, too much bond may have transferred to the tool, the jaws may be closing unevenly, or pressure and release may be dragging the cluster. Pause before adding more adhesive. Follow the instructions for your specific cluster system, remove residue from the tool as its maker directs, and check the jaw alignment away from your eye. Replace the tool only if it stays sticky after proper cleaning, is damaged, or cannot grip and release consistently. A different applicator can change the contact point, but it cannot correct excess bond or a rushed release.
What the sticking tells you
The moment the tool catches is useful diagnostic information. If the cluster sticks as soon as you lift it from its tray, inspect the pickup point and the tool tip. If it releases from the tray but catches after placement, look at the adhesive contact area, the amount of pressure, and whether the tool is sliding while you open it. If the tool keeps grabbing after cleaning and with a fresh cluster, inspect the jaws themselves.
This distinction matters because "lash glue" is not one universal material. DIY clusters may use a bond-and-seal system, a pre-glued band, or another adhesive with different directions and removal steps. A fix suggested for one formula may be unsuitable for another. KISS, for example, instructs Falscara users to use a light coat of Bond, place Wisps under the natural lashes and slightly away from the waterline, then apply Seal under the Wisps to address sticky residue. That is system-specific guidance, not a rule for every cluster product.
People describing this problem online often focus on the tool: one wearer says the bond grips the tweezers and pulls at the lashes during removal; another reports the tool sticking to glue and taking the cluster off. Those posts establish that the frustration is real, but they do not identify one cause or prove that a particular tool is at fault. The checks below help separate a technique issue from a tool issue.
Check 1: Is the applicator touching the bond?
Look at where the jaws meet the cluster. Many users naturally squeeze near the base because that feels secure. With a tacky bond system, that can put the tool directly on the adhesive-coated area. The tool may then pick up part of the bond film when you open it. A metal or coated jaw can still catch a tacky formula; "nonstick" is a product description, not a guarantee against every adhesive, amount, or contact angle.
First, compare your grip with the instructions for the exact lash system you own. KISS says to pick up a Wisp from its middle-outer end for control, then place it under the natural lashes; it also describes its applicator as nonstick. If your product's instructions identify a pickup area or a specific side of the band, use that rather than gripping the adhesive-coated edge by habit. Do not assume that placement directions for one brand apply to another.
Before trying again, inspect the tool tip in good light. A transparent or dark residue may be hard to see, so gently wipe the jaw using the method approved by the applicator maker. Do this away from the eye, then let the tool dry fully. Do not lick the tool, add oil, or coat it with powder to make it release. Social posts sometimes recommend improvised barriers, but they are not a substitute for the product instructions and can introduce contamination or transfer material toward the eye.
Check 2: Is too much bond reaching the cluster or the tool?
More adhesive does not necessarily create a better release. If the applicator is coated before it reaches the lash line, inspect the application sequence: did the tool touch a wet bond layer, did adhesive build up on the cluster band, or did you re-grip the same tacky area several times? A tool can become a second adhesive surface when bond transfers to it.
Use the quantity and waiting steps specified by the system. For Falscara, KISS says to apply a light coat of Bond and notes that a little goes a long way. The company then directs users to apply a thin coat of Seal under the Wisps to eliminate sticky residue. Do not add a generic "dry for X minutes" rule: formulas and systems differ, and their instructions may set different timing. If your kit calls for a seal, remover, or separate applicator, do not skip or substitute that step based on advice for another brand.
A useful test is to change one variable at a time. At your next application, use the product's stated amount and sequence, then note whether the tool catches before placement or only after it. If residue appears on the jaws, clean them according to the tool's instructions before continuing. If the tool is visibly sticky, do not keep pressing it against your lashes; repeated attempts can smear more product and make the cause harder to identify.
Check 3: Are you pressing too hard or dragging on release?
A cluster can move with the applicator when pressure stays on the band as the jaws open. This can happen even when the tool is clean. Pressing harder may feel like a way to secure the cluster, but a tight pinch can make release less controlled and can push the tool into the adhesive. On the other hand, barely touching the band may not seat it as your product's instructions require.
Use a mirror and keep your elbow supported so the tool is not moving as you release. Place the cluster where the manufacturer directs. If the system calls for clamping, bring the jaws together only enough to make contact, hold for the time the instructions specify, and gradually reduce pressure while opening. Avoid pulling the applicator sideways along the lash line. If the cluster follows the tool, stop and reassess rather than tugging it back into place.
Do not practice release mechanics on your own natural lashes. If you want to inspect how the jaws close, test the tool empty over a clean surface. For any practice with a cluster and adhesive, use only a method the product maker permits and keep it away from your eye. A short demonstration video can help you compare hand position, but it cannot confirm that your adhesive amount or tool is compatible with the exact product you have.
Check 4: Are the jaws clean, aligned and intact?
A bent tip, rough edge, loose hinge, or uneven closure can snag the lash band. Close the applicator slowly over a plain background and look at the contact line. Do both sides meet evenly? Does one corner touch first? Is there a gap at the other end? Does the tool spring open smoothly, or does it scrape as it moves?
If you see residue, clean the tool only as its manufacturer recommends. Community advice to use rubbing alcohol is user-generated experience, not a universal cleaning instruction. Some finishes, coatings, adhesives, or tool handles may not tolerate the same cleaner. Check the brand's care guidance, keep cleaning liquids away from the eye, and allow the tool to dry before its next use. Do not share eye-area tools; the FDA advises against sharing or swapping eye cosmetics because of contamination risk.
If the jaws are visibly misaligned or damaged, replacement is reasonable. If they close evenly and release cleanly when dry, but catch only when a particular adhesive is present, focus on the system instructions, contact point, and residue rather than buying another tool immediately.
Retail and sourcing references
The two links below are retail references for different buying roles, not proven fixes. We may earn a commission from qualifying purchases through these links, which does not change the troubleshooting order above or establish product compatibility. Neither item has been hands-on tested for this article, and a rating total is a signal of accumulated customer response rather than evidence that a tool works with every lash system. Review the current listing, variant, recent feedback and return terms before ordering.
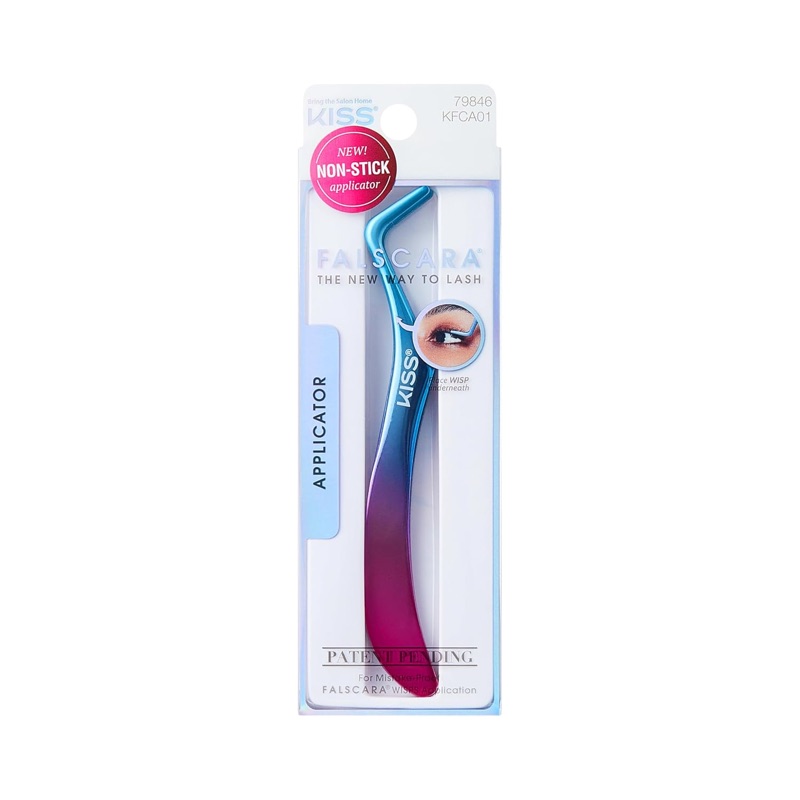
Falscara eyelash applicator for DIY clusters
The applicator sold with the Falscara system, which the maker describes as nonstick and pairs with its own Bond and Seal steps. Useful when you already use that system and want the tool it was written around — confirm the listing is the exact version your kit references.
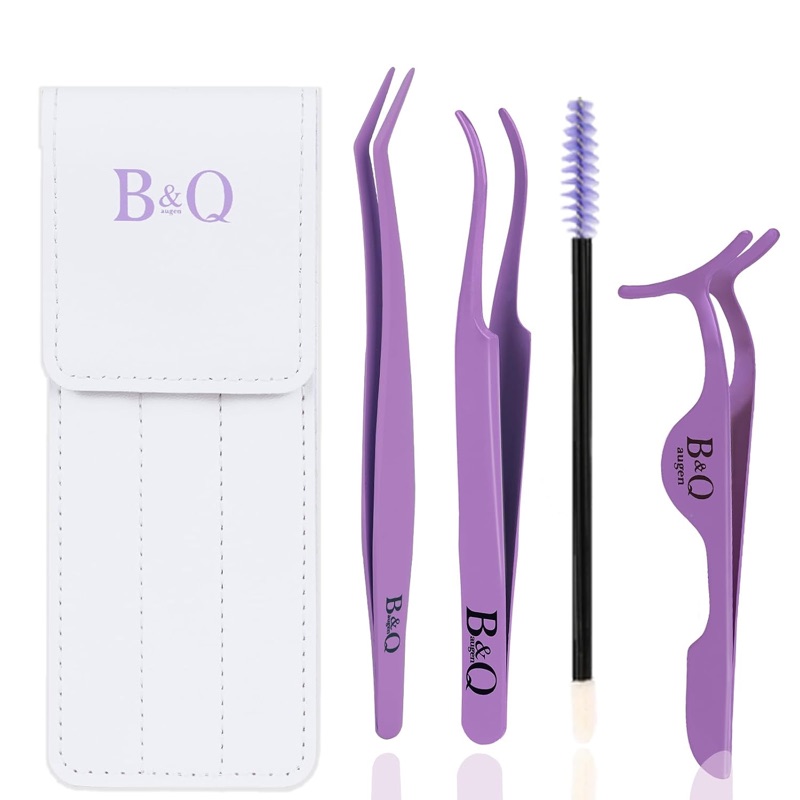
Eyelash applicator tool set, 3 pc
A three-piece lash tweezer set in a multi-tool format, which may help you compare grip shapes and jaw alignment. The listing does not establish that it will stop a particular adhesive from sticking, so inspect jaw closure before trusting it near your eye.
Card photos are the current marketplace listing images and may differ from the delivered product; confirm details on the live listing.
At the time of the page check on October 18, 2026, the linked KISS listing displayed 4.5 stars from 7,797 ratings and the three-piece set displayed 4.2 stars from 1,590 ratings. Amazon ratings and availability can change.
When should you replace the applicator?
Replace it when cleaning does not remove persistent residue, the tips no longer meet evenly, an edge is rough or bent, or the hinge has become inconsistent. A tool that repeatedly slips or catches despite correct use is not worth forcing near the eye. Stop using it if the coating is peeling or the metal has an exposed burr.
If the tool is intact, first change only what the evidence points to. Residue means clean it; an uneven jaw means replace it; a catch at the adhesive contact point means change your grip or follow the product's placement instructions; a problem that appears only with one formula calls for checking that formula's directions. This approach avoids blaming a tool for a product-compatibility or application issue.
A safer troubleshooting order
When a cluster lifts with the tool, use this sequence:
- Stop; do not pull the cluster or add more bond.
- Check whether the jaws touched a tacky band or bond-coated area.
- Confirm the amount, order, and timing in the exact lash system's instructions.
- Clean residue by the tool maker's method and let the tool dry fully.
- Check jaw alignment and surface condition away from the eye.
- At the next permitted application, adjust one variable and release without sideways drag.
- Replace the applicator if it remains sticky after cleaning or is physically damaged.
Eye-area safety sets a hard limit on experimentation. The FDA notes that eye cosmetics can create infection or injury risks when misused, including injury from an applicator. Keep sharp tools steady, work in a well-lit place, and do not apply clusters while moving in a vehicle. Keep adhesive and tools away from the waterline unless the specific product directions explicitly say otherwise. Stop if you develop pain, swelling, persistent redness, discharge, or a vision change; seek professional care rather than trying to solve irritation by changing tweezers. The American Academy of Ophthalmology also warns that rubbing, tugging, or pulling can injure natural lashes and that glue may cause allergic reactions.
Quick questions
Should I buy a nonstick applicator?
It may be worth considering if the jaws are clean and the product's design suits your grip. "Nonstick" describes the maker's intended feature; it is not a universal compatibility test for all bonds and seals. Check the exact listing, care instructions, jaw shape, and return policy.
Can I use rubbing alcohol on lash tweezers?
Only if the applicator manufacturer says that cleaner is suitable. A forum recommendation is not enough to establish compatibility with a coating or handle. Clean the tool away from the eye and let it dry completely before reuse.
Why does the tool stick only after I clamp?
The tool may be touching residue from the bond or seal, or pressure may be dragging the cluster as the jaws open. Check the system's seal step and the contact point before deciding the metal itself is the problem.
Can I pull the applicator away quickly?
A fast pull can tug the cluster. Do not yank or twist it free. Reduce pressure gradually and open without sliding across the lash line. If it remains attached, stop and follow the lash-system maker's instructions rather than forcing it.
The practical decision
A lash applicator that pulls clusters off is a symptom, not a diagnosis. Start with the contact point and residue, then verify adhesive quantity and sequence, release pressure, and jaw condition. Replace a tool that is damaged or cannot be cleaned, but do not expect a different shape alone to fix excess bond or incompatible instructions. If the problem persists, pause the application and contact the product maker. Protecting your eye and natural lashes matters more than finishing a set.