A customer opens a press-on set and the nails are loose at the bottom of the box. None has broken. The design may still be beautiful. But the left and right thumbs, alternate sizes and decorated accents no longer sit where the seller placed them. The card has lost its most useful job: letting a person understand the set at a glance.
That problem begins with a narrow product choice. The small adhesive strip between a nail and its display card has to hold through packing and transit, yet let a customer lift the nail without a gummy patch on its underside. More tack is not necessarily better. A nail that survives a shake test but tears the card or leaves a thick layer on the tip has merely failed later in the journey.
The concern is grounded in practice, though it is not a measured industry defect rate. A nail artist described double-sided display tape as a frustration while redesigning her press-on packaging. A separate report described putty residue when taking press-ons off a work stand; that is a different use case, but it points to the removal side of the trade-off. Marketplace listings offer pre-cut display strips and storage cases with mounting tape. They show formats on sale, not that the adhesive will work on your card, finish and mailer.
Keep three adhesives from becoming one purchase
The adhesive that attaches a press-on to a natural nail is a wear product. Mounting tape attaches a finished tip to a card or storage case before use. Putty or tabs on a manicure stand hold a tip while an artist paints it. The contact surface, required holding time, removal motion and acceptable residue are different. A search for "nail sticky tabs" will return all three. Buying the first popular listing without defining the job can put the wrong adhesive in a retail pack.
For the display-card job, specify exactly where the strip touches: preferably a controlled area on the underside of the finished tip and a known spot on the card. Does the customer keep the card for storage after wearing the set? Will a second piece of tape be supplied for that later use? A one-time mounting strip should not be advertised as a reusable storage system until repeat attach-and-remove cycles have been tested.
The card itself is half the bond. Uncoated paper, gloss lamination, matte lamination and plastic do not offer identical surfaces. Print varnish or powder can be left on a card; an underside of a nail can vary with mould texture and finishing. A supplier's "strong adhesive" description is therefore an assertion about its product in general, not proof of performance against the two actual surfaces you sell.
The buyer's real acceptance test has two endings
Make a small batch of complete sets with the proposed strip. Use the actual decorated nails, printed card or tray, retail cover and shipping mailer. Photograph the layout at pack-out, including size labels and the position of every nail. Keep a reference set beside the test units. A bare card on a desk cannot reproduce pressure from a lid, a file tucked behind it or a mailer that bends.
First test retention: after normal assembly, handling, storage and a representative parcel journey, are the nails still in their assigned positions? A small movement may be acceptable if the sizes remain readable; a loose accent nail mixed with other sizes may not. Agree on the pass criterion before looking at the result. If you perform a drop or vibration simulation, document the package, height or method and number of repetitions; do not call a homemade test compliance with a named shipping standard.
Then test release: ask a person who did not pack the set to remove a nail as she normally would. Where does the adhesive stay — on the card, on the tip, split between both, or in a string? Does it lift the printed surface? Does the tip warp, crack, lose decoration or pick up a fingerprint during the attempt? Can she still identify the size after removing one nail? Record the release from several positions on the card, including the largest and smallest tips. One oversized thumb can hold differently from a narrow little-finger tip on the same strip.
Run these checks on more than one production lot and after realistic storage, not just immediately after assembly. Heat, pressure and time may change some adhesive systems, but do not assume a specific outcome without testing the chosen tape and packaging. One tape manufacturer describes differential tapes with a more permanent side and a removable side for temporary mounting, and one adhesive brand distinguishes removable products from permanent ones. Those references explain why "double-sided" alone says little about release. Neither reference certifies the marketplace products below.
Keep the retail presentation test distinct from shipping protection. If a lid presses directly on raised decorations, tape is being asked to resist leverage from the box itself. A deeper tray, a different orientation or a stiffer mailer may solve that load more honestly than adding adhesive. Make one parcel with the normal carrier-facing materials and another with the proposed packaging change, then compare displacement and removal. A card photographed flat for an online listing is the starting condition, not evidence that it will arrive that way.
Pre-cut pieces versus a roll
Pre-cut strips can make positions and quantity easier to repeat. A sheet with a known count lets the packer take one piece per nail without measuring. It also introduces a fixed footprint: a strip that extends beyond the underside of a small tip can grab the card where it should not, or become visible from the front. Check that the liner lifts cleanly with gloves or the tools your packer actually uses.
A roll lets a worker cut for a very wide thumb, a miniature tip or a card layout that changes between designs. That flexibility brings more opportunities for uneven length, extra backing waste, skewed placement and variable assembly time. A roll can be economical in the box yet costly if every set requires careful measuring and rework. The question is not "which tape is stronger?" It is which format produces an accepted card at the rate and consistency your operation needs.
Do not add two strips under every nail by habit. On a long tip, two spaced contact points might reduce rocking in one tray, but they also double placement work and may make removal harder. Test one appropriately sized piece against two at defined positions on the same decorated tip. Document which option holds the tip straight without touching the painted face or reaching beyond the underside. If both fail, change the card support or cavity rather than automatically increasing the tape area.
Decide what "no residue" means in this kit
"Residue-free" sounds definitive but needs an inspection rule. Under a good light, inspect the underside of the detached tip for visible adhesive, tack to a clean finger, fibre pickup and discoloration. Check the card for torn ink or lifted laminate. Test the nail after an hour and after the intended storage period, because a fresh assembly can behave differently from a set kept in inventory. A soft-touch card coating and a high-gloss card may produce different removal behaviour with the same strip.
Do not promise that a customer can clean residue with any household solvent. It may affect the nail's finish, decoration, or later adhesive bond. If a mounting tape leaves residue on the underside, replace or redesign the mounting method rather than handing the buyer an untested cleanup instruction. Similarly, do not place tape on the visible painted face to increase retention. That shifts the risk onto the design the customer paid for.
One adhesive brand's own FAQ notes that its products have different bond strengths and that removal from hard nonporous surfaces can require a rolling motion or additional remover. Even a branded "removable" label has conditions. Ask a supplier for the intended substrates, bond type, thickness or profile, liner and handling instructions, then test those details with the exact card and tip. A generic paper-craft glue dot can be useful as a comparator, but it is not automatically a nail-packaging solution.
Retail and sourcing references
The two links below are retail sample routes for the two formats compared above: a pre-cut sheet and a cut-to-length roll. We may earn a commission from qualifying purchases through them. Neither is a verified private-label or recurring wholesale arrangement, and a rating is not a retention result.
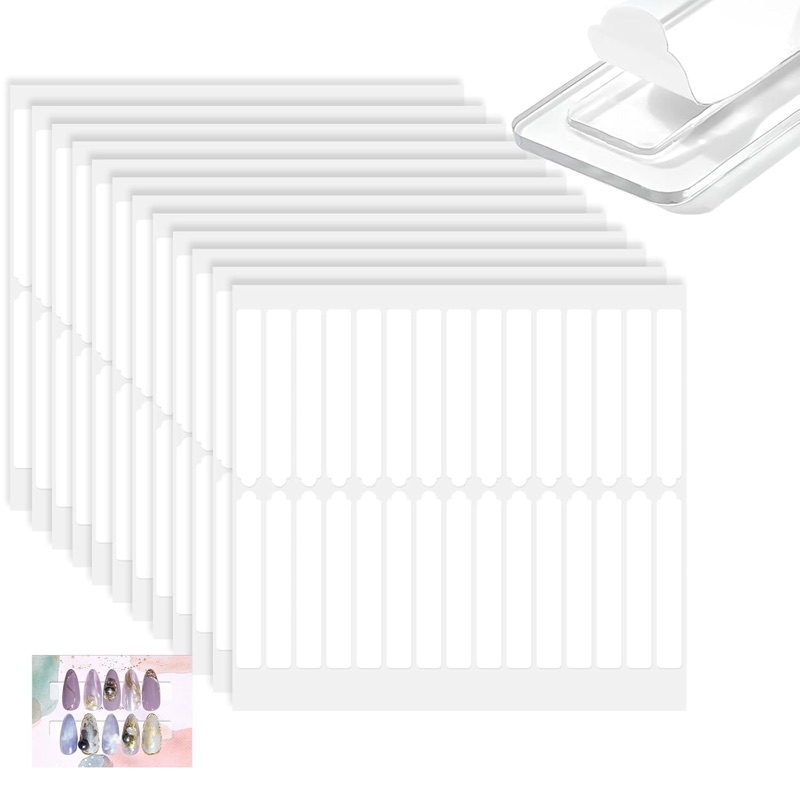
Pre-cut display tape, 12 sheets, 360 pieces
A pre-cut display strip pack listed as 30 pieces per sheet, 360 in total, with 4.6 stars from 100 reviews when checked. The fixed footprint makes placement repeatable — measure the actual adhesive area and test release on your finished tip and card before adopting it.
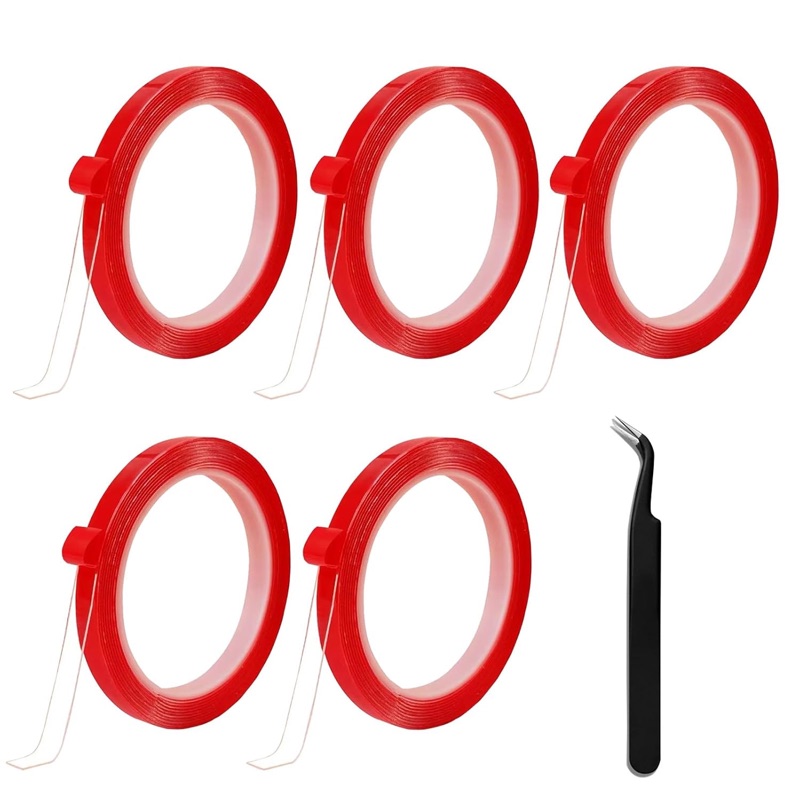
Double-sided display tape, 5 rolls
A five-roll pack supplied with tweezers, listed at 4.6 stars from 265 reviews. The roll suits wide thumbs and layouts that change between designs, but adds measuring and cut waste — confirm the usable width and length of a delivered roll and time an assembly before committing.
Card photos are the current marketplace listing images and may differ from the delivered product; confirm details on the live listing.
Ratings, review totals and bought-in-past-month labels are moving marketplace signals. Product fit, accepted-pack yield and a customer-friendly release matter more than the badge on a search result. For the surrounding pack-out question — tray depth, mailer choice and the bag-versus-box decision — see our bag or box packaging guide.
Translate the test into a reorderable specification
Name the mounting component in the kit bill of materials with its format, supplier SKU, adhesive-piece width and length or roll width, approximate thickness, liner type, colour, placement map and required count per finished set. State whether a piece may be trimmed and whether a change in adhesive, liner or substrate needs approval. Attach a dated approved sample card with ten or the actual set count mounted on it. Include the customer's release result in the approval record, not only a picture of the sealed box.
When the retailer or assembly partner requests a substitution, "clear double-sided nail tape" is too loose a description. The replacement may have a different contact area, require longer pressure, or leave a stronger bond on the wrong side. A supplier should tell you which face is intended for the card and which for the nail if its product has different sides. If that distinction is absent, do not infer it from a technical sheet for a different product.
At incoming inspection, check the delivered piece count or roll length, liner release, visible contamination, cut consistency and carton identity. Mount spare tips from the same finished SKU on your approved card and repeat both retention and release. At pack-out, inspect the distance between strips and size labels so a strip does not cover a number or bridge two adjacent nails. Keep the lot or purchase-order number linked to the finished kit batch. That makes it possible to investigate a complaint about loose nails or difficult removal without guessing which tape was used.
Write down the failure location. If the strip stays attached to the card while a tip drops, inspect the tip underside and contact pressure. If the strip and tip lift together, inspect the card finish and its surface preparation. If the carrier splits, investigate the tape construction and handling. These observations direct the next sample request; a blanket instruction to buy "stronger tape" does not. When a design has heavier charms than your standard line, treat it as a separate packaging load rather than assuming the approved tape works for every weight and centre of gravity.
Cost the accepted card, not the retail pack of tape
Suppose a set has 24 tips and takes one mounting piece per tip. A run of 500 sets needs 12,000 correctly placed pieces. If the packer rejects 3% of pieces during handling, the illustrative input requirement is 12,000 divided by 0.97, rounded up to 12,372. The 3% is a scenario, not an observed defect rate. A 360-piece retail pack would require at least 35 packs for that scenario, before samples or other losses. Check the actual count and purchase units; a roll instead needs measured usable pieces per length, including cut waste.
Add labour. Time the same packer assembling several complete sets with the pre-cut sheet and the roll, using the same card and layout. Count liner scraps, crooked pieces, rejected tips and finished-card time. Then compare those accepted cards after a representative shipping trial and release test. A few cents saved on tape do not help if they create an extra handling step on every nail or turn a customer's first look into a pile of loose tips.
Keep a small service stock of matching mounting material if you offer replacement nails or reusable storage cards. Replenish by the approved specification and expected production runs, rather than buying a new "similar" tape each time a marketplace listing changes. A consistent set presentation depends on the little adhesive piece being as controlled as the tip size and printed card.
The decision can be made before a large packaging order. Select the candidate formats, build finished cards, test holding and release after the real packing journey, calculate yield and assembly time, and approve the one that does both jobs. A display card should keep every nail where it belongs until the customer chooses to lift it — and then let go cleanly.