If you sell press-on nails, the glue bottle can be the smallest item in the kit and the component most likely to create a disproportionate customer-service problem. A cap that loosens, a brush that arrives stiff, or a bottle that does not fit the tray can make a polished set feel unfinished. Yet choosing glue by price or by a supplier's "strong hold" claim alone tells you very little about whether it will work inside your specific kit.
The useful question is not simply which nail glue is best. It is whether a particular glue, applicator, label, and package work together in the exact set you plan to ship. Sellers ask what glue to include with every press-on set, while consumers describe mess, clogged squeeze bottles, and difficulty controlling the amount dispensed. These are individual experiences, not controlled tests, but they point to a practical product-development task: test the glue as a kit component before committing it to every order.
This guide lays out a small-batch approval process. It helps you choose what to compare, write a useful sample request, assess the complete packed kit, and decide whether to include glue, offer it separately, or provide adhesive tabs as another option. It does not promise a wear time or make a blanket safety claim. Those depend on the formula, the nail set, application directions, and the user.
Start with the buyer's job, not the bottle
Before sampling, define what the included adhesive is meant to do. A customer buying a ready-to-wear set may value a short setup and easy application. A customer who wants longer wear may care more about having a reliable adhesive and clear prep instructions. Someone who prefers short, temporary wear may want tabs. One small bottle cannot satisfy every use pattern, and adding both glue and tabs does not automatically make the set better if the directions leave the customer unsure which to choose.
Look at your product format and sales promise. Is the adhesive essential to the set, or could customers choose it separately? List the tools and instructions already included; press-on kits vary in their combination of files, prep items, tabs, glue, and cards.
Write a one-sentence use case before contacting suppliers. For example: "A first-time customer should be able to apply this medium-length set at home using the included brush-on glue and a one-page instruction card." That statement is not a performance claim. It is a test brief. It tells you which bottle and directions to evaluate and keeps the sample discussion focused.
Choose the adhesive format to test
The basic formats have different trade-offs. A squeeze tube or small nozzle bottle can be compact and inexpensive, but customers may find it harder to control a small amount, and a narrow opening can become difficult to use if adhesive dries around it. A brush-on bottle offers a familiar application motion and can spread a thin layer, but the brush, wiper, neck, and cap all need to work together. A brush that sheds, stiffens, or picks up excess product can make a neat package frustrating to use. User comments about these experiences are useful prompts for testing, not proof that every bottle of a given type will behave that way.
Adhesive tabs offer a different route. They avoid a liquid bottle in the kit and may suit customers who prefer a temporary or glue-free application. They are not interchangeable with glue: the package needs to explain which option to use, and the nails and instructions should be evaluated with that choice in mind. Do not claim one format lasts longer for all users unless you have evidence for the specific product and directions.
For an initial comparison, request samples of no more than two or three formats. Include at least one configuration you can realistically source at your expected order size. A custom bottle or formula may look attractive, but it can have a higher minimum, longer lead time, extra artwork, or a separate compliance review. A standard bottle can be a lower-complexity way to assess fit before you invest in custom packaging.
Send a sample brief suppliers can answer
"Please send your best glue" is not a useful request. Suppliers cannot know whether you need a retail-ready consumer product, a kit accessory, a specific applicator, or a private-label item. Send one compact specification sheet for each candidate. Include the adhesive format, intended use with press-on nails, bottle capacity, applicator type, cap style, outer dimensions, current packaging, and destination sales market. Ask the supplier to identify what is standard and what requires customization.
Request the documents that apply to the exact formula and destination market. Ask for the current ingredient declaration, product label artwork or label text, safety data sheet where applicable, and any test or compliance documents the supplier says are relevant. Record document names, issue dates, formula or product codes, and the supplier contact who supplied them. A document for a different glue, factory, or package is not confirmation for the sample in your hand.
Ask whether the supplier can provide samples from the intended production configuration, and whether a later bulk order would use the same formula, bottle, brush, cap, and label. If any component might change, get that in writing before paying for custom art or approving a production sample. Supplier pages advertise brush-on and private-label services, but advertised capability is only a lead; MOQ, exact configuration, and documents still need to be confirmed directly.
Run a repeatable sample check
Test each candidate in the same sequence and record what happened. Keep the lot or sample identifier, date, room conditions if relevant, and the exact press-on set used. The purpose is comparative screening, not a laboratory claim about chemical performance.
First, inspect the unopened bottle. Photograph the front, back, cap, base, seal, and any outer carton. Compare the received sample with the listing or specification: size, colour, closure, printed information, and visible fill level. Note damage, residue, staining, or a strong odour. Do not open or handle a leaking or visibly damaged sample as though it were acceptable.
Next, check the applicator on a clean surface and on a test nail. Note whether the cap opens and closes smoothly, the brush reaches the product, the brush is centred, and the amount dispensed is manageable. On a brush-on sample, look for visible brush damage, excess product around the neck, or a cap that becomes difficult to close. On a nozzle or squeeze format, note whether the opening is controlled and whether the bottle dispenses more than intended with light pressure. These are observations about the sample, not universal pass/fail thresholds.
Use the glue only according to the supplier's directions and the instructions you plan to provide. Test on a small number of nail sizes and shapes from your own range. If your collection includes a wide thumb, a deep curve, or a long nail, include those examples. Record whether the application steps are clear, whether the product can be used without contaminating the brush or nearby surfaces, and whether the press-on sits as intended. Do not change several variables at once: nail prep, glue amount, placement, and hold time can each affect the outcome.
Finally, inspect the bottle after use. Check whether the cap can be fully closed, the neck or nozzle has visible residue, and the brush or tip remains usable at the next session. Follow the supplier's storage instructions between checks. If you compare multiple samples, use the same interval and storage conditions and label each one. A sample test cannot establish shelf life or predict every customer's experience, but it can uncover obvious problems before launch.
Check the packed set, not just the loose bottle
A bottle that works on a desk can still fail in a retail package. Place the glue in the intended tray, pouch, carton, or accessory compartment with the actual nails, insert, file, tabs, and instruction card. Confirm the bottle does not press against nail tips or raised decorations, and that customers can remove it without tipping out the rest of the kit. The package should close without bowing or forcing the lid against the cap.
Do not choose a box from a generic nail-kit size chart alone. Packaging suppliers themselves note that nail shape, decoration height, tray layout, and accessory wells affect the final dimensions; their recommendations still need to be checked with the fully arranged product. Measure the assembled kit, including the tallest nail decoration and the largest bottle dimension. Share these dimensions with the packaging supplier, then request a physical sample or mock-up using the real components.
For a shipping check, prepare a small number of complete kits as they would leave your workspace. Inspect them before and after the shipping or handling simulation you can reasonably conduct. Look for a loosened cap, glue residue, a shifted bottle, scuffed printed surfaces, crushed nail tips, or a tray that no longer holds its contents. This is a screening check, not a certified transit test. If shipping damage is a material risk, ask a packaging lab or qualified provider about testing appropriate to your sales channel and parcel conditions.
Photograph the approved layout from above and after closing. Those photos become a simple production reference: bottle orientation, insert position, instruction-card placement, and free space around the bottle. A packing reference can prevent a later supplier or fulfilment change from quietly creating a new fit problem.
Retail and sourcing references
The three links below cover two consumer glue formats and one bulk brush-on listing. We may earn a commission from qualifying purchases through these links. Each is a reference for comparing format and documentation, not evidence that a glue suits your kit.
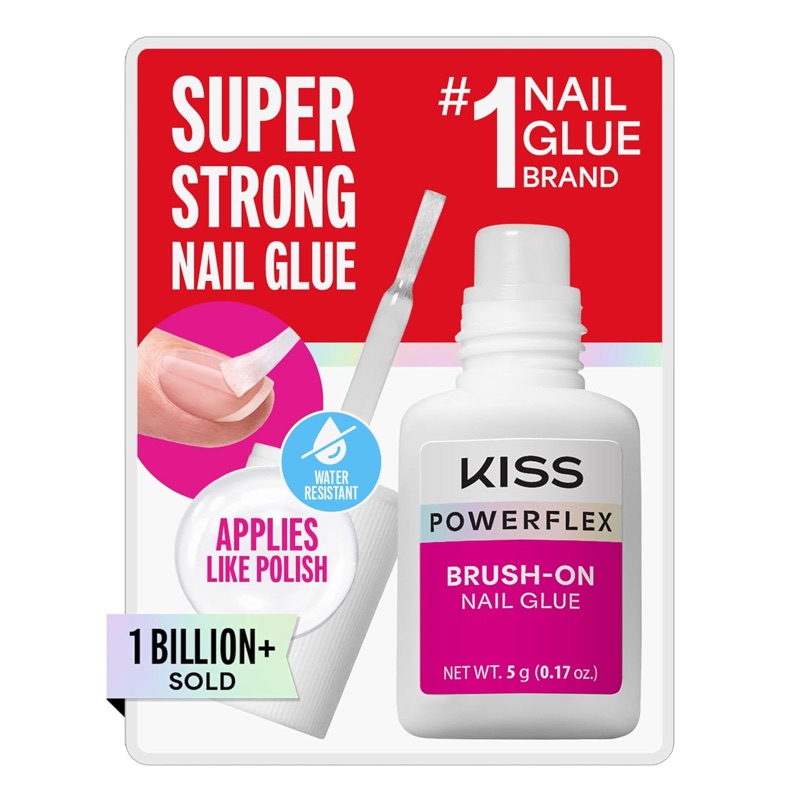
Brush-on nail glue for press-on sets
A brush-on format, which suits painting adhesive across a bonding area rather than squeezing a bead from a nozzle. Compare its brush, wiper, neck and cap in your own kit — a brush that sheds or stiffens creates a different complaint from a bottle that will not close.
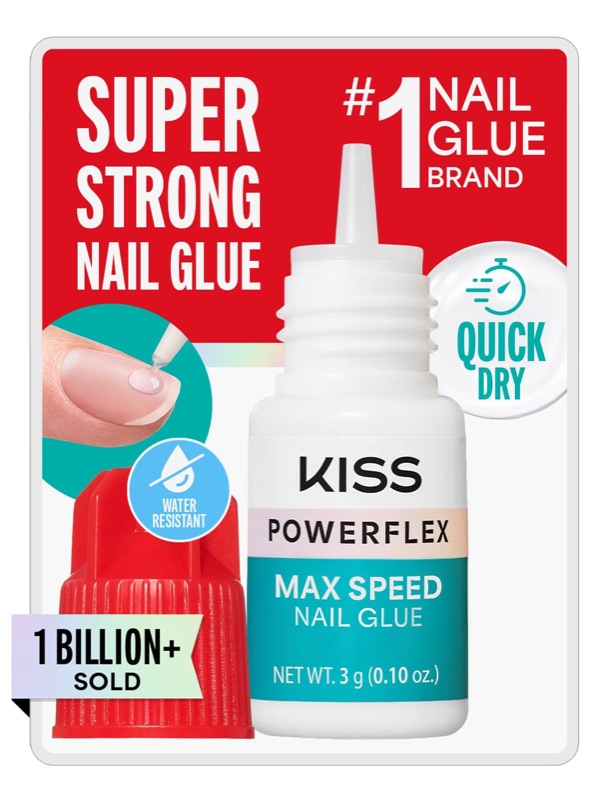
Fast-drying drop-on nail glue for press-ons
A drop-on format for the same brand family, useful as the comparison candidate when your test is about controlling the amount dispensed rather than spreading a layer. Read the directions on the exact bottle: hold times and application points vary by product.
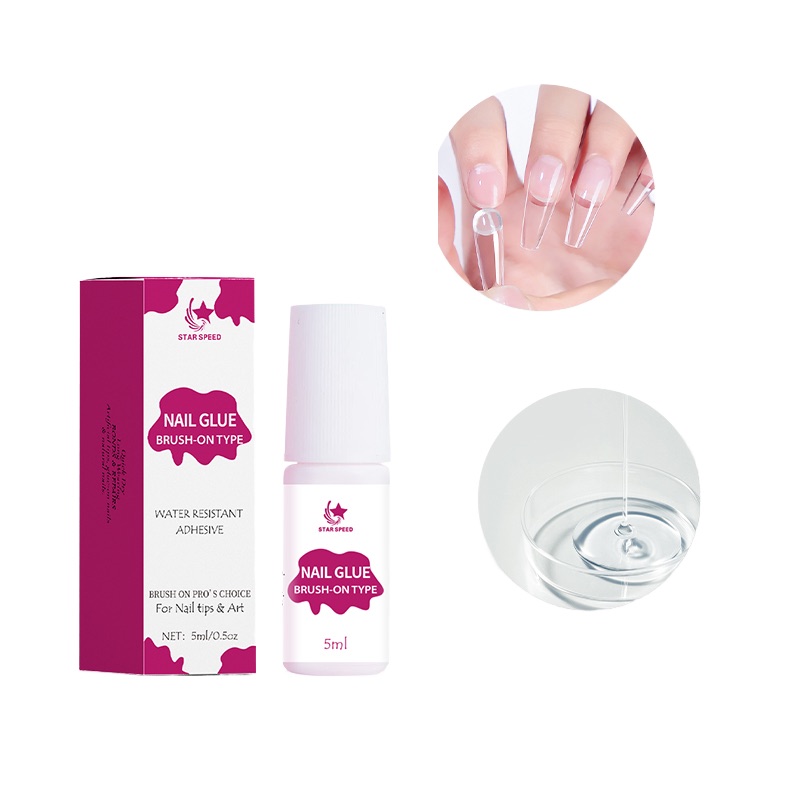
Brush-on nail glue, 5 g, wholesale
A bulk brush-on glue listing for brands assembling kits. Treat it as a sample inquiry rather than a kit component: request the ingredient declaration, label text for your market, matched brush-cap-bottle configuration and current MOQ before quoting it into a kit.
Card photos are the current marketplace listing images and may differ from the delivered product; confirm details on the live listing.
Product identity and current listing details should be confirmed on the destination page before naming or describing any linked item.
Review label and market requirements before artwork approval
Treat glue as a product that needs its own documentation review, not a decorative accessory. Requirements depend on what the product is, how it is marketed, its formula, package size, destination, and applicable rules. Do not rely on a supplier's phrase such as "safe," "non-toxic," or "compliant" as a substitute for checking the actual product documentation.
For the United States, the FDA says cosmetic products sold at retail to consumers must carry an ingredient declaration, even when described as "for professional use only." The correct classification and labelling obligations for a particular adhesive should be confirmed for that product and its claims; do not assume that every nail adhesive is treated identically. The FDA also explains that most cosmetics and ingredients do not require premarket approval, so "FDA registered" or "FDA approved" language should not be treated as proof that a product has been approved for performance or safety.
CPSC guidance explains that cautionary labelling can apply to hazardous household products and that the requirements depend on the product. That is another reason to ask a qualified compliance professional or the relevant authority about the exact formulation, package, and market before finalizing a label. Check that the label remains legible on the bottle or carton, that required information is not hidden by an outer insert, and that the instructions match the exact adhesive supplied.
Keep a simple approval file with the sample photos, supplier specification, formula or product identifier, label proof, document versions, and your decision. If the supplier changes the formula, bottle, applicator, or label, reopen the approval rather than assuming the previous review still applies.
Compare landed cost and reorder risk
The lowest sample price is not necessarily the lowest-cost kit. Build a per-kit comparison that includes the glue, any extra inner bag or protective insert, the box change needed to fit it, labelling, freight implications, and expected loss or damage allowance. Then compare it with the cost and customer experience of including adhesive tabs, selling glue separately, or offering a kit choice. Use supplier quotes and your own packaging measurements; do not treat a marketplace price as a delivered cost.
Ask suppliers to quote at realistic order quantities and state what the price includes: bottle, applicator, cap, label, carton, and artwork. Have the supplier or freight provider confirm the shipping route for the exact liquid product; a sample shipment does not guarantee the same route for a commercial order.
Record lead time, reorder quantity, and how the supplier will notify you of a formula or component change. If the bottle may change between orders, keep the package flexible or sell the glue separately until repeat supply is established.
Use a clear approval gate
Before approving a first order, make sure you can answer six questions: Does the sample match the requested product and documents? Can a first-time customer understand how to dispense and apply it? Does the closure remain clean and usable after the test? Does the bottle fit the complete kit without stressing the nails or package? Are the label and instructions being reviewed for the intended sales market? Can you reorder the same configuration at a cost and quantity your business can support?
If one answer is unknown, keep that item open. Ask for a revised sample, a corrected document, a packaging mock-up, or a written quote. If the sample leaks, arrives damaged, has mismatched details, or lacks the product-specific information you need for review, do not solve the issue with prettier artwork. Hold the component until the underlying question is resolved.
The decision may be to include glue, offer tabs, sell adhesive separately, or launch without an adhesive and explain why. Each can be a valid product choice when the customer can understand it. A well-designed press-on kit is a coordinated set of nails, tools, directions, adhesive, and packaging. Testing the glue as part of that system is a small step that can prevent a very visible first impression from being determined by the smallest bottle in the box.