A press-on nail sizing kit is not simply a few clear tips taped to a card. It is the first version of the product a customer uses to decide whether to buy from you. If its tips, shape, numbering, or instructions differ from the set you later send, the kit creates confidence in the wrong answer. That can lead to a custom order that does not fit, even when the customer followed every step correctly.
For a press-on nail brand, the job of a sizing kit is precise: help the buyer identify a repeatable size record for one named tip system. It should not promise a universal nail size, and it should not quietly stand in for every shape you sell. The more clearly you define its scope, the more useful it becomes for customers, fulfilment staff, and future product development.
This guide explains what must match between a sizing kit and the final retail set, what may be different, and how to use sample feedback to improve a system without mixing incompatible parts. It is written for sellers creating custom press-ons, branded ready-to-ship collections, or a new blank-tip line. The goal is fewer preventable sizing errors, not a more elaborate package.
Start with the question the kit must answer
Before choosing card stock, adhesive dots, or packaging, decide exactly what a buyer can determine from the kit. In most cases, the answer is: “Which numbered tip in this specific shape and mould covers each of my nails without side gaps or pressure?” That is different from asking, “What is my nail size?” A person may have one record in a short square line and a different record in a medium almond line.
Write the scope in plain language on the kit and in the product listing. Include the shape, stated length, the product family or mould code, the number of sizes included, and the date or version if you revise it. A label such as “Almond Sizing Kit” is incomplete if you sell several almond profiles. A customer needs to know whether the test tips represent short soft-gel almond, medium ABS almond, or a separate wide-fit family.
A useful kit includes only the information needed for a reliable choice. Most sellers need a numbered tip range, a simple left/right hand record area, a brief fitting instruction, and a way to return the record. You may add a QR code leading to a short video or form, but it should supplement rather than replace the physical labels. A buyer should still be able to read the numbers after the kit has been opened, handled, and photographed.
1. The tip mould and material must match
The most important rule is simple: the sample tip should come from the same mould family as the final retail tip. A clear, unpainted sample is acceptable when the base tip, size system, curve, and sidewalls match. It is not acceptable to use a similar-looking tip from another manufacturer because it is convenient or cheaper.
Mould differences are not limited to outline. Two tips both described as short coffin can have different internal widths, contact-area lengths, cuticle shapes, and arches. They may carry identical numbers while fitting differently. Material can add another layer: a softer gel-style tip and a rigid plastic tip may flex and sit differently on the same nail bed.
Before assembling a kit, compare the sample tips with a finished control set. Place each matching number together and inspect them from the front, side, and underside. Check the internal width at the widest point, the cuticle-edge width, curve depth, contact-area length, sidewall angle, and number marking. Keep a photo record. If you cannot state that the test tip and production tip match in these functional features, make a new kit instead of explaining the difference away.
2. Shape and stated length must match the sales listing
Shape is not only a design choice. It affects where a tip narrows, how much material remains at the sidewalls, and how customers judge the cuticle line. A customer who tests a short squoval sample cannot safely assume that the same sequence will fit a long almond product. Even when the mould began with a shared size table, the finished shapes may have been cut or formed differently.
Create separate kits when the shape changes enough to alter fit. This may mean one kit for a square/squoval family and another for a tapered almond/coffin family. You do not have to create a new kit for every colour or artwork variation when the blank tip is unchanged. The boundary is functional: does the customer receive the same geometry they tried?
Stated length deserves the same attention. A longer free edge can change leverage and the way a tip sits on a shorter natural nail. If your range has short, medium, and long versions, test whether the same size sequence remains valid before telling customers to reuse it. Where it does not, label the kits separately. A smaller selection with trustworthy instructions is better than a broad catalogue with assumed interchangeability.
3. The size labels and full size range must match
A sizing kit can fail even when the physical tips are correct if the labels are not. Numbering must be printed or attached in the same direction, on the same type of tip, and in the same sequence used for fulfilment. Do not assume that a customer will remember whether the largest tip is 0, 00, 000, or 1. Put the number where the buyer can see it while trying the tip, then give them a simple record field for each finger.
Include every size that a buyer could receive in the final product. Leaving out rare large or small sizes makes a kit appear simpler, but it removes the people who need the kit most. If an extended-size version is sold separately, label that distinction clearly and provide a route for the customer to request it. Do not include one oversized thumb tip without the neighbouring sizes needed to make an informed choice.
Check the full range as a sequence. Measure or inspect the largest three, several middle sizes, and the smallest three. You are looking for duplicated labels, skipped sizes, visibly inconsistent curve, or a jump between sizes that makes the intermediate choice unusable. This matters when stock is replenished: an unannounced mould change can preserve the label sequence while changing the actual fit.
Your fulfilment system must use the same labels. The size record submitted by a customer should be readable by the person making the set without translation. If you use internal SKU names, map them once in the order system rather than relying on memory. A customer’s “right thumb 0” should never be converted into a different factory label by guesswork.
4. The finished coating and decoration need a final-size check
An uncoated clear tip can identify a baseline size, but it does not always prove the fit of a finished product. Multiple gel layers, a thick top coat, 3D decoration near the cuticle, or a structural design treatment can affect the final inside width, curve, or flexibility. This is especially relevant for custom sets where the design changes the physical tip after the sizing sample was chosen.
The answer is not to send every customer a complete painted sample. It is to check your own finished control set against the approved sizing-kit reference. For each new construction method, take a representative tip before decoration and one after it is complete. Compare the internal dimensions, curve, and cuticle edge. If the finished result has changed materially, revise your production process or provide a clear product-specific exception.
Keep the check focused on functional change. A surface colour that does not alter the inside of the tip may not require a new kit. A build-up that narrows the contact area or changes flex is different. Document it in the SKU record so that an assistant or future supplier knows which designs are safe to make from the standard size system.
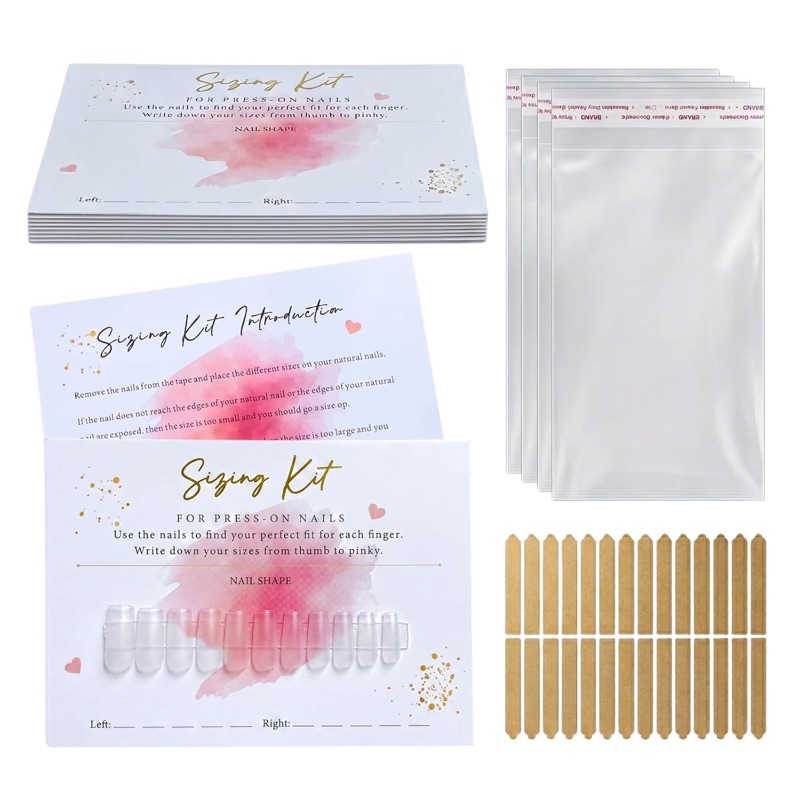
Press-on nail sizing kit cards with clear sample tips
A sizing-kit set of printed cards with clear sample tips for recording repeatable tip numbers. Confirm the current listing and the tip sizes against your own approved mould before mailing a kit.
5. The customer instruction must match the decision you expect
Good instructions reduce ambiguity without telling a customer that their natural nails must conform to the kit. Use a short sequence: test on bare, clean nails; start with the largest plausible tip; choose a tip that reaches sidewall to sidewall without pressure; check that the base sits just above the cuticle; and record the number for each finger separately.
Tell customers what not to do. They should not force a too-small tip across the nail, use the same number for both hands without checking, or assume a number from another brand is transferable. When a measurement or test result falls between two options, state the policy you actually follow. If you ask them to size up, explain whether that means choosing the next wider tip and whether they should report that they were between sizes.
Provide an edge-case route. It can be a form, email, or checkout note for thumbs outside the kit range, very flat nails, unusually curved nails, or a shape that does not sit correctly. Ask for a clear photograph or millimetre measurements only when it helps you make a specific decision. Do not treat customer photographs as a substitute for the physical kit when a physical kit is available.
The return step should be frictionless. Give the buyer a named order field or form for left and right thumb, index, middle, ring, and pinky. Preserve the submitted record with the order. If you later revise the mould, retain which version the customer tested. That history can prevent an unnecessary dispute when a repeat buyer selects a new shape.
How to validate the kit before you launch it
Run an internal validation before mailing the first batch. Select tips from more than one pack of the intended size system, assemble the kit as a customer would receive it, and have at least a few people follow the written instruction without coaching. Record where the process breaks down. Do they misread labels? Do they choose a tip too small because the card makes it hard to view the sidewalls? Does the record form lose the hand or finger order? These are product-design problems, not customer failures.
Then compare the returned size records with the finished sets you would make from them. Put the selected sample and the corresponding finished tip together. Check the same features you inspected during sourcing: internal width, cuticle coverage, curve, contact area, and visible sidewall fit. If the result is inconsistent, identify the specific point of drift. It may be the kit mould, the final mould, the finish process, the instruction, or the order form.
What may differ without misleading the customer
Some differences are functional; others are simply presentation. Clear sizing tips may be packaged on a plain card while the final set uses colour, art, a branded box, and application accessories. The kit may use temporary adhesive dots, while the retail set includes a different adhesive choice. It may arrive in a small envelope rather than the final display packaging. These differences are acceptable when they do not alter the sizing decision.
Say so clearly. A short note such as “This fitting kit uses unpainted samples from the same size system; final design and packaging will differ” sets the right expectation. Do not say “same nails” when only the general shape is shared. Precise language is part of fit accuracy.
The launch checklist
Verify the mould, size labels, physical dimensions, instructions, and final decorated set as one connected system before publishing the kit.
Before you list or mail a sizing kit, confirm the following. The sample tips and retail tips share the approved mould family and material. The kit represents the exact shape and stated length in the listing. The complete label range is present and maps directly to fulfilment. Finished control tips have been checked where coating or decoration could alter fit. The instructions tell customers how to select and submit their record, and they give edge cases a real route for help. Finally, the kit version is stored with the supplier and product references.
This checklist is modest, but it prevents the most expensive type of sizing error: the one created by your own system. A buyer who followed a mismatched kit should not be treated as someone who “measured wrong.” The product information failed to stay connected from sample to sale.
A sizing kit earns its place when it narrows uncertainty. It gives the customer a physical reference, gives the maker an order record, and gives the brand evidence about where the size system is weak. Use it as a controlled product-development tool, not as a decorative add-on. When the sample and final set describe the same geometry, labels, and instructions, the kit becomes a reliable first step rather than another source of returns.