A press-on set can include twenty-four nails and a sheet of twenty-four adhesive tabs, yet still fail to provide a second usable application. The customer may have plenty of narrow tabs left and nothing broad enough for a thumb. Counting total stickers does not answer the question a repeat-use customer cares about: how many complete applications can this particular sheet support for their ten fingers?
One user with long nail beds and a wide thumb described using multiple tabs on a single thumb and struggling to find larger ones. That is an individual experience, not a population estimate. It points to a product-development question that is easy to overlook when purchasing by sheet count alone. This guide shows how a small press-on brand can compare tab widths, lengths and quantities against the nail set it sells, then test the finished kit before deciding whether to add an extra sheet or a different size mix.
Start with two separate fits
Fit the artificial nail first, without adhesive. It should sit on the natural nail as intended without pressing into the surrounding skin. Then consider the tab. The number printed on a nail tip is not a universal adhesive-tab number; the two components may come from different size systems. A sticker can fit inside a press-on while leaving too little contact area on the natural nail, or can cover the natural nail while projecting beyond the press-on's contact area.
Retail instructions often tell customers to select a corresponding tab size, and video tutorials show the peel, placement and pressing sequence. One brand tells users of its tab system to choose coordinating artificial nails and tabs; a retailer's tutorial tells users to measure tabs against their nails before applying them. Both are useful application references. Neither tells a brand whether the distribution of sizes on a purchased sheet matches the hands and nail sizes its own product serves.
Do not define a good tab by maximum coverage alone. A tab that extends onto skin or hangs beyond the press-on can create another problem. The brand needs an acceptable footprint for the real pair of surfaces: natural nail and underside of its finished tip. That footprint depends on the shape, curvature and placement instructions. It should be observed with physical samples, not inferred from a listing photograph.
Count usable pairs, not nominal pieces
Many tab sheets have repeated sizes and some have only one or two of the widest shapes. Photograph a sample sheet beside a ruler and assign a temporary letter to each distinct tab shape. Record the measured width and length of the adhesive area, not merely the overall backing. Note how many copies of each appear on a sheet. If the design has tapered ends, measure the wide point and the region that will sit near the cuticle separately. State how you measured so the next buyer can compare a reorder using the same method.
Next lay out the brand's actual ten-tip size combinations. A customer can have different left and right thumbs; do not assume the set contains mirrored adhesive needs. For each finger, identify every tab on the candidate sheet that fits within the intended contact zone when placed according to the supplier's instructions. A tab that needs to be stretched, doubled, cut across a liner, or moved onto skin to appear usable should be marked as a workaround, not as a normal fit.
Create a ten-finger allocation for one application and physically remove those tabs from a test sheet. Can the remaining tabs make a second full allocation for the same hands? Repeat for a narrow-hand and wide-hand case drawn from your sizing requests or test group. If you do not have customer measurements, label these as hypothetical profiles and gather real data before claiming coverage for a target segment.
A simple illustration makes the inventory problem visible. Suppose a sheet has two tabs that fit a particular customer's two thumbs and many tabs for smaller fingers. After one manicure, the thumb-compatible stock is exhausted. Twenty-two unused stickers can remain without enabling a second full application. That arithmetic is hypothetical; the actual result depends on the sheet, nail set and customer. It explains why "24 tabs equals two uses" is an unsafe product claim.
Width alone misses the long nail bed
A wide thumb may need a broader tab, but a long natural nail bed may also need enough adhesive length in the correct position. One listing can offer fifteen numbered sizes while making some small tabs longer and narrower; another can offer a different shape mix with the same number of sizes. The count of size labels is not a specification of the largest usable contact patch. Treat a listing's description of its narrower, longer small tabs as a seller claim to check against physical samples, not a measured guarantee.
When a customer says the tab is "too small," record which dimension failed. Did it stop short at the sidewalls? Leave an uncovered length toward the free edge? Sit awkwardly under a strongly curved tip? Is the nail itself the wrong width or curve before adhesive enters the picture? A complaint form with a photo of the bare natural nail, dry-fitted press-on and proposed tab can separate these causes. Never treat an anecdote about one shape as evidence that all sheets need a wider thumb sticker.
Some seller pages advise layering tabs or using a "gap-filling" type. That is a different product configuration. Unless the tab manufacturer has approved the method for the exact item and you have tested it with your finished nail, do not build a brand's standard application count around stacking several stickers. The cost and thickness change, and the customer may be left with fewer usable pieces than the pack implies.
The sample test a brand can actually run
Buy two or three distinct tab layouts and retain the packaging, lot information and exact product identifier for each. Include a narrower multi-size sheet, a layout with larger shapes, and the current sheet if the brand already supplies one. Avoid buying three rebranded packs that appear to use the same die-cut pattern. The purpose is to compare geometry and allocation, not collect near-identical product photographs.
Recruit a small test group covering the hands the brand intends to serve. Ask each person to dry-fit the press-on set, record the selected tip for each finger, and then choose adhesive tabs under the candidate's own directions. Take photos before pressing the nail down so the team can see whether the tab stays within the intended bonding surfaces. Note when an exact fit is unavailable and what substitute a user reaches for. Keep left and right hands separate in the record.
Test application as well as paper allocation. The backing should peel without tearing the adhesive, and the cutout should be distinguishable from neighbouring sizes. Observe whether testers can identify a size number while handling a small transparent sheet, whether the liner is easy to lift, and whether tabs shift when the nail is positioned. The same measured width can produce a different customer experience if the die cut, backing or release film changes.
Use the supplier's application and removal directions and document the conditions. Do not invent a universal number of seconds to press or a universal wear duration. One brand's own tab guidance, for example, describes applying its tabs to the press-on and holding for thirty seconds; that is an instruction for that system, not evidence that an unrelated sheet performs the same way.
Ask testers to report where a nail lifts, whether adhesive remains on the nail or natural nail after removal, and whether the tab shape appeared to match at the start. These observations help diagnose a mismatch. They do not establish wear-time performance for a population. A small bench or user sample can reject a plainly unsuitable layout, while a marketed longevity claim needs its own supported test plan.
Retail and sourcing references
The two links below are tab layouts with different nominal counts and shapes. We may earn a commission from qualifying purchases through these links. Neither has been physically tested here, and a piece count is not a count of complete applications.
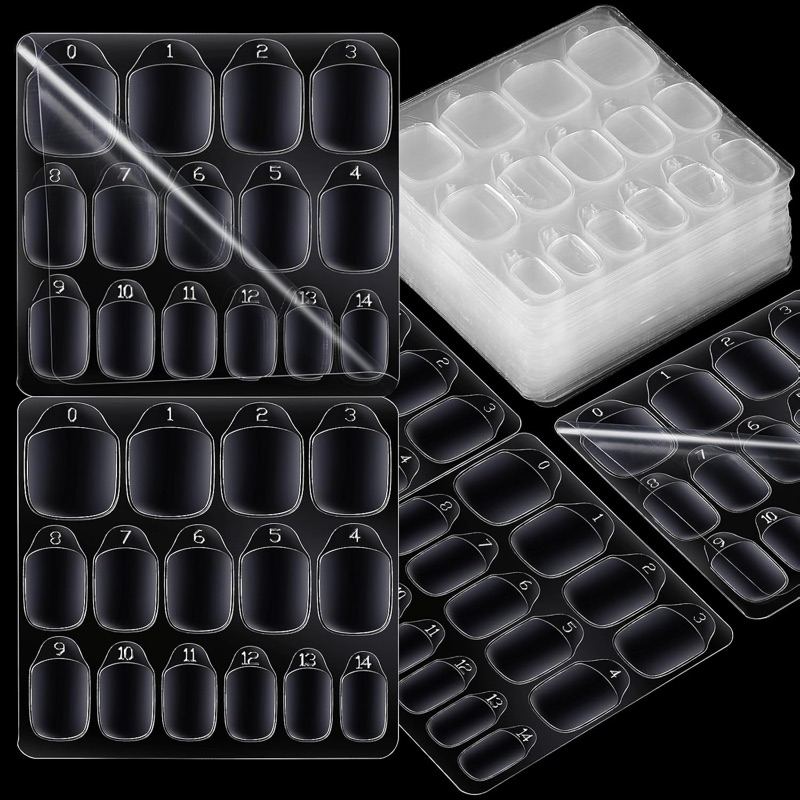
Press-on adhesive tabs, 600 pcs, 15 sizes
A 600-piece multi-size sheet set across 15 sizes, the kind of layout to audit for how many thumb-width shapes it actually carries. Map one ten-finger allocation against your tip mould before treating the total count as two or more applications.
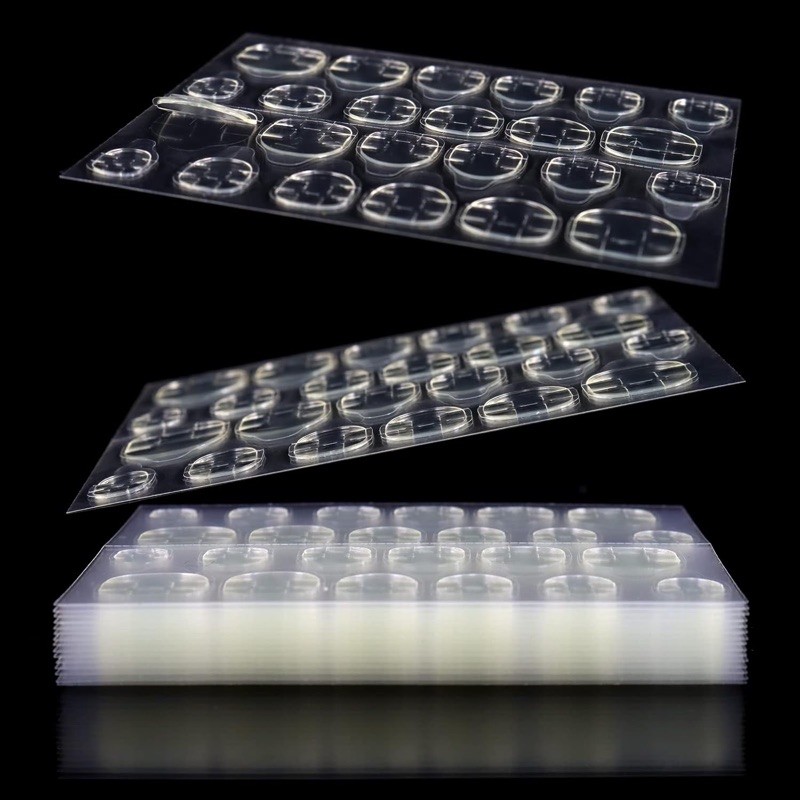
Adhesive tabs, 288 pcs, 12 sheets
A twelve-sheet pack totalling 288 tabs, useful as the second geometry in a comparison because the same count can hide a different shape mix. Check whether the widest and longest positions are present, and whether a supplied sheet can cover a second full manicure.
Card photos are the current marketplace listing images and may differ from the delivered product; confirm details on the live listing.
Other brands also offer replacement tabs for their own nail systems and multi-size packs at different counts. Those formats establish that replenishment options exist, not that any sheet fits your tip mould or your customers' thumbs.
Turn the results into a kit decision
There are several possible fixes, and they have different costs. If one tab shape is missing but the rest of the sheet fits, request a layout with more of that shape or include a supplemental wide-tab strip if the supplier can make it. If the largest tab is too narrow or short, merely adding duplicate sheets does not solve the fit. If the tabs fit but the completed second application fails because of the quantity mix, an extra sheet may be enough. If the tip itself rocks or pinches, go back to nail sizing rather than trying to fill the error with adhesive.
Calculate the cost per complete usable application for the cases you actually tested. Divide the landed cost of tabs included in a kit by the number of complete ten-finger allocations the supplied mix can make for each profile. Show the range, because one profile may use two wide tabs while another uses four. Add the cost of damaged or hard-to-peel pieces observed in handling. Do not count every sticker in the denominator if some sizes remain unusable for that customer.
Then decide what the product page promises. "Includes two tab sheets" is a verifiable inventory statement. "Two complete applications for everyone" is a fit claim that two sheets may not support. If the brand sells refill sheets separately, show the actual layout or a width-and-length reference for key sizes, with a warning that customers should confirm fit before buying. Making the customer buy a large multipack to obtain two more thumb tabs is a poor repeat-purchase experience even when the nominal sticker price is low.
Questions for the sheet supplier
Send a marked-up sheet image with the dimensions you measured and the intended kit allocation. Ask for the die-cut drawing, adhesive patch dimensions by position, number of each shape per sheet, backing and release-film construction, and whether the exact layout can be replenished. Ask whether samples from the proposed order will use the same material and cut pattern as production. A numerical label without a dimension table is insufficient when comparing two layouts.
If requesting a new arrangement, specify whether you are changing tab dimensions, number of repeated wide sizes, the printed numbers, or only the outer pack. These changes can have different tooling, minimum order and lead-time implications. Do not assume a factory supports custom wide tabs or single-size replenishment because a marketplace listing says "OEM." Get the offer, sample and quote for the precise change before describing that capability on your site.
For incoming inspection, keep an approved physical sheet and drawing. Check that the widest and longest positions are present, cuts are centred, liners release without damaging the tab, labels remain readable, and sheets are packaged without shifting or contamination. Sample across cartons and record the lot. If a supplier substitutes a visually similar layout with one fewer thumb-sized pair, the total piece count may be unchanged while the kit loses its second usable application.
Supplier pages already discuss wholesale tab options, private-label packaging and alternative counts such as twelve or fifteen sizes. The existence of these options is not proof of minimum order, affiliate eligibility or suitability for a particular brand. Treat them as leads for a sample request and apply the same physical allocation test.
A small, durable piece of product data
The useful output is a sheet map: a dated photograph, a position-by-position dimension list, quantities per shape, ten-finger allocations for tested profiles, and the exact tip mould and tab lot used. Keep that map with the approved sample. It is more useful at reorder time than a vague note saying "strong sticky tabs, 24 pieces." A change in mould, adhesive sheet or liner should trigger a comparison against the reference.
Consumer advice about selecting the nearest size remains useful, but the brand controls the sizes and quantities customers receive. When the wide shapes run out first, the problem is often visible before a set ships: the sheet did not contain enough complete allocations for the intended customer. Measure the distribution, test it against actual hands, and sell the number of usable applications the kit can support.