A beautiful approved sample does not prove that a delivered batch is ready to sell. Between approval and packing, a press-on nail order can change in quiet ways: a substitute mould, a different size sequence, thinner sidewalls, a shifted decoration, a missing accessory, or a packaging insert from an older version. None of these requires a dramatic factory error. They are ordinary production risks, and they become expensive when they are discovered only after customers receive the sets.
A receiving check gives a small brand a controlled pause between delivery and fulfilment. It is not a claim that every unit has been laboratory-tested. It is a repeatable method for deciding whether the batch matches the sample and specification you approved. The goal is to detect meaningful variation early, keep a record of what was accepted, and isolate unclear stock before it becomes a return problem.
This guide is for press-on nail sellers receiving blank tips, finished sets, or assembled private-label kits. It assumes you have an approved reference sample and a written order record. If you do not, create those before your next order: a good inspection cannot compare a batch with a memory or a generic product photo.
Set up the receiving record first
Give the batch a simple internal identifier. Record the supplier or seller name, purchase-order reference, delivery date, SKU, shape, stated length, size system, decoration or finish, packaging version, and quantity received. Photograph the outer carton labels and a representative unopened inner pack. Then place one approved control sample beside the units you inspect.
Use the same inspection sheet every time. The sheet does not need to be complex. It should include the seven checks below, a pass/fail or hold result, the number of units sampled, notes, photos, and the person who made the decision. Consistency matters more than elaborate wording.
Choose samples from more than one inner pack. Inspecting only the top set can miss variation between bags, trays, or carton locations. For a small order, you may inspect a larger proportion. For a larger order, use a defined sample plan you can repeat and increase the sample if you find a defect. The point is not to announce a universal percentage; it is to make the check sufficient to reveal whether the stock is consistent.
1. Confirm the SKU and approved reference
Begin with identity. Check that the received item is the SKU you ordered, not merely a similar-looking design. Match the shape, stated length, colour direction, surface finish, size range, quantity per set, and any special decoration or accessory requirement against your written specification and approved sample.
Look for signs of a silent substitution. The product name may be correct while the mould has changed. A clear or neutral finish may hide a different material. A product photo may show an older package. This is why the approved physical sample is your primary reference: place it next to the received unit and compare the front, side, and underside.
If the supplier supplied several designs in one delivery, keep the records separate by SKU. Do not accept a carton based on one successful design. A long coffin design with charms has different risks from a short French set, even when both use the same outer box.
2. Check size sequence and physical dimensions
Next, check that the size labels, number of tips, and physical sizes match the approved system. For a finished set, lay the ten nails in order. For blank-tip inventory, select a full set of sizes from more than one pack. Confirm that labels are present where expected, no number is duplicated or missing, and the largest and smallest tips correspond to the control sample.
Measure the internal width of the highest-risk sizes: usually the largest two or three, a middle size, and a small size. Use the same measurement point you recorded during sampling. A digital caliper makes this easier for a small-batch check, but the useful result comes from a consistent method, not the tool alone. Compare both the width and the visible curve; equal width does not guarantee the same fit.
3. Inspect edges, sidewalls, and surface finish
Run a fingertip and visual inspection around the edge of each sampled nail. Look for burrs, sharp points, warping, rough trimming, cracks, or uneven sidewalls. A minor issue on one blank tip may be workable before a design is applied; the same issue in a finished set can cut the customer, interfere with application, or make an expensive design look careless.
Examine surface finish under consistent light. Compare gloss, matte texture, chrome effect, colour, transparency, and any printed or hand-painted detail with the approved sample. Do not reject a batch because two photographs look different under different lighting. Instead, use the same light, background, and viewing angle for the control and received unit. Record the observation in plain terms: “one visible scratch near free edge,” “matte finish visibly glossier than control,” or “colour shift from warm pink to cool pink.”
Check the underside too. Residue, uneven coating, or material flash can change how the nail sits on the natural nail. For sets designed to be reusable, an inside-surface defect can be as important as a visible top defect because it affects later application and cleaning.
4. Test decoration placement and attachment
Decoration should be inspected as part of the product, not as a separate cosmetic extra. Compare the placement, orientation, scale, and symmetry of gems, flowers, bows, decals, chrome pieces, or layered gel work. A slightly different accent may be acceptable only if your product specification permits normal hand-finished variation. If the design’s value depends on matching placement, specify the reference photo and accept/reject condition before production.
Perform a gentle handling check that reflects normal packing. Do not pull at a decoration until it breaks; that does not represent a customer’s use and can destroy your evidence. Instead, lightly touch or move the nail as it would be handled during assembly and packaging. Look for loose pieces, exposed adhesive, snags, edges that catch, or decorations that contact neighbouring nails when laid in the tray.
For raised designs, compare the height and package clearance together. A charm that is securely attached but sits higher than the approved sample can still be damaged by the lid. Keep the packaging check linked to this one, especially for long nails and 3D sets.
5. Verify the complete retail unit
Inspect the set as a customer receives it. Count the nails and confirm that the size arrangement is correct. Check whether glue, adhesive tabs, prep wipe, file, cuticle stick, instruction card, and any promised storage item are present in the intended quantity and position. A finished nail set is not complete when only the nails are correct.
Open one unit from each selected inner pack. Compare the arrangement with the approved package sample. Check that the card, tray, or adhesive dots hold each nail in the intended order and do not leave residue. Make sure accessories cannot scratch the nails or press onto raised decoration during transport. A missing alcohol wipe may seem small, but it can change the application experience the listing describes.
Treat printed material as part of the version. The instruction card must match the adhesive system and removal advice actually included. Check logo, collection name, SKU, barcode where used, and any required warnings. Obsolete cards or mixed label versions are a traceability problem, not only a design problem.
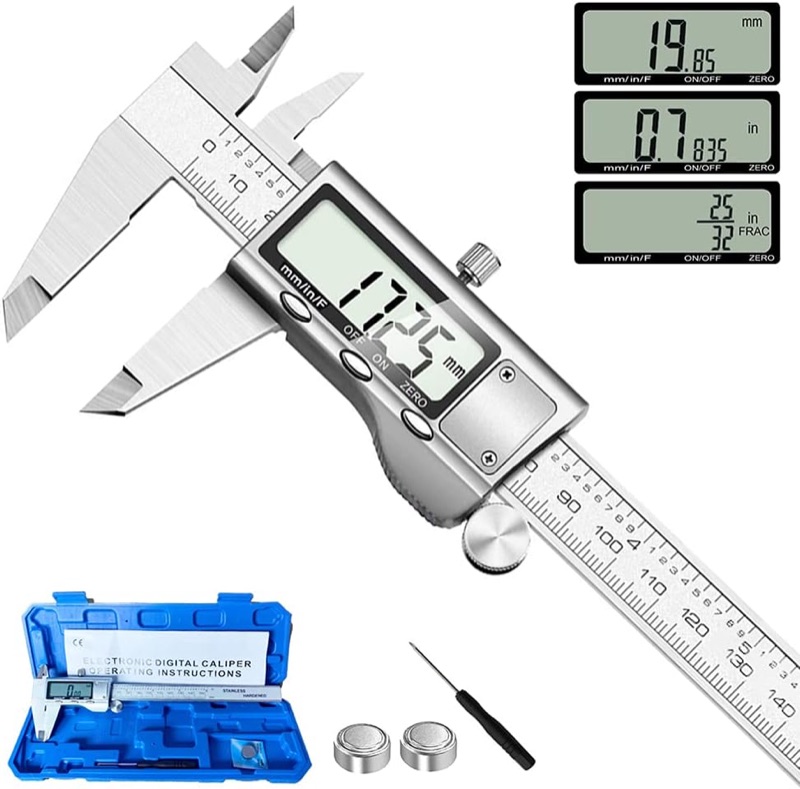
Digital caliper for tip width and curve checks
A stainless steel digital caliper with an LCD readout, useful for recording tip width and curve measurements during a receiving check. The numbers only mean something if the same measuring point is used every time.
6. Check packaging fit and transit protection
Packaging can hide a defect until the first shipment. Close the retail unit and check lid clearance, nail retention, accessory position, and the condition of the outer display box. Long tips should not touch the end wall; 3D accents should not press against the lid or protective film. The set should not rattle when gently turned through normal orientations.
Then place the retail package in the intended mailer or carton. Use the same void fill, sleeve, or protective layer planned for real orders. Perform a modest internal handling test: close and reopen it, turn it, and simulate the motions of ordinary packing. This is not a formal freight certification. It is a practical check for preventable movement, scratches, crushed corners, and detached pieces.
Inspect after the handling test, not only before. Compare the nail order, finish, decoration, retention points, and box condition to the control sample. If a design fails only once it is packed, the solution may be a different card, box clearance, or outer transit layer rather than a change to the nail itself.
7. Record the decision and quarantine uncertainty
The final check is operational. Mark the batch pass, fail, or hold. A pass means the inspected units match the approved reference and written specification within the limits you have defined. A fail means you have found a material mismatch or repeated defect that prevents normal sale. A hold means you do not yet have enough evidence to decide, so the inventory should not be mixed into approved stock.
Photograph defects beside the approved control and label the evidence with the SKU and batch reference. Keep the original packaging where useful. Contact the supplier with a short factual description, the affected units or packs, and the comparison evidence. Avoid vague claims such as “not good.” State what differs: the size-0 internal width is narrower than the approved control; two sampled sets have missing size labels; the rhinestone accent shifts under normal handling; or the insert presses on the tallest decoration.
If only part of a batch is affected, physically separate it. Do not distribute it through normal fulfilment while you wait for an answer. A mixed inventory bin makes it hard to identify later orders and can convert a manageable supplier issue into a broader return problem.
Build a simple acceptance standard before the next purchase
The seven checks work best when the purchase order and sample approval establish the same reference. Save an approval pack containing the control-sample photos, measurement sheet, design reference, set-contents list, packaging sample, supplier product or mould reference, and version date. Link it to the SKU. The next order then has a clear starting point, rather than a supplier being asked to “make it like last time.”
For recurring items, record the issues you find by batch. One loose decoration may be isolated; repeated loose decorations point to a process issue. One missing accessory may be a packing error; the same omission across packs may mean the bill of materials or assembly instruction is wrong. This distinction helps you request the right corrective action and decide when an offer is no longer dependable for repeat sourcing.
Do not use inspection to manufacture certainty you do not have. A small receiving check cannot prove every unit is flawless, and it cannot replace compliance testing where that is required. Its job is narrower and valuable: compare the actual shipment with the product you approved before customer orders make the problem harder to solve.
The decision rule
Release stock only when the physical tips, finish, decoration, retail unit, and packaging all match the approved reference; quarantine anything you cannot confidently classify.
Release a press-on nail batch only when its identity, size system, finish, decoration, retail contents, packaging protection, and batch record all align with the approved reference. Hold it when a change is unexplained. The short delay at receiving is often the lowest-cost point to find a mismatch.
A brand that keeps this record can improve its next order. It knows which mould worked, which size labels were stable, which decoration needed extra clearance, and which packaging protected the set. That knowledge is more durable than a positive first sample, and it gives your customers a more consistent product every time they open a box.One practical way to keep the work manageable is to inspect the highest-risk features first: the largest tips, the most decorated accent nails, the first and last units from separate inner packs, and the retail package after assembly. If those checks uncover variation, expand the sample before you release any stock. This creates a deliberate escalation path without pretending that every batch needs the same level of scrutiny.