The button holds; the gap does not. That distinction helps you choose a fix. If the shirt sits comfortably and just one short section opens, a piece of double-sided fashion tape may keep the placket closed for an event. If the cloth is stretched across several buttons, or the front parts as soon as you sit, the tape is being asked to resist the shirt's fit problem. In that case, look at sizing, a hidden snap, or an alteration.
First, find out what is opening
A row of buttons closes a shirt only at a handful of spots; the placket between them is still free to pull apart. That pull may come from too little room at the bust, buttons spaced too far apart for the garment, or a front shape that does not sit well on your body. A blouse can fit at the shoulders and waist and still be short on room across the chest, so the gap alone does not diagnose the size.
Look for the other clues: fabric drawn into horizontal lines, buttons straining at their holes, a placket that lifts off the body. Those suggest the shirt is under tension, not just being untidy.
Try the shirt in the positions in which you actually wear it. Button it, stand as usual, then sit and reach forward. Does one gap appear at the bust, or do several buttons pull at once? Check the armholes and side seams while you are at it. If they tighten too, hiding the opening at the front will not make the shirt comfortable.
The reason to check before taping is simple: adhesive joins cloth, but it cannot add ease to a bodice or move its shaping. When the fabric is already pulled tight, the strip has to hold against that pull. It may lift or make the front pucker, and the shirt still fits tightly even if the gap disappears for a while.
When fashion tape is a reasonable quick fix
Use fashion tape for a small, localised opening, on a shirt that is otherwise easy to move in, when the fix only needs to last through a short wear.
Tape products are not interchangeable: some are described for fabric-to-fabric fastening, others for attaching fabric to skin, and some claim both. Do not assume a strip sold for clothing can go on skin. Even when the maker says skin contact is intended, use its directions and warnings. A published staff trial of one fashion tape found it held at first but felt flimsy to the tester — a cautionary anecdote, not a prediction for every tape.
When the product permits fabric-to-fabric use, the tape can sit between the two inside faces of the placket. Align a short strip with the gap, press one edge onto it, then close the other edge over the strip. Nothing needs to be stuck to your body. Read the package first: width, adhesive and intended surfaces differ, and some products describe only skin-to-fabric use.
Adhesive needs a surface it can grip. Dust, lint, body oil, moisture, texture, nap and fabric finishes all change how a strip behaves. Delicate silk, lace, an open weave or a coated material deserves extra caution: tape may show through, fail to hold, leave tack behind or disturb the finish. A supplier calling a tape "safe" or "waterproof" does not tell you how it will behave on your blouse.
Skin and removal deserve attention
If a product is meant to touch skin, check its warnings before use. Skin-contact tape listings commonly warn against application to irritated, sunburned or sensitive skin and advise a sensitivity pretest. Customer reviews on the same pages describe minor irritation after several hours. That is a single report, not evidence about how often irritation occurs, but it shows why a broad "skin safe" sales claim cannot promise that every person tolerates every adhesive.
Stop if the skin becomes uncomfortable, and remove the tape gently rather than pulling it off quickly. If removal would mean pulling sharply at the skin, keep the tape on the fabric instead, or skip it. Do not assume a "fashion" label means medical-grade, hypoallergenic or suitable for prolonged contact.
Remove the tape before washing the shirt. Follow the manufacturer's removal directions and the garment's care label. Peel slowly while supporting the fabric; do not yank a strip away from delicate cloth. If adhesive remains, avoid scraping, heat or household solvents until you have checked the care label and tested the proposed method in a hidden spot. A maker's removal tip suits that tape; it does not override the fabric care instructions.
Choose the fix that matches the problem
- One small gap, shirt otherwise relaxed: a short fashion-tape strip is a sensible temporary choice. Carry a spare only if the packaging permits clean storage, and test it before counting on it for a full day.
- The same gap every time you wear the shirt: a sew-in snap between the existing buttons is usually the neater long-term solution. A tailor can place it where the edges naturally meet, rather than where they would meet only under tension. A snap adds a closure point; it does not correct a bodice that is too tight, so ask the tailor to assess the pull first.
- Several gaps or strong pulling: try the next size up and assess the shoulders, armholes and waist. If the larger size fits the bust but is loose elsewhere, a tailor may be able to take in side seams or adjust darts. Buying for the fullest area and tailoring the excess elsewhere is often a better starting point than forcing a smaller shirt closed. A different cut or a fuller-bust range may simply be more comfortable.
- A shirt you rarely need open: if the design permits, a tailor can stitch part of the placket closed while preserving enough buttons for dressing. This only works if you can still get the garment on and off.
- A low-risk emergency: a small safety pin can work from the inside, but it may show, snag fine fabric or leave a hole. It is a temporary fallback, not automatically safer than tape. A camisole underneath, or leaving one button open over a suitable layer, may be simpler than fastening the placket at all.
For a garment you make yourself, pattern and button placement can prevent the problem: placing a main button at bust-point level and spacing the others above and below it is standard construction advice. Ready-to-wear shirts have fixed placements, so that is not a reason to move buttons without considering the placket structure.
A careful way to apply it
- Check the label. Confirm whether the tape is for fabric-to-fabric, skin-to-fabric, or both. Read any warnings about sensitive skin, wear duration and removal. If a package does not explain its intended use clearly, do not improvise on the body.
- Try it off the body first. On a hidden seam allowance or a spare swatch of similar fabric, apply one piece and press it as directed, then remove it slowly. Look for a mark, residue, pulled fibres or a change in surface. A test on a different fabric is not a reliable stand-in for the actual shirt.
- Put the shirt on and locate the exact gap. Fasten all buttons, then use a mirror or ask someone to identify the section that opens during normal movement. Do not pull the two sides together harder than they naturally sit; that creates extra tension the tape must resist.
- Start with one short piece. Follow the product's instructions for which backing to remove first. Place the tape on the inside of one placket edge, centred over the opening, clear of the button and buttonhole. Press the other edge into place without stretching the fabric. A long strip stiffens the front and is harder to remove cleanly.
- Check the front and the inside. The placket should lie flat rather than pucker. No adhesive edge should be visible, and the strip should not have caught lining, hair or another layer. If it is crooked, use a fresh strip rather than peeling and reapplying the same piece.
- Move before leaving. Sit, stand, lean forward, reach as you normally would. If the shirt pulls open again or the tape begins to lift, remove it and choose a more reliable fix. Do not layer more tape over a failing strip to overpower the strain.
Surface preparation is product-specific. Makers of skin-contact tapes typically ask for clean, dry, oil-free skin and fabric, no finger contact with the adhesive, and a pretest on both. Treat that as guidance for that product, not an industry-wide recipe. Do not add alcohol or another solvent to the fabric or your skin unless the tape maker and the garment care label allow it; finishes and dyes do not all react alike.
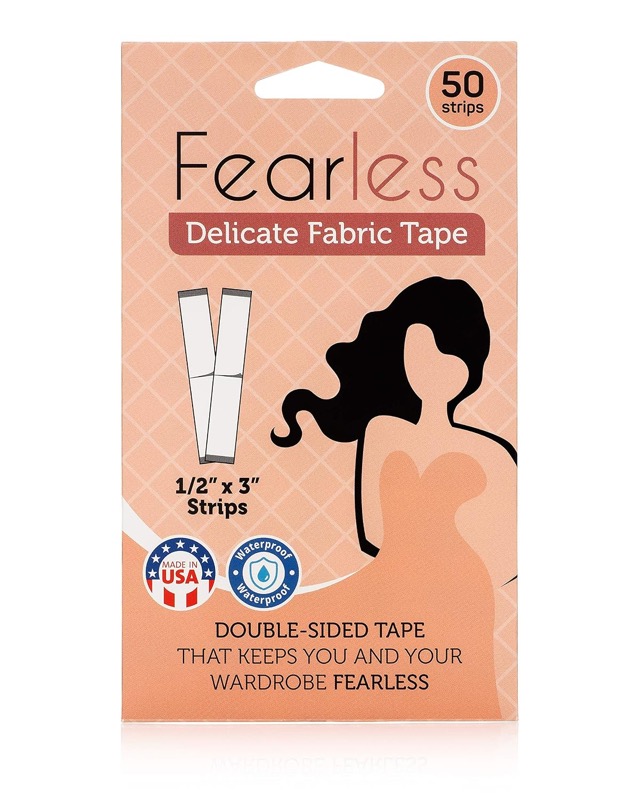
Double-sided fashion tape, 50 individually wrapped strips
Individually wrapped clear strips sold for delicate fabrics, which makes a single-strip test on a hidden seam allowance practical. Confirm the stated dimensions and intended surfaces on the listing.
What to look for in a tape pack
Fashion tape is a repeat purchase in the sense that individual strips are consumed and the pack must be replaced. That makes pack design and clear instructions more useful than "all-day hold" language.
- Use case: does the maker explicitly say fabric-to-fabric, skin-to-fabric, or both? A product described as body tape may be intended for skin contact, but the listing must spell out the directions and limits.
- Strip dimensions: width and length decide how much of the placket a piece can bridge and whether it will be visible. Wider or longer is not automatically better; excess adhesive is harder to conceal and remove.
- Backing and handling: individually cut strips are convenient in a handbag; a roll reduces packaging but needs cutting and careful storage. Check whether the liner peels without touching the adhesive.
- Surface compatibility: look for fabric types and exclusions, plus instructions for testing. "Works on all fabrics" is a broad promise that should prompt a request for documented limits.
- Removal details: the package should explain how to remove the tape and what to do if residue remains. Do not rely on a generic marketplace description instead of product-specific directions.
- Pack count and unit: verify whether a listing's quantity means strips, pairs or packs.
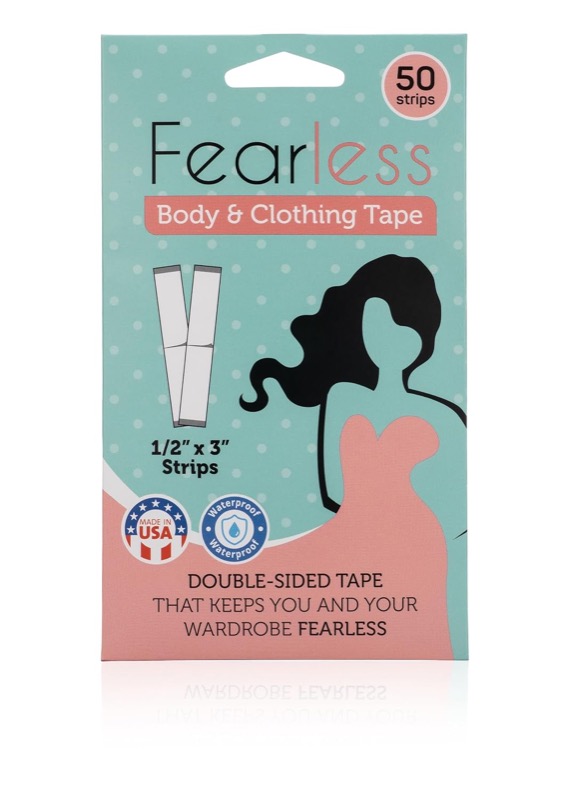
Double-sided clothing and body tape, 50 strips
A tape sold for both clothing and body use, which matters when the placket only closes against skin. Check the maker's skin warnings and pretest before wearing it anywhere visible.
Testing tape on the fabrics you sell
For a small apparel brand, test candidate tape on the fabrics you actually sell, not just a cotton sample. Record the fabric composition and finish, strip placement, time worn, movement, temperature and humidity if relevant, lift at the edges, residue, and the removal result.
Include a light woven blouse, a textured fabric and a smooth synthetic only if those are part of the range. Use the same garment and application method when comparing samples. Keep skin testing separate from fabric testing, and follow the product's own skin-use directions. A handful of trial garments cannot establish universal compatibility, but it reveals obvious mismatches before you recommend a fix to customers.
The practical answer
If only one small section of an otherwise comfortable shirt opens, try one properly selected strip of fashion tape after a hidden-fabric test. Keep it as a short-term styling aid, use it only on the surfaces its instructions allow, and remove it gently before laundering.
If the placket keeps pulling, tape is the wrong tool: have a hidden snap added, adjust the fit, or choose a cut with more room through the bust. The quickest fix is useful only when the shirt itself is not being asked to do more than its construction can handle.