A tip can span the nail and still be the wrong fit. A press-on tip can cover the natural nail from sidewall to sidewall and still feel wrong. The reason may be its side-to-side arch, commonly called the C-curve. A deeper tip placed on a flatter nail can press at the edges or hover through the centre; a flatter tip on a more curved nail can leave side gaps. The number printed under the tip and a width chart do not describe this whole fit question.
Consumers describe the problem in plain terms: a set "squeezes" the nail, leaves pockets, or will not sit down even when the width seems right. Community discussions include people asking how to find brands that suit flatter nails and whether a database of brand curves exists. Marketplace listings now also use phrases such as "flat nail bed" and "no C-curve." These are useful signals of a naming and fit problem, not proof that one profile suits everyone or that a listing's claim is accurate.
For a small press-on brand, the job is not to choose a universally "best" curve. It is to decide which profile fits the customer group and product line you intend to serve, document the actual sample, and make sure the production reference stays the same. This guide focuses on that approval decision. It does not set a medical standard, promise wear time, or assume a supplier can produce a custom curve until that supplier confirms it.
Separate C-curve from the other dimensions
C-curve describes the crosswise arch seen when looking at the nail tip from its free edge. It is different from the lengthwise slope from cuticle to tip, sometimes discussed as the apex or profile. A tip may have a suitable side-to-side arch but a cuticle line or lengthwise profile that still fails to sit naturally. Ask the supplier and your team to name which direction they mean whenever they use "curve," "arch," or "apex."
Width is a separate measurement. It is usually recorded across the widest part of the tip, but the exact measuring points matter. A curved surface can produce different readings depending on whether someone measures straight across the underside, follows the arc, or uses the outer edge. The resulting numbers are not interchangeable. Ask the supplier to identify the surface and points used, then use the same method for every sample and future comparison.
Shape, size, length, flexibility, thickness, and finish may also affect the way a tip sits. A square and an almond tip from different moulds should not be assumed to share a profile simply because both are labelled size 4. Supplier buyer guides make the same practical point: size numbers and profiles can change across moulds, shapes, or suppliers, so brands need physical samples and a clear reference.
Write a sample request that can be answered
A request that says "send medium C-curve tips" leaves too much room for interpretation. Start with a one-page brief that identifies the intended product family, target customer, nail shapes, lengths, size range, finish, set count, and sales market. State whether you want to evaluate a stock mould or ask about a custom profile. Do not combine both questions in one sample request unless you can distinguish their costs and timelines.
Ask the supplier to name the mould or product code used for each candidate and tell you whether that mould is used for the final decorated product. Request the size-by-size width chart and the method used to measure it. Ask for front, side, and free-edge photographs of representative sizes, with the tip held in the same orientation and a ruler or scale visible. If the supplier has profile drawings, mould specifications, or a numerical curve description, request them; treat their availability as a question, not an assumed capability.
Make the supplier distinguish what is standard from what requires a new mould, a modification, or only a different assortment. Ask whether the sizing kit, finished sample, and repeat order will use the same mould reference. Confirm sample quantity, sample charges, production minimums, lead time, and which components are included. If replacements by individual size matter to your model, ask that separately and get an explicit answer. A sourcing page or sales message is a lead; it does not establish the terms for your order.
Compare samples before applying adhesive
Use at least two samples if the decision is between profiles. Ideally, keep shape, length, material description, and finish as similar as possible so the curve is the main variable. If two supplier samples differ in several ways, record those differences; do not attribute every fit difference to curvature alone. Label each sample with the supplier, product code, mould reference if supplied, size number, date received, and any finish or coating.
First check each tip against a clean, bare natural nail without glue or adhesive tabs. Place it in its intended orientation and allow it to rest with light contact; do not press hard to make it conform. Look straight at the free edge, then view the underside and sidewalls. Note whether the tip rocks, whether the centre or edges visibly float, whether the sidewalls are covered without overlapping skin, and whether the cuticle edge sits where the customer would expect.
Keep the check non-destructive and follow the product's instructions for any later application test. Social posts sometimes suggest heating or manually reshaping a tip, but individual user advice is not a validated manufacturing method. Do not make heat-adjustment instructions part of your customer guidance unless the exact material, method, and safety implications have been properly assessed. For selection, it is clearer to record the mismatch and request a more suitable profile or a different sample.
Build a profile record instead of relying on labels
A useful sample record is repeatable, even when the supplier does not provide a numeric C-curve scale. Keep one approved tip from each relevant size and photograph it in a simple jig or marked position. Use the same camera angle, distance, background, lighting, and orientation. Include a millimetre scale in the image, but do not infer a curve angle from a flat photograph unless you have a validated method for doing that measurement.
For each size, record the mould code, nominal size label, width and width-measurement method, length, thickness if available, material description from the supplier, and the observed crosswise profile. Use consistent descriptors such as flatter, middle, or deeper only for internal comparison, and attach the reference photos. The words are a house vocabulary for your team, not a universal scale that customers or suppliers will automatically understand.
Add an observation field for fit: no visible rocking; contact appears even; centre gap; edge gap; pressure; cuticle mismatch; or not tested. These are screening notes, not laboratory measurements. If the supplier reports a numerical specification, preserve the original wording and unit beside your observation. Do not convert a marketing phrase into an angle or claim that two suppliers' "medium" profiles are equivalent.
A record can be a spreadsheet, a printed sheet in the sample box, or a product-development system. The important thing is that the physical tip remains linked to the entry. Store a dated photograph of the approved sample and do not relabel a replacement sample as the same reference until you have compared it. This small discipline prevents an old size chart from drifting away from the mould and finished product it was meant to describe.
Check the size range, not only the most convenient sample
C-curve is not a one-size decision. Compare representative sizes across the range, especially the smallest and largest, plus any sizes with high replacement demand. The profile may appear to change as the tip gets wider, or the mould design may use a different geometry for certain sizes. That does not automatically mean the product is defective; it means you should see the actual range before promising that one profile works consistently.
For each sampled size, compare the tip with the intended tester or target fit reference. If one size fits comfortably while adjacent sizes create pressure or gaps, record that pattern. A mismatch concentrated at one size could be an assortment problem; a consistent mismatch across sizes may indicate that the mould profile is not suited to the customer group. Neither conclusion should be made from one hand or one sample alone.
If the product has a sizing kit, compare the kit tips with the sellable tips from the same mould and finish stage where practical. A sizing kit built from a different mould can produce a misleading fit record. Supplier guidance also recommends matching the sizing kit to the actual collection rather than assuming one chart covers every shape and profile.
A short internal test matrix makes the comparison easier to review: sample code; size; shape; width; profile photo; tester fit note; pressure or gap observation; and decision. Use the same matrix for each candidate. Do not invent numerical acceptance tolerances before seeing product variation and agreeing on the measurement method with the supplier. A tolerance is meaningful only when both sides know exactly what was measured and how.
Retail reference for a consumer C-curve tip
The link below is a consumer-side reference for C-curve tips, not a bulk sourcing or custom-mould offer. We may earn a commission from qualifying purchases through it. Check the live listing and the selected variation before relying on current price or availability.
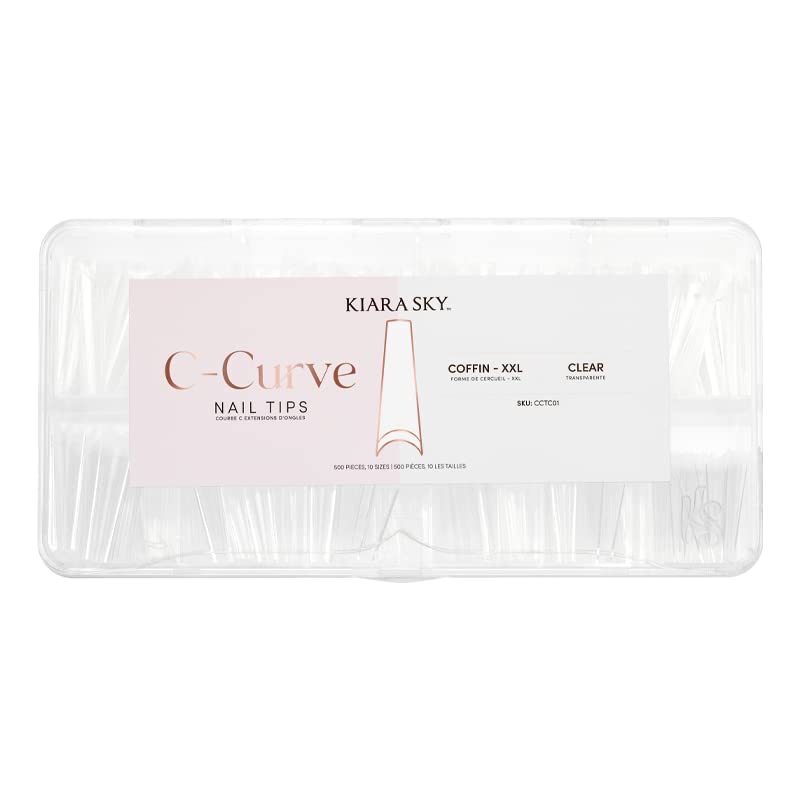
C-curve XXL nail tips, 500 pcs, 10 sizes
A 500-tip case across 10 sizes in a coffin shape, useful for seeing how a retail listing presents a deeper C-curve profile. It is a consumer reference for comparing profiles by eye — it is not a mould specification, and the listing does not quantify the curve.
Card photos are the current marketplace listing images and may differ from the delivered product; confirm details on the live listing.
Approve the finished product, not just the blank tip
A blank tip is an early sample, not always the final sellable product. If the collection adds several finish layers, raised decoration, or other material, check a finished sample too. Published buyer guidance from suppliers notes that coatings or decoration may affect the final fit and recommends comparing the finished sample against the approved reference. Treat that as a reason to verify the actual item, not a claim that every coating changes every tip by a predictable amount.
Inspect representative finished sizes from the line and compare their profile photos with the blank samples. Check whether decoration or finish interferes with the customer's view of the sidewalls or cuticle edge. If the supplier uses a different finishing route on a later design, request a sample of that route before approving artwork and packaging. A pretty top view can hide a profile mismatch underneath.
When you approve a sample, create a short approval record with date, product code, mould reference, selected sizes, finish, photographs, supplier contact, and unresolved questions. Include the finished sample and the blank reference if both matter. Ask the supplier to confirm that the production order will follow those references and to notify you before changing the mould, material, finish sequence, or size assortment.
Turn fit feedback into a controlled reorder
After launch, tag customer comments by the actual problem: pressure, visible centre gap, side gap, tip rocking, cuticle edge mismatch, or width coverage. Avoid combining all of these as "wrong size." If the customer reports pressure but the width covers the nail, the issue may involve profile or another dimension. That is a useful clue for product review, not a diagnosis that can be made from a short message or photograph.
Track the product code, shape, size family, and batch alongside the feedback. A small brand can begin with a simple weekly count of replacement requests, fit questions, and returns, then review recurring patterns after enough orders accumulate. Do not call a one-off complaint a trend. When the same issue repeats in the same size or shape, compare the returned product or customer photo with the retained approval sample before changing the specification.
For a reorder, send the supplier the approved sample code and the measurement record, not just "same as last time." Request confirmation that the mould and finished specification are unchanged. When the delivery arrives, compare a sample from the new lot against the retained reference under the same viewing and measurement setup. Note visible differences and ask the supplier to explain them before you decide whether they are acceptable. If packaging or assortment also changed, record that separately so a fit issue is not confused with a packing mistake.
How to choose the next step
If the sample fits comfortably across the intended range, the mould is identified, and the supplier confirms the same reference for production, document approval and move to the next decision. If only one size or shape fails, ask whether the supplier has a suitable alternative mould or a separately specified size family. If every sample feels wrong, pause before paying for custom work and test another stock profile first.
A custom mould may be an option, but confirm the commercial impact: tooling cost, minimum order, sample iterations, ownership or reuse terms, timing, and whether future reorders can use the same tooling. Those details vary by supplier and are not implied by a "custom" button or a catalogue image. Compare the total cost and risk with the cost of using a stock profile and narrowing the product promise.
The practical outcome is a narrow, documented decision: which mould or profile is approved for which shape and size family, how it was checked, what remains unverified, and what must be repeated at reorder. That gives your product team a basis for consistent size kits, clearer customer fit guidance, and better supplier conversations. The objective is not a universal C-curve label. It is a fit reference your brand and supplier can both reproduce and inspect.