A claw clip is a small machine wearing a finish. The body, paint or acetate pattern is what sells it, but the spring, pin, seat and teeth decide whether it opens, closes and holds after a month of use. A sample can look perfect on the table and still crack at the pivot or lose spring return in the customer's hair.
Buying guides rank clips on size, grip, hair type and price. None of that gives a supplier an acceptance threshold, and "strong hold" is a marketing phrase rather than a specification. This guide converts the qualities buyers already judge by eye into checks that produce a repeatable record.
A decorative sample can hide a mechanical problem
The complaints worth designing around are mechanical: a spring that snaps, a seat that cracks after a few uses, a pin that migrates so the jaws open unevenly. Each points to a different part, and each is invisible in a product photo.
Treat reported failures as failure modes to screen for, not as a defect rate. One broken premium clip does not describe the category; it does describe where to put the checks.
Everything below is a buyer-designed screen. Cycle counts are checkpoints you choose and document, not an industry standard, a service-life prediction or a certification. A bench run cannot prove a clip will survive a year in someone's handbag.
Specify the mechanism before you test
Identify the construction first. Concealed-spring, simple plastic, acetate-insert and decorative jumbo designs should never share an approval result just because they share a product name.
Ask for the body material and finish, the spring material and type, the pivot construction, overall dimensions, jaw opening and tooth count. Confirm whether the style is stock or customised, and which of those attributes changes between versions — a supplier swapping the spring wire between runs is exactly the substitution a photo will not reveal.
Define the use case in the same brief: half-up styling, a full twist, fine hair, thick hair, long lengths, or salon use. Length alone cannot promise universal hold. A wide jaw can accept a large bundle and still slip if the teeth barely engage or the force is uneven side to side.
Keep fit and mechanical durability as two separate claims. A clip can have a strong spring and the wrong jaw for the customer, and no amount of extra tension will fix a geometry problem.
Record a baseline for every unit
Label each sample and inspect it before it is used. Note the relaxed jaw position, symmetry, tooth alignment, hinge gap and spring seating. Look for hairline cracks around the pivot, whitening or stress marks in plastic, chipped acetate, burrs, sharp edges, loose decoration, and a spring end sitting in the hair path.
Open and close it slowly over a tray so a loose part cannot disappear unnoticed.
Measure outside length and width, usable jaw opening, and tooth spacing at a consistent point, with the same light contact on every sample so flexible bodies are not compressed differently. Dimensions do not prove hold, but they are how you detect that a later lot is not the body you approved.
Then check operation without hair: open to the intended range and release several times. Both jaws should move smoothly, the spring should return them without a catch, and the teeth should meet in a repeatable pattern. Record grinding, clicking, sideways wobble, spring-leg movement or failure to close.
Do not "fix" a stiff spring with pliers. Bending it changes the sample and hides the assembly problem you are trying to document.
Check hold with a repeatable hair setup
Cycling cannot tell you whether the clip holds the hair it is sold for. Choose a setup tied to the claim: a prepared swatch, or a small consenting panel. Explain the test, avoid painful styles, stop on discomfort, and never present a short trial as a safety study.
Record hair length, bundle size or density, texture, condition and the style being made. Use the same placement for every sample. A thick-hair design should be tried on a dense or long bundle; a fine-hair clip needs a smaller smooth one.
Observe whether the teeth engage evenly, whether the clip slides down, whether it releases stray strands, and whether the spring stays seated under load. Standing, turning the head, walking and a normal sit-to-stand make a usable screen if applied consistently — but that sequence is not a standardised wear test.
If the clip will not hold the bundle, separate a size mismatch from a spring or tooth problem before asking for more tension. Wider jaws, longer teeth and a shallower contact pattern all change retention, and only one of them is a spring question.
Cycle the hinge to an agreed count
A clip that opens once proves almost nothing. Agree a screening count with the product team before testing — 50 or 100 full open-and-close cycles per unit is a practical first comparison, more for a clip sold for daily use. Those are your checkpoints; they are not a published pass level.
Use the same motion every time: open to the intended range without forcing past the stop, release, let the spring close. Count complete cycles, keep a steady pace, and do not twist or drop the sample unless that is a separate test. A powered fixture improves repeatability; manual cycling is acceptable if the operator and motion are recorded.
Inspect at the baseline, at each agreed checkpoint and at the final cycle. Watch for a crack spreading from the pivot, a pin migrating, a spring leg escaping its seat, a gap between the jaws, a broken tooth, or a change in return speed or force. Re-measure the same dimensions.
A workable pass rule: no cracks or displaced parts, full closure without assistance, no new sharp edge, and no change that prevents the intended hold. Add a force range only if your own trials establish one.
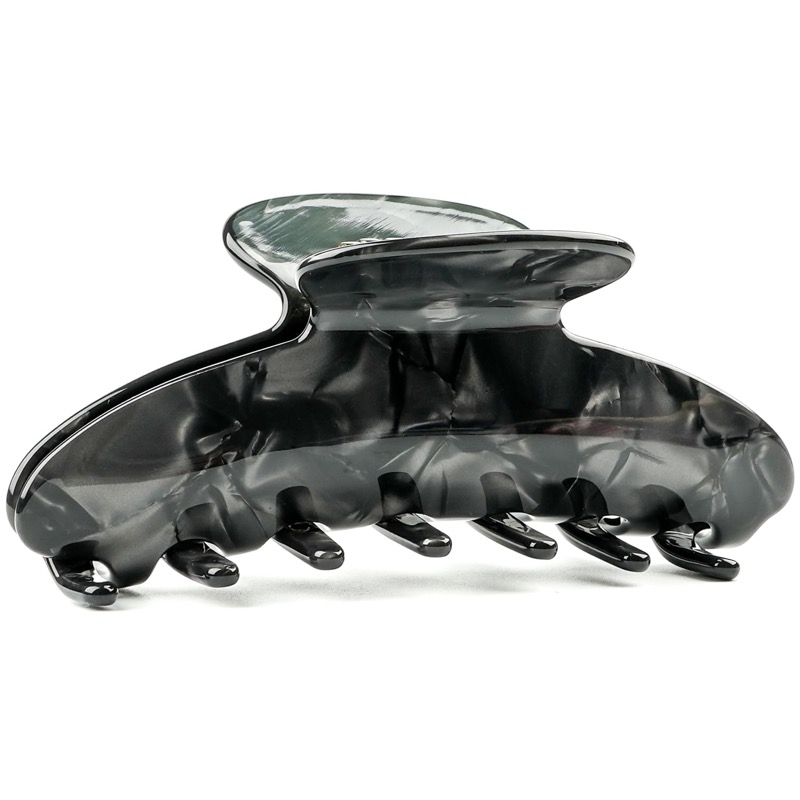
MAORULU large acetate claw clip, 4 inch
A retail example of the construction under test: a moulded acetate body with a concealed spring and toothed jaw. Check spring seating, pivot gap and jaw opening on the physical unit rather than the pack photo.
Marketplace photos show the outside of the clip; spring seating and pivot clearance are inside the body.
Read the failure, not just the break
When a unit fails, record the first visible change and the cycle or wear point where it appeared.
A crack beside the pivot, a spring slipping out of its seat, and a migrating pin point at three different causes: material and moulding stress, seat geometry, and hole size or assembly. A body that flexes without cracking is a dimension or material comparison against the approved sample, not a breakage.
Treat those as diagnostic leads. The factory confirms the construction and investigates; appearance alone will not tell you the spring grade or metal composition.
Keep the failed unit intact. Photograph it from both sides with the spring in place and again in the failed position, and label it with sample ID, cycle count, hair setup, operator and date. Send that record with the approved reference.
Repeat a failure on more than one unit from the lot before calling it a pattern. If units fail at the same seat or pin, request a revised sample and a written change description; if one unit differs, widen sampling under your own quality plan rather than condemning the lot.
Write the specification and inspect what arrives
| Specification field | Why it matters at reorder |
|---|---|
| Product code and revision | A photo cannot distinguish two spring versions |
| Body material and finish | Substitution changes feel and colour |
| Dimensions and jaw opening | Detects a shrinking or re-moulded body |
| Tooth layout | Explains hold complaints after a tooling change |
| Spring and pivot configuration | The parts that fail first |
| Cycle count and pass rule | Your own screening method, stated as such |
| Substitutions | Written approval required |
| Packing | Protects the hinge in transit |
At incoming inspection, compare new units with the approved reference: dimensions, symmetry, tooth alignment, pin position, spring seating, closed-jaw contact and visible finish. Open and close a sample from each lot using the agreed count or an abbreviated incoming check.
Decide in advance which conditions hold a lot — a cracked body, a displaced spring, a loose pin, a jaw that will not close — and which are appearance preferences. Then record the disposition with the lot number so a later complaint can be traced to the right construction.
Choose the number of units from the order risk and the cost of a failure. A three- or five-unit check is a reasonable starting screen for a small buyer, and it is still not a statistical defect rate.
When the supplier changes a part
If a spring, pin, body or mould changes after approval, re-test the revised construction. A different spring wire changes how far the jaws open and how much force is needed, even when the outside looks identical.
Keep the earlier sample, and record which version was approved for each purchase order. That is what makes reorders comparable — a saved product name or the phrase "large acetate claw clip" will not.
Compare total accepted-unit cost too: sample freight, customisation, packaging, inspection, production quantity and defects. A low minimum order helps you evaluate a design; it does not prove bulk consistency, so get the quote in writing against the exact code, materials, spring version, quantity, lead time and destination terms.