A press-on nail box has two jobs that are easy to confuse: make the product look worth opening, and deliver each nail in the condition in which it was approved. For short, flat, undecorated sets, one compact box may manage both. Long tips and 3D designs change the problem. A box that looks elegant in a product photograph can still bend a long free edge, crush a charm, rub a glossy surface, or let the nails shift until the customer opens a disordered set.
For a seller, packaging is therefore part of the product specification. It should be decided while you are sampling the tip and decoration, not after you have photographed the finished set. The appropriate package depends on the exact nail profile, the height of the decoration, the way the nails are mounted, and the protection used during shipping. There is no universal “nail box size” that works for every collection.
This guide helps press-on nail sellers turn a finished design into a packaging brief. It focuses on long shapes, 3D flowers, bows, pearls, charms, layered gel work, and other raised elements. It does not assume that bigger packaging is always better. Oversized empty space can allow movement; undersized space can create pressure. The objective is controlled clearance and a repeatable shipment test.
Start by separating three packaging layers
Many packaging mistakes begin when one item is expected to do everything. A product display layer presents the nails to the buyer. A retention layer holds the ten nails in the intended order. A transit layer protects the retail package during mailing or wholesale delivery. These may be integrated for a simple product, but they should be specified separately.
The display layer can be a clear case, paperboard box, sleeve, or another customer-facing format. It carries the visual identity, product name, sizing information, and opening experience. The retention layer is the card, tray, adhesive position, compartment, or insert that stops the nails moving within the display package. The transit layer may be a rigid mailer, padded outer carton, or a defined void-fill arrangement. It is not automatically the same as the display box.
1. Internal length: protect the longest part of the approved design
Measure the longest finished nail, not the blank tip. Include the full free edge, any extension of the design, and any decorative part that projects past the regular outline. Measure it after the final top coat and decoration are complete. A long coffin or stiletto can require substantially more internal length than a short sample from the same shape family.
Then measure the usable internal length of the display package and its retention surface. “Usable” means the distance available after the card, adhesive dots, lid thickness, and any accessory pocket are in place. Do not use an external carton dimension as a substitute. A box may look large on paper but lose critical space once an insert is fitted.
Leave intentional end clearance. The exact amount must be verified with a sample because tip stiffness, mounting method, and transit conditions vary. What matters is that the free edge does not touch a wall, hinge, or accessory pouch when the package is closed. At the same time, the nail should not have enough room to slide forward and strike that wall during handling.
Use a finished master set as the control. Mount it in the proposed package, close the lid, and view it from the side. If the longest tips tilt or contact the edge, revise the layout before you approve printing. A small orientation change, a longer card, or a different box opening can solve the problem more effectively than simply adding empty volume.
2. Internal height: make room for decoration without creating loose space
For a 3D design, internal height is usually the decisive measurement. Measure from the mounting surface to the highest point of the finished set. Do not rely on the height of one decorative component before it is applied. Gel layers, adhesive, orientation, and neighbouring nails can change the final profile.
Check the proposed lid clearance with the package fully assembled. The highest point must not touch the lid, protective film, printed insert, or a loose accessory bag. Contact can flatten a flower, chip a rhinestone, transfer residue onto a glossy surface, or detach an embellishment. A transparent lid is not proof of clearance; view the package from the side and use a simple gauge or spacer during sampling.
More headroom is not always safer. If the mounted nails are far below the lid with no stabilising insert, they may bounce or shift under impact. The correct structure gives the decoration space while keeping the base of each nail restrained. A shallow tray with a raised cavity, or a secure mounting card inside a rigid case, may be better than a tall empty box.
Map the tallest point across the full set. A central 3D bow on one accent nail may need a different layout from ten nails with small pearls. If the decoration is concentrated on a single nail, place it where the packaging offers the greatest clearance rather than assuming every position has identical depth. The layout should support the product, not force the product to fit a decorative card design.
3. Retention: stop nails moving without damaging their finish
A package can have correct dimensions and still fail if the tips are not retained. Long nails act like levers. When a mounted tip moves at the base, the free edge can strike the package wall. Raised decoration can catch on a neighbouring nail. The retention system must hold the base securely while allowing a customer to remove the nails without bending them.
Test the actual adhesive dots, tabs, glue point, foam strip, or tray cavity you plan to use. Adhesive strength should be sufficient for the intended distribution path, but not so strong that the customer damages a reusable nail during removal. Placement matters: a central attachment point may allow a long edge to swing, while an attachment near the base can be more stable. Avoid covering size markings or leaving residue where the buyer will apply adhesive.
Check each nail position, not only a single hero tip. Small pinkies can lift from an oversized dot; wide thumbs may not sit flat on a narrow mounting area. A retention method that works for flat tips may fail for deep curves. If you use a card, confirm the surface finish does not transfer dust, ink, or texture to the nail during storage.
Accessories must not become moving hazards. Place glue, tabs, files, alcohol wipes, and cuticle sticks in a separate pocket or compartment. A small loose file can scratch a finished set during transit. A pouch taped over the nail card can press onto 3D accents when the lid closes. Define the accessory location in the same specification as the nail layout.
4. Surface protection: separate nails from rubbing and pressure
A glossy plain tip can show fine scratches that are invisible before shipping but obvious under direct light. Chrome, mirror finishes, decals, and hand-painted art are even more vulnerable. Raised elements add contact points that can catch on plastic film or another nail. The packaging must prevent surface-to-surface rubbing as well as obvious crushing.
Start with the nail arrangement. Leave enough separation between adjacent tips that they cannot overlap or touch when the package is handled. For long tapered designs, spacing near the free edge can matter more than spacing at the cuticle. Do not make a card crowded merely to reduce its footprint.
Choose a protective cover only after checking the finish. Some films, foam sheets, and clear lids are safe when they remain separate from the nails; others can press against them or create static that attracts dust. A protection layer should be held away from the decorated surface, or it should contact only an area of the package designed to take that pressure. Test it after the same curing time you use before dispatch, not immediately after making the set.
The outer transit layer should prevent compression of the display package. This may require a rigid mailer or a secondary carton rather than a padded envelope. A padded envelope absorbs some impact, but it can still bend around a long or raised product. Match the protection to the route you actually use, including warehouse handling if the product will be stored or shipped by another party.
5. A sample test is more useful than a perfect rendering
Packaging decisions should be approved with the finished product inside, not from a digital mock-up or an empty box. Build a complete sample: final nails, the selected retention method, the display package, instructions, accessories, and the planned transit layer. Photograph it open and closed. Record the internal dimensions and the version of every component.
Perform a simple handling test that reflects your intended route. Close and reopen the package, turn it through normal orientations, and inspect the nails. Then place the package in the proposed mailer or carton, move it through a controlled sequence of light drops or handling motions, and inspect again. The purpose is not to claim a formal laboratory shipping certification. It is to reveal preventable movement, contact, scratches, and detached pieces before production.
When you inspect, use a defined list: nail order; visible side and top surfaces; free-edge condition; decoration attachment; residue from the retention method; lid clearance; accessory position; and condition of the display box. Compare the result to the approved master set. A sample that looks good only before its first transit test has not passed the packaging decision.
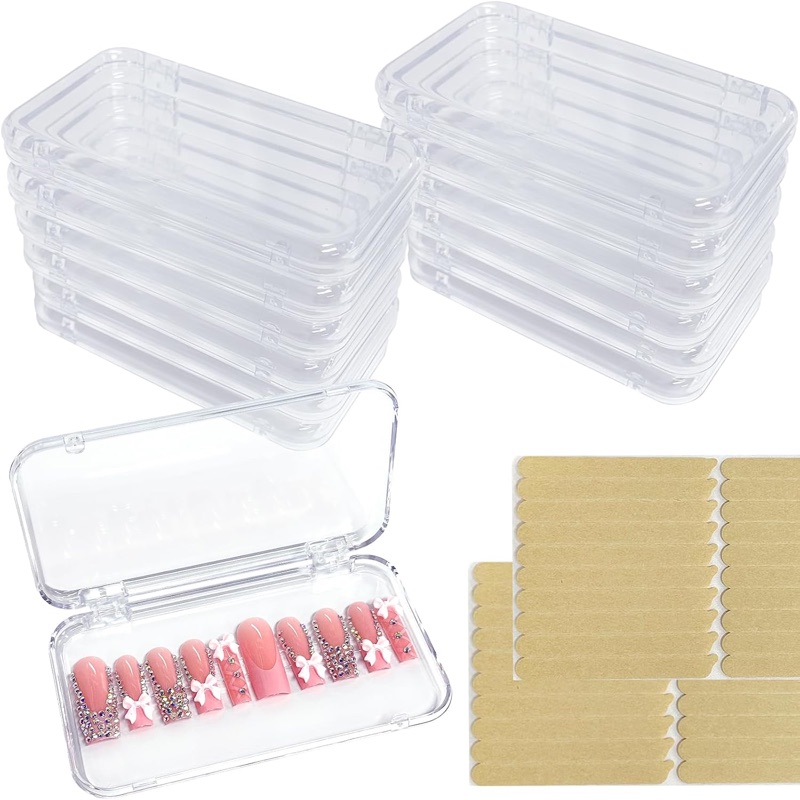
Press-on nail packaging boxes, 14 pieces, sized for long sets
A 14-piece set of press-on nail packaging boxes listed for long and XL–3XL sets. Use it as the transit-test subject: check lid clearance, internal retention, and whether a finished long or 3D set survives a first shipment.
Turn the sample into a supplier-ready packaging specification
Once the sample passes, write a short specification that another person can follow. Include the external and usable internal dimensions; material and lid style; card or tray dimensions; nail arrangement; retention method and attachment positions; maximum approved decoration height; accessory location; protective layer; transit package; and the inspection points required on delivery.
Use drawings or photographs with reference marks where they reduce ambiguity. A photo of the finished set in its approved package is particularly valuable because it shows the intended spacing and orientation. Add a version date. If the nail shape, 3D treatment, or accessory pack changes, review the specification rather than assuming the old box will still work.
For a supplier-produced box, request a packaging proof with your actual finished sample or a close physical equivalent inside. A paper or empty-box proof is useful for artwork, but it does not verify clearance or retention. If you are ordering custom quantities, separate the decisions: first approve the structural sample, then approve the artwork, then approve the production run. Combining all three into one untested order makes it hard to identify the cause of a failure.
Inbound check: do not judge only the first box
When a packaging shipment arrives, inspect more than the top sample. Pull units from different inner packs. Check that their internal dimensions, hinges, inserts, cards, and protective pieces match the approved sample. Assemble at least one finished nail set in each relevant configuration, especially the longest and tallest design. A supplier can deliver the correct outer box while changing an insert, adhesive dot, or cavity depth that affects the product.
Keep an acceptance record. Note the arrival date, supplier reference, component version, units checked, any defects, and photos. If a component has changed, isolate it from normal production until it passes the same test. This protects you from mixing an unapproved packaging version into orders simply because it looks similar.
Do not make customer promises that your packing has not been tested to support. Instead of claiming “unbreakable” or “damage-proof,” describe the product honestly and use evidence from your own check to decide whether the package is appropriate. If a 3D accent is fragile by design, the packaging should reduce avoidable damage, while your listing and care instructions should set sensible expectations for handling.
The decision rule
Approve packaging only when the longest nail, tallest decoration, retention method, surface protection, and transit test all match the same retail-ready reference.
Approve a package for a long or 3D press-on set only when it meets five conditions. It has enough usable length for the longest finished nail. It has enough controlled height for the tallest decoration. It keeps every nail fixed without leaving residue or causing removal damage. It separates nails, accessories, and protective surfaces so they cannot rub or press together. And it survives a repeatable internal handling test in the same outer transit layer you intend to use.
Packaging is not an afterthought to nail design. It determines what the customer sees when the set arrives, whether a delicate design remains sellable, and how much rework your brand absorbs before an order is shipped. Treat the box, card, and mailer as one small protection system. When they are sampled together with the final nails, you can make a purchasing decision based on the product in front of you rather than a generic packaging photo.