Packaging is part of the product when the design has height
A flat, short press-on set can often sit neatly on a card inside a slim box. That format may become unreliable with long stilettos, sculpted flowers, bows, pearls, metal pieces, or chain details. The box may not give the design enough room, keep nails stable, or tell a customer how to store the set after wear.
This is already visible in the retail market. Marketplace sellers list long and 3D nail sets with dedicated box packaging, and packaging product pages promote clear display cases and floating-frame formats. Those listings show that sellers are pairing decorative nails with dedicated packaging. They do not show that a particular format will protect every design or survive every shipping route.
For a press-on brand, the question is: what holds this exact nail set in position from assembly through delivery, and then gives the buyer a sensible place to keep it? The answer should come from a sample pack-out, not a supplier photo or empty-box measurement.
This guide is for brands selling long or visibly dimensional press-ons. It explains how to define the packaging job, measure the real set, choose components, test a sample, and keep packaging claims honest. It is not a promise that any particular box will prevent breakage or preserve every decoration.
Begin with the decoration, not the box catalogue
Before selecting a box, classify the set by the packaging stress it creates. "Long" and "3D" are useful descriptions, but they do not identify the same risk.
Length stress
Long tips can create a problem at the top or edge of a tray. A box may have enough face area but no clearance once tips are fixed to a card. Measure the longest nail in the assembled presentation, not only loose on a ruler.
Height stress
Pearls, sculpted flowers, raised chrome forms, bows, and textured finishes create occupied height. A case that looks generous when empty can press against a decoration after the card, adhesive, and lid are in place.
Movement stress
Chain details, loose charms, layered elements, and nails on flexible tape can move differently from a flat set. They may need a different holding method, a separator, a revised layout, or a narrower transport claim.
Set-completion stress
A retail kit may include spare tips, adhesive tabs, glue, a file, an alcohol pad, a wood stick, a care card, and sizing information. If they sit above the decorated set, they can create contact and pressure. Decide where every component lives before approving the outer box.
The first packaging brief should name the specific design feature that needs protection. "3D nails" is too broad. "Long stiletto set with a raised flower on the ring finger and a detachable chain on the middle finger" gives a packaging supplier and a packing team something they can actually evaluate.
Measure the packed set in three dimensions
Start with the completed set in its intended display position and record the space it occupies, rather than the supplier's external box dimensions.
- Display length. Measure the longest tip after it is fixed to the card or holder. Include the gap from the tip to any lid, border, or closure.
- Display width. Measure the full layout, including any spare tips, labelled compartments, and the part of the card the customer must grip to remove the set.
- Occupied height. Measure from the base card to the tallest decoration, then add the thickness of tape or adhesive, backing card, and any proposed insert.
- Safe handling zone. Mark where packers and customers can touch without pressing the decorated faces or dislodging a component.
- Accessory zone. Record where tabs, glue, file, and instructions sit when the lid closes. An accessory can need its own compartment or pocket rather than a place on top of the nails.
Measure the most demanding approved design in the collection. A plain French-tip sample should not approve a box for a raised floral set. If the range mixes flat and statement styles, it may need more than one internal layout.
Pick a packaging format for the job it must do
There is no universal "best press-on nail box." Each format asks different questions during sampling.
Card and sleeve
A card inside a sleeve can work well for a flat set with a controlled layout. The sample questions are: does the card flex, can the tips shift before the sleeve is fully closed, and is there enough headroom for the highest point? If the design is long or dimensional, test the edge clearance before ordering a printed sleeve.
Rigid box with an internal card
This format can separate the presentation layer from the outer shipping layer. It gives a brand room for instructions and accessories, but only if the inside is deliberately organised. Test whether the card stays flat, whether the box opening creates contact with the nails, and whether an accessory packet moves into the display area.
Clear storage case
A clear case may make it easier for a customer to see and re-store a reusable set. It can also make flaws in card layout or loose accessories more visible. Product pages describe clear cases for display and storage in different dimensions, so a brand should check usable internal space rather than choosing from product photos alone.
Floating-frame case
Floating display boxes use two flexible films to hold an object in view. This can make a sculpted set visually striking, but the films themselves become part of the sample test. Do they touch or pull on the highest decoration? Can a customer remove the nails without scraping an edge? Does the presentation remain acceptable after the box is opened and reused? A 3D display effect is not the same as an approved shipping result.
Two-part retail and shipping system
For a fragile or elaborate set, a consumer-facing case may need a separate outer mailer or carton. The inner package provides presentation and storage; the outer layer handles fulfilment and shipping. This does not mean every set needs a heavy box. It means the retail display case should not be assumed to be its own mailer unless the brand has tested that exact route.
Build the pack-out in the order it will be packed
Packaging samples can look convincing when arranged slowly for photography. A production format has to work in the order a real packer will use it.
Start with the backing card, nail holding method, and final arrangement. Add accessories, close the inner package, then place it into the actual mailer or carton. Do not test a display case by itself if it will be delivered inside another outer package.
Use a written assembly sheet with a reference photograph. It should answer practical questions: Which nail faces up? Where does the longest tip sit? Which side holds the tool kit? Is a protective insert placed before or after the care card? Where must a packer avoid applying pressure? The sheet does not need to be complex. It needs to prevent every packer from inventing a new layout.
| Stage | What to confirm | Failure that should stop approval |
|---|---|---|
| Nail placement | Every nail sits in the approved orientation | A tip or charm contacts the border or lid |
| Accessory placement | Tools and instructions have a defined location | Accessories lie on the decorated nail faces |
| Inner closure | The box closes without forced pressure | Closure distorts the card or compresses a raised element |
| Outer pack | The retail set fits the actual mailer or carton | The case is loose, rattles, or requires an unplanned filler |
| Customer opening | The first opening has a clear handling path | The customer must pull directly on a decorated nail to remove it |
This is a sample acceptance record, not a supplier contract. Add the photos and measurements that make it meaningful for your collection.
Retail and sourcing references
The following are retail and sourcing references for comparing press-on nail packaging formats. We may earn a commission from qualifying purchases through these links. The linked products do not prove that a particular format protects your designs, suits your dimensions, or meets current supplier terms. Recheck product details, sample availability, customisation conditions, and CPS eligibility before ordering.
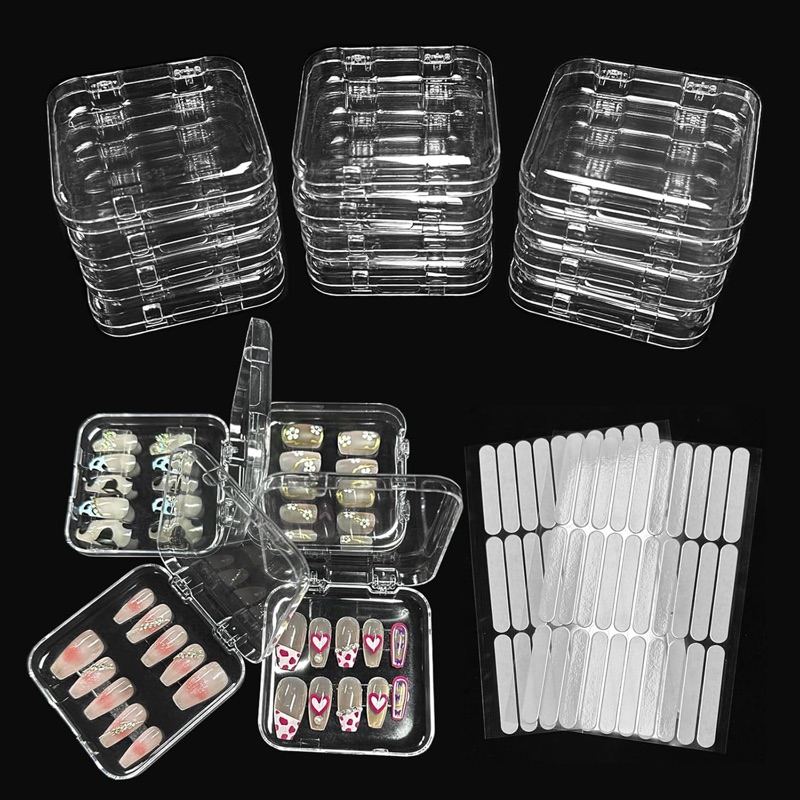
Clear acrylic press-on nail storage boxes with tape, 12 pc
A 12-piece clear acrylic press-on nail storage box set with double-sided tape for holding the tips. A retail reference for checking usable internal space on a clear display format rather than judging from a product photo.
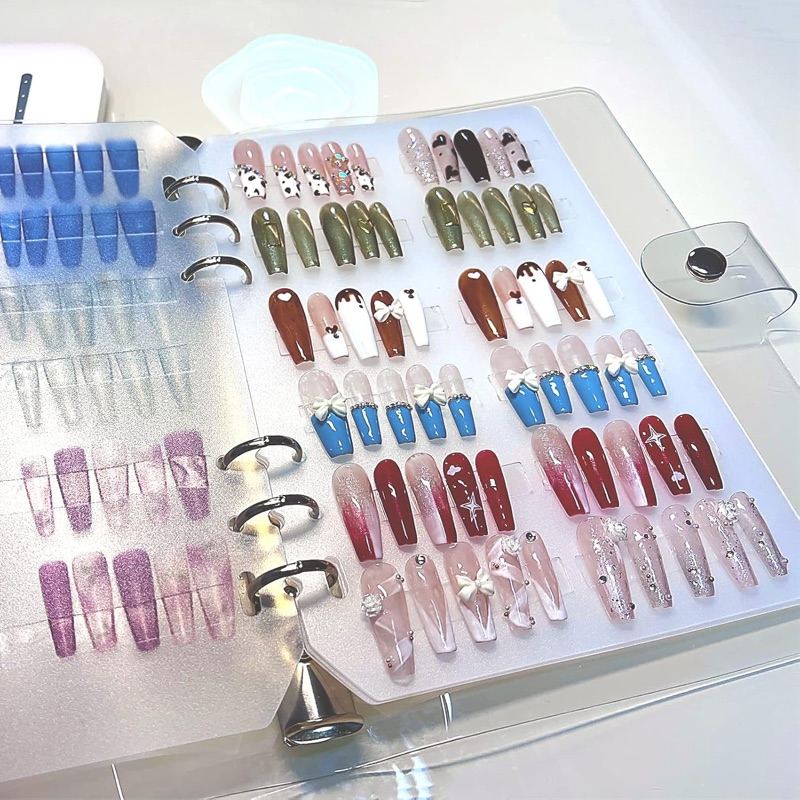
Press-on nail organizer, clear empty boxes, 10 pc
A 10-piece clear empty press-on nail organizer set. A second display and storage format to compare — useful for testing how a long or raised tip sits once the lid is closed.
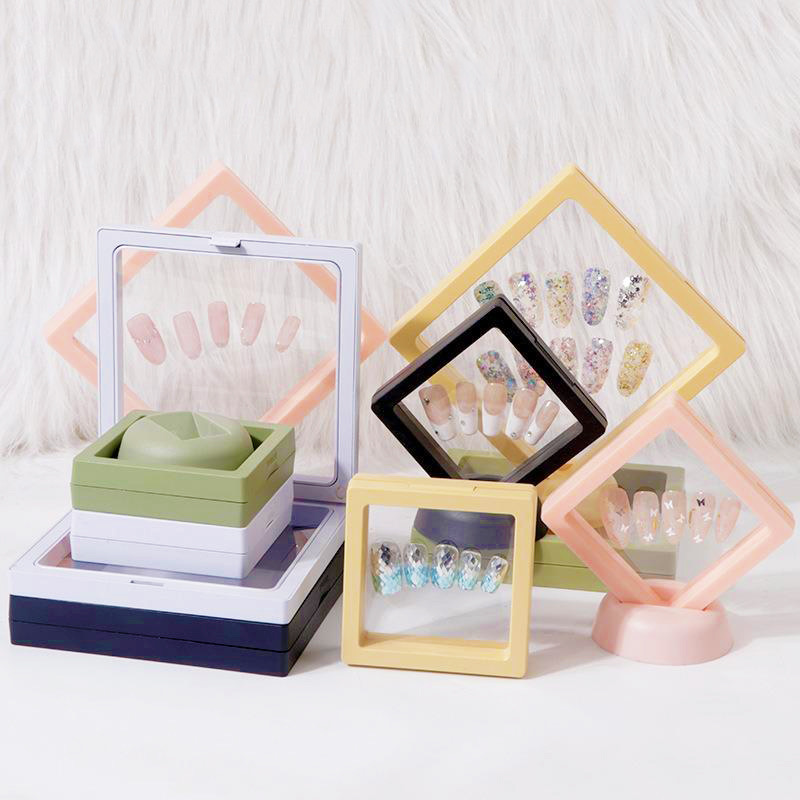
Floating-frame press-on nail packaging box, custom logo
A wholesale floating-frame press-on nail packaging box using clear PE film, offered with custom logo options. A sourcing route for comparing an available format — verify dimensions, film behaviour and sample availability on the exact listing.
Card photos are the current marketplace listing images and may differ from the delivered product; confirm details on the live listing.
Run a sample test that separates display from delivery
An attractive sample is only the first step. The minimum useful test has three parts.
1. Close and reopen
Pack the finished set, close it, reopen it, and inspect the same points each time: the longest tips, the highest decorations, the cuticle-side edge, any chain or movable component, and the card adhesion. Repeat after a person who did not design the layout follows the assembly sheet. If the result depends on one experienced person's careful hand, the format is not ready for regular fulfilment.
2. Outer-pack check
Put the retail set into the planned mailer or carton with the same inserts and labels used in production. Handle it through shelf placement, pick-and-pack movement, and handoff. This screening test can reveal obvious contact, rattle, closure, or fit problems before an order is placed.
3. Customer removal check
Give the packed sample to someone who has not been shown the set. Ask them to open it and identify the nails, accessories, and instructions without coaching. Watch where their fingers go. If the most natural grip point is a 3D flower, a chain, or a highly decorated tip, redesign the card or add a clear handling cue. A package that protects the set until opening but encourages accidental damage at the first use has not completed its job.
Record pass, revise, or fail for each sample. A revision may be as small as moving an accessory packet or as significant as changing the box height. Do not change three variables at once if you want to understand what improved the result.
Write supplier questions that lead to useful samples
A listing that says "custom logo," "3D display," or "long nail packaging" is a starting point, not an approval. Ask each potential supplier the same practical questions:
- What are the usable internal length, width, and depth after the case, insert, and closure are assembled?
- Can the supplier provide an unprinted sample in the proposed size before finalising artwork?
- Which elements are customisable: print, insert, card, colour, film, closure, or external sleeve?
- How are samples packed for transit, and what are the current ordering and shipping terms?
- What information does the supplier need from the brand to quote a change in size or internal layout?
The Alibaba product card in this guide is a sourcing reference for a custom-logo floating-frame press-on nail packaging box. It is appropriate for comparing an available product role and supplier questions. It does not confirm current sample availability, final dimensions, logo options, minimum order quantity, or fitness for a particular 3D nail set.
Make the customer-facing claim smaller than the test
Unless a brand has a much more extensive transport programme, packaging copy should describe what the set includes and how the customer should handle it, not promise that the nails are impossible to crush, break, or detach.
Useful language is concrete: "Includes a reusable storage case," "Store the set flat in its case after removal," or "Lift nails from the labelled card edge." Avoid "damage-proof," "crush-proof," and "guaranteed protection." Those words turn a packaging feature into a broad performance claim that a product photo cannot support.
The customer instructions should also match the product. A plain short set may only need storage guidance. A long decorated set may need a small illustrated note showing the safe removal edge, where accessories are stored, and how to return the nails to the case. That is not unnecessary copy. It is part of making a reusable product usable after the unboxing moment.
What a finished approval looks like
Approve packaging only when the real long or 3D set fits the layout without forced contact, the accessories have a defined location, the customer can open it safely, and the completed retail set has passed the brand's own outer-pack screening check. The design can still be beautiful. The difference is that beauty is no longer the only criterion.