The box should fit the finished set, not the idea of the set. A box can look generous in a product photo and still press a raised charm against its lid. A long coffin set can fit the same tray outline as a shorter set, yet need more vertical room once the nails are mounted. The reliable way to size packaging is to assemble the actual sellable kit first, measure the packed arrangement, then check a physical sample. A supplier's outside dimensions or a generic "nail box" size cannot answer whether your finished nails will sit without rubbing.
This matters most when a range includes extra-long tips, sculpted flowers, bows, gems, layered charms, or other raised details. It also matters when the kit adds a size card, glue, adhesive tabs, a file, or an instruction insert. Each component can change the tray, closing depth, and outer shipping pack. Make the package brief from the product that will ship, not from the flat blank tip or an early mock-up.
The approach here is deliberately practical: define the largest pack-out your collection needs, separate usable interior space from outside dimensions, and make the sample prove the fit. There is no universal clearance number that guarantees every design is protected. A prototype has to be checked with your own tips, tray, box, and mailer.
Why a published box size is only a starting point
Packaging listings often give a length, width, and height without saying whether those measurements describe the inside, the outside, or a catalogue size. That omission is enough to make two quotes look comparable when they are not. Board thickness, a folded lip, a magnetic flap, a foam insert, or a raised tray all reduce usable room. For a rigid box, an outside depth of 26 mm does not mean that the cavity is 26 mm deep.
One custom magnetic flip box marketed for press-on nails states 171 x 82 x 26 mm. The page does not clearly identify those figures as usable internal dimensions. Treat them as a question for the supplier, not a fit specification. Ask for the internal cavity dimensions after the insert is installed, the material thickness, and a drawing that labels inside and outside measurements. Ask whether the listed size is fixed or can be changed for a sample and production run.
Supplier guides now commonly advise brands to start from nail shape, decoration height, tray layout, kit contents, and shipping route. They also recommend reviewing the complete packed sample rather than approving a box render alone. That is sound advice, but those pages are written by packaging sellers; their general instructions do not establish that a particular box protects a particular nail design. Your own recorded sample remains the decision point.
Measure the set that creates the tightest fit
Do not choose one "hero" nail and measure only that. Build a small range matrix before requesting quotes. Include the longest shape, the highest decoration, the widest tray arrangement, and the version with the most accessories. Those may be different SKUs. If one box must serve every design, the required package envelope is set by whichever version occupies the most room in each direction.
First arrange the nails in the exact order and orientation customers will receive. Use the intended card, adhesive dots, tray, or fitted insert. Measure the complete arrangement at its widest and longest points. Then measure the tallest point from the bottom of the tray to the top of the highest nail, charm, or other part that must not be compressed. Record whether the decorated nails face up, lie flat, or are held at an angle.
Next add every item that shares the retail box: the nail file, prep pad, adhesive tabs, glue, stick, sizing card, or instructions. Do not estimate these from a web thumbnail. Use the actual components or production-intent samples. If an item sits in its own well, mark its position and dimensions. A narrow accessory can force a wider insert even when it adds little weight.
For a line with several styles, use a one-page table that ties each SKU to a sample ID, tip shape and length, highest decoration, tray dimensions, kit contents, and measured packed dimensions. It also catches a common development mistake: approving packaging around a plain medium almond set and later trying to use it for an extra-long, heavily decorated style.
Ask for usable dimensions in writing
Send suppliers a drawing or clearly labelled measurement sheet. Request the following separately:
- Clear inside length, width, and depth after the insert is fitted.
- Outside length, width, and depth of the closed retail box.
- Insert material, thickness, cavity depth, and how it retains each nail.
- Whether the nail surface or raised decoration touches the lid when closed.
- Any measurement tolerance the supplier will use for production.
- The packed box dimensions and weight when all included components are inside.
Do not assume "custom size" means every dimension can be adjusted at the same price or minimum. A supplier may need a new die, insert, or sample when the internal layout changes. Ask whether a stock box, a custom insert in a stock box, or a fully custom structure is being quoted.
A useful request-for-quote line is: "Please quote the closed retail box and insert around our attached production-intent tray. Confirm finished internal cavity dimensions after the insert is installed, external dimensions, material thickness, tolerance, sample cost, sample lead time, MOQ per design, and whether the decorated nail tops have contact with the lid." Attach the same layout and kit list to every supplier so the replies can be compared on equal terms.
Choose the insert by what must stay still
A backing card with adhesive dots can be a simple option for flat, light sets. It lets a buyer see the design and can keep the tips in order, but the dots and card need to hold the actual nails without the tips lifting or sliding during handling. A clear case or formed tray may make the set visible and reusable; test the lid and edges against the highest embellishment. A die-cut foam or paperboard insert can separate pieces, though it adds material, takes up space, and may require a custom tool.
The right choice depends on how the nails are arranged and how they move. Check whether neighbouring tips can touch, whether sharp sidewalls catch on the insert, whether a gem can snag when the customer removes a nail, and whether the tray can be lifted without bending the card. A cavity should hold the tip where intended without crushing a raised feature. These are sample questions, not claims that one material is automatically protective.
Avoid designing the cavity from an unadorned tip if the finished set adds gel layers, rhinestones, charms, or sculpted pieces. A photo or digital mock-up may help with artwork placement, but it cannot show friction, actual insert fit, or closure pressure. Ask for a physical sample using the complete arrangement. If the supplier cannot build your exact decorative sample, send a dimensioned dummy or representative piece and label clearly what is and is not production-intent.
Run a pack-out check before approving artwork
When the sample arrives, use a short repeatable sequence and keep the results with the sample code.
- Check the box against the drawing. Measure the usable cavity with the insert installed; do not measure only the exterior.
- Load the actual nail tray and all kit components. Confirm each piece has a defined position and the box closes without force.
- Inspect the highest decoration from the side before and after closing. Look for contact marks, bent card, loosened gems, or a lid that springs back. Do not press harder to make a poor fit look acceptable.
- Gently turn the closed box through the orientations it may experience in ordinary handling. Open it and note any nail that shifted, rubbed, lifted, or changed order. This is a screening check, not a certified transit test.
- Put the retail box into the intended mailer or shipping carton with the planned cushioning. Check whether the package can close, whether the retail box slides, and whether the outer dimensions change the shipping method or rate.
- Photograph the closed package, open arrangement, insert, and any contact marks. Record the date, sample version, dimensions, and the person who checked it.
Repeat the same sequence if the supplier changes the insert, board, tray, nail design, accessory list, or box structure. A new dieline or artwork file is not proof that the physical pack-out stayed the same. Keep the approved sample and its drawing together; use both when comparing a production lot.
What the linked products can and cannot tell you
The two links below represent different packaging roles: a low-profile pouch-and-card pack-out, and a bulk-sourcing lead for a rigid presentation. We may earn a commission from qualifying purchases through these links. Neither is a blanket recommendation, and neither listing establishes that it protects your own nail set.
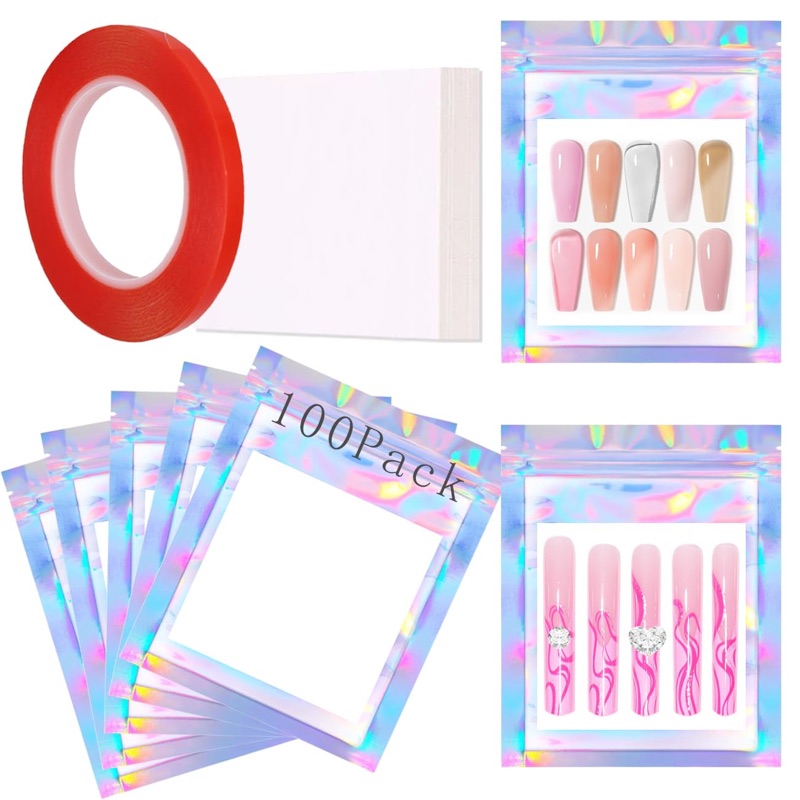
Press-on nail packaging pouches with cards, 100 pcs
A 100-piece pouch set with cards and double-sided tape, listed at 4.8 stars from 349 ratings and 100+ bought in the past month. A useful reference for a low-profile pack-out — the listing does not show that it has the depth or transit protection a long, decorated set needs.
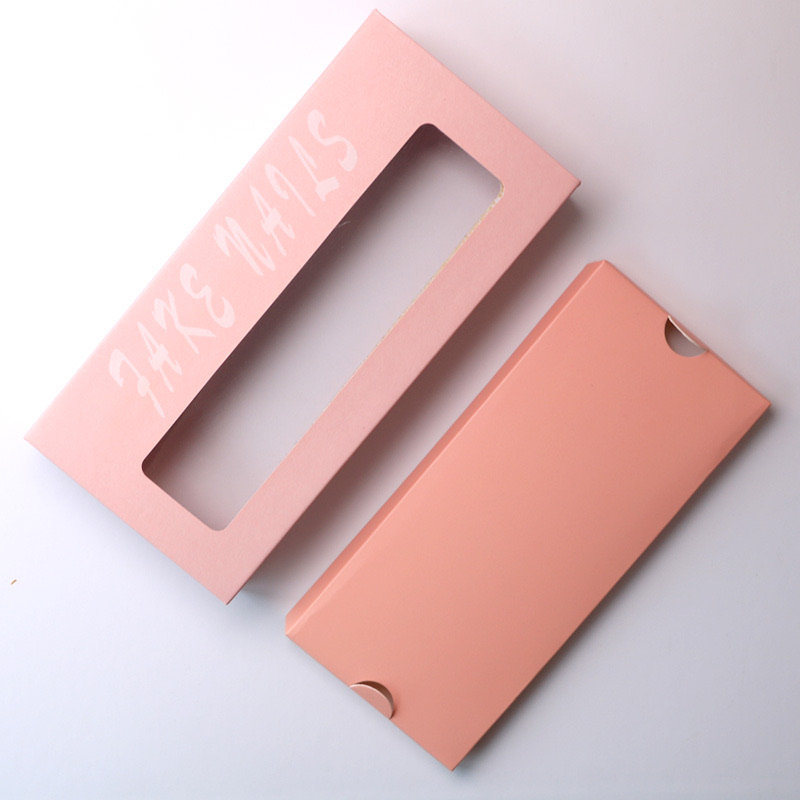
Custom magnetic flip press-on nail box
A custom magnetic flip box marketed for press-on nails, listed at 171 x 82 x 26 mm with no product reviews and 100 sold. A sample candidate only — those figures are not identified as usable internal dimensions, so request the cavity size after the insert is fitted.
Card photos are the current marketplace listing images and may differ from the delivered product; confirm details on the live listing.
Marketplace counts and commission terms can change. The supplier profile displayed a 16-year platform history, but supplier history and store-level ratings do not verify this specific box's fit or production consistency. Request a current quote, internal dimensions, exact material and insert details, sample cost, shipping terms, MOQ by design, and an agreed way to compare production with the approved sample.
Retail protection and parcel protection are different jobs
The retail box holds and presents the set. The mailer or shipping carton has to handle parcel movement and external compression. One cannot be assumed to replace the other. A decorative magnetic box may be a suitable display format yet still need a protective outer pack for individual orders. Conversely, adding a large shipping carton around every set may increase postage and storage costs without solving a loose tray inside the retail box.
Carrier packaging guidance recommends measuring the final parcel at its extreme points for dimensional-weight and size checks, and generally discusses cushioning and separate boxes for some fragile goods. Those are carrier-level shipping instructions, not a press-on-specific test plan. Apply the carrier's current rules to the actual destination and package; do not copy a generic two-inch cushioning recommendation into a tiny nail carton without checking whether it is appropriate. The practical sequence is to secure the nails within the retail package, then evaluate that package inside the chosen mailer or carton.
For small brands, compare at least two pack-outs: a flat pouch or card format for simpler designs, and a deeper tray-and-box format for raised or fragile-looking designs. Compare the complete package, including postage, not just the unit cost of the box. If your orders ship through different channels, test the version that will actually be used for each one.
Estimate the cost of the format, not just the carton
When two samples pass the fit check, compare their cost per accepted sellable kit. Include the box, tray or card, insert, adhesive dots, printed instructions, setup or die charges, sample fees, freight, duties if applicable, and inspection. Divide the planned landed packaging cost by the number of usable units, not merely the number ordered. If some units fail inspection, the practical cost per accepted unit rises.
Record the parcel dimensions and weight after packing. A small change in depth can affect storage, mailer choice, or the carrier's dimensional pricing rules. Check current carrier rates for the actual destination and service before selecting the retail format. Avoid using generic shipping-price estimates as a promise to your customer; distance, service, packaging, and rate changes affect the final amount.
For repeat orders, keep the approved spec, drawing version, sample photos, bill of materials, and supplier's written quote in the same product folder. Identify the insert and box by a version or sample code rather than "pink nail box." This simple record makes it easier to spot a changed board thickness, cavity, finish, or accessory layout before a reorder is approved.
A practical go or no-go decision
Approve a packaging sample only when the actual nail set and accessories fit the usable interior, the box closes without pressing the highest feature, the insert keeps the arrangement where intended during a basic handling check, and the final pack-out works with the planned mailer or carton. If any of those points is uncertain, request a revised sample or keep the item out of the first order.
The key question is not whether the box is marketed for press-on nails. It is whether the named tray, nail version, insert, box, and shipping pack have been checked together. Write down the measurements, keep the photographs, and make the supplier's quote refer to the same specification. That gives a small brand a repeatable basis for ordering and replenishing packaging without assuming that one catalogue size fits every design.