A display card makes a small press-on set look orderly. It also creates one of the least glamorous product decisions in a nail business: what holds the nails in place until a customer takes them off the card? A strip that lets a decorated nail drift inside the package has failed. So has one that holds firmly but leaves a tacky lump beneath the nail. The right mounting method must survive your actual packing and shipping route, release cleanly, and be practical to apply to every set in a repeat order.
This guide is for sellers attaching finished press-ons to cards or box inserts. It covers the temporary mounting material inside a retail pack, not adhesive tabs supplied for wearing the nails or putty used to hold tips on a painting stand. Those products can look similar online and have quite different jobs. The decision is best made on assembled samples of your own nails, card and outer pack, with a record of what happens when they are opened.
The hidden specification in a finished nail set
A seller asked other nail makers what tape they used to arrange press-ons in a box. That is a useful formulation of the buying problem, although one discussion cannot establish how common the problem is. Another maker described putty residue after taking a practice nail off a stand. The stand is a different application; the anecdote is a reminder to test release rather than accept “removable” as a sufficient specification. Do not cite complaints about wearing adhesive on a natural nail as proof that a packaging adhesive will fail. They involve different surfaces and contact times.
Packaging guides already tell sellers to think about trays, inserts and the full kit. One supplier tray guide also raises adhesive contact, residue and stability. The missing operational detail for a small brand is how to compare two mounting materials under one repeatable pack-out, then turn the winner into a purchase specification. That is the work here.
Start by writing a one-line release requirement: “All nails must remain in their numbered positions through our normal fulfilment route and remove from the display without visible adhesive transfer or damage.” It is a proposed acceptance criterion, not a claim that any off-the-shelf tape will meet it. Add stricter finish-specific observations where necessary.
Separate the three adhesives before shopping
A press-on kit may contain an adhesive tab sheet for the wearer. That sheet is a consumable accessory with skin and nail contact; it should be named and packed separately from the mounting material that stays with the display card. A temporary painting stand uses another bond: the maker repeatedly removes a tip while filing, polishing or curing it. A stand product that performs well at the workbench has not been validated for a sealed retail pack over storage and shipping. Conversely, a mounting strip that works on a card is not a suitable substitute for a wear tab merely because it is double-sided.
For a display card, two practical sample categories are precut double-sided mounting pieces and a roll of tape cut in-house. Putty and gel-like pieces can also be sampled if the supplier describes the intended use and you can control portion size and release. Treat “residue-free,” “reusable” and “strong hold” as seller claims until your finished set confirms them.
Ask what each sample actually includes. Listings sometimes bundle bags, cards, boxes and tape, while others sell only one component. A “press-on nail adhesive tab” search returns wear tabs, stand stickers and packaging strips side by side. Compare the photographs, intended contact surface, size and quantity of the exact variant. If the listing does not state whether the product is for packaging, request that clarification rather than relying on a broad title.
Build a sample that represents the difficult SKU
Do not test one loose blank nail on a desk. Choose a finished SKU that exposes the mounting method's weaknesses. Include the longest nail, the widest thumb, the shortest small nail and any design with a heavy charm or raised decoration. If you sell both a flat glossy set and a high-relief set, treat them as separate pack configurations. Their centre of mass and required clearance differ.
Use the approved card stock or actual box insert. Different coatings, textures and print finishes may change how the adhesive remains attached to the card when the nail is lifted. Arrange nails in their intended order, mark their positions on a duplicate card, and use one clearly measured piece per nail. If you choose a strip across a row, record that geometry too.
Make at least two comparable samples for each candidate so one unusual failure does not decide a reorder. This is an internal screening plan, not a statistically validated sample size. Label the card with SKU, finish, nail-tip lot, card version, adhesive source and batch, amount per nail, assembler, date and storage conditions. Keep a control sample of the current method if you already sell the set. Change only the mounting material in the first comparison; otherwise a new card coating, box and nail shape can obscure the cause of a result.
Watch assembly, not just the finished photograph
The maker's hands reveal a bad choice before a package ever ships. Time one complete set with each method using the normal packing sequence. Record whether the material is easy to peel from its liner, whether it folds onto itself, whether lint sticks to exposed edges, and whether positioning needs to be redone. Count the pieces discarded or cut incorrectly. A strip that is cheap per roll may be expensive when an assembler spends extra minutes separating backing or trimming ten tiny squares.
Check that nails align without being pressed so hard that the card bows. Note whether the smallest tip has enough flat contact area, whether a large thumbnail rocks on an undersized dot, and whether the adhesive protrudes visibly around a translucent nail. Inspect the card after you close and reopen the box. A package window or accessory sachet should not bear on a raised design. If it does, changing tape strength alone is unlikely to fix the contact point.
Record labour as observed time for your particular process, not as a universal “minutes per set” benchmark. A useful cost line is mounting cost per saleable set = adhesive consumed + discarded adhesive + assembly labour + replacement cost from failed sample packs. Use your actual purchasing and wage figures. Keep postage, card printing and box costs in a separate full-pack calculation so you can see whether the adhesive change is driving the difference. Reorder risk matters too: note the vendor's pack quantity and whether the same cut width or dot diameter can be bought again. No projected saving is a real saving until you have the records.
Check movement inside the pack and mailer
Finish each sample as a customer order, including the accessory pack, outer mailer and cushioning your team actually uses. Handle a duplicate the way the fulfilment route reasonably entails: turn it over, carry it, place it in a box with other orders and inspect after a real trial shipment if feasible. Document the sequence.
On opening, photograph the nail positions before touching them. Note any lifted edge, slipped small tip, collision between decorated nails, contact with a clear lid, or transfer of colour or glitter onto the card. If the mounting survives only when the outer mailer is packed in a way your routine team cannot repeat, revisit the system. A stronger bond is one option; a shaped tray or more clearance may solve the underlying movement more reliably.
Do not infer from one arrival that all routes and seasons are safe. Adhesive behaviour can vary with time and conditions, and a printed card or finished nail may also change. If inventory sits before sale, retain a sample for a realistic storage interval and repeat the opening check. Record where it was kept, rather than claiming an accelerated-aging result without a defined method. A nail held perfectly on packing day can still become hard to release later.
Retail and sourcing references
The two links below are packaging-adjacent kits that contain mounting material; neither is sold as a tested display-mounting adhesive. We may earn a commission from qualifying purchases. Before ordering, confirm which component in the listing is the double-sided piece and whether the seller intends it for display mounting rather than for wear.
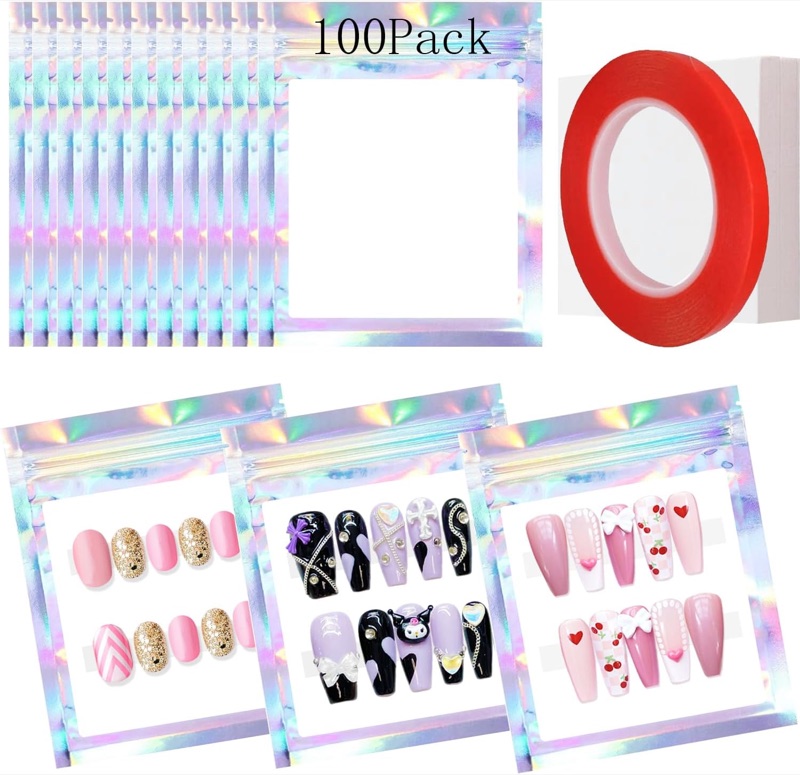
Press-on nail packaging bags with display cards
A small-quantity pack of bags and cards for test runs, which is the scale where a mounting method is worth comparing at all. Check the listing's contents first: if no double-sided piece is included, this is packaging only and cannot answer the release question.
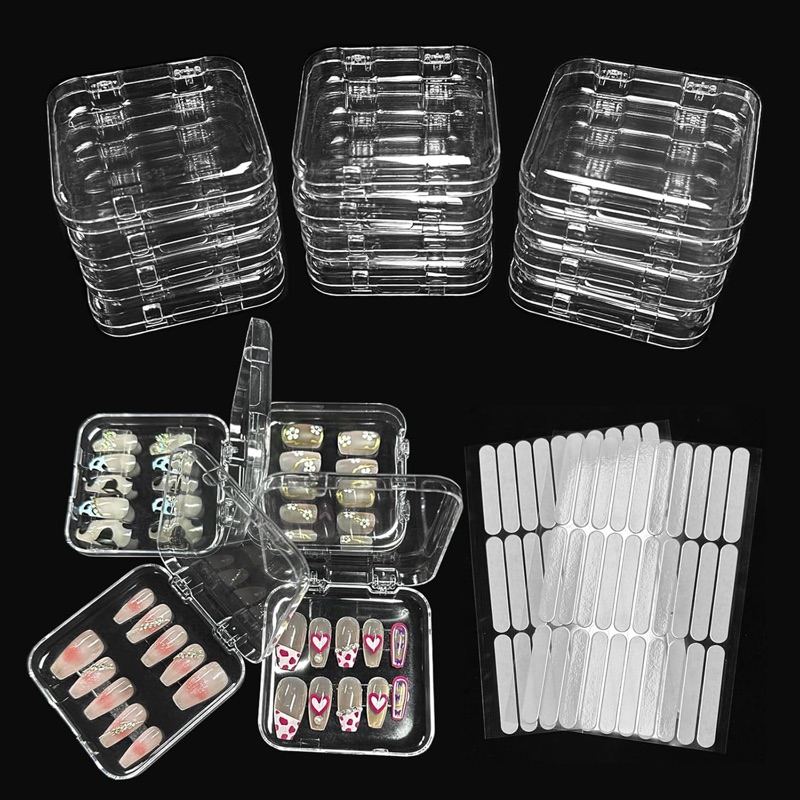
Press-on nail storage boxes with double-sided tape
A boxed set that includes double-sided adhesive, useful if your pack uses an insert rather than a flat card. Treat the tape as an unknown until you run the removal check on a decorated nail — a kit level “strong adhesive” claim says nothing about residue.
Card photos are the current marketplace listing images and may differ from the delivered product; confirm details on the live listing.
If you cannot confirm that a proposed strip is meant for display mounting, do not label wear tabs as its equivalent. The same applies to a bulk marketplace offer: evaluate the seller, exact product, order terms and any affiliate path before calling it a sourcing option. A “hot product” badge may help find candidates but does not establish adhesive performance or buyer fit.
Make the customer's removal the decisive test
Give the assembled sample to someone who did not pack it. Ask them to remove the nails as they normally would, without solvents or special instructions. Watch which edge they grasp and whether the card bends, a nail flexes or the adhesive follows the nail. Repeat on nails from the middle and end of a row. Photograph the underside immediately after removal against consistent light, then check the card for torn coating, exposed fibres or leftover adhesive. Record the number and identity of nails affected; “mostly clean” hides a recurring problem on the smallest tip.
If a mark is visible, distinguish a removable fragment from a stain, scuff or coating transfer. Do not recommend acetone as a universal cleanup step for retail customers. A solvent could affect the nail finish or decoration; verify any proposed cleaning instruction on that exact material and obtain appropriate product guidance first. Better packaging lets the buyer lift the nail cleanly without repair work.
Define the threshold before judging candidates. For example, a brand may require no visible transfer on any nail in its comparison, no damaged decoration, no detached nails on arrival and an assembly time within its own cost target. Those are brand decisions, not industry standards. If both candidates fail, change the contact area, card material or retention design before ordering more of the same tape.
Turn the winning sample into a supplier brief
A supplier cannot reproduce “the sticky stuff we liked” from a product photo. Send the complete application: finished nail tip material and underside condition, card stock and coating, nail shapes and lengths, layout, retail box or pouch, accessories, storage interval, intended sales market and planned order quantity. Supply a photo and a physical reference sample when possible. Specify the material's form, approximate contact dimensions, placement and whether it must remain on the card after removal. Ask which side has which adhesive or liner if the product is asymmetric.
Request samples from the exact manufacturing or stock specification offered for repeat purchase. Ask for a written quote that identifies pack count, dimensions or thickness if provided, liner format, lead time, minimum order, replacement policy and any permitted substitution. These are questions for the supplier; they are not promises that a marketplace seller offers custom conversion or single-size refills. If the adhesive comes already applied to printed cards, request a complete card proof with nails mounted and removed. An empty print proof says little about release.
Make any change to adhesive, card coating or nail-tip material a new sample decision. A supplier may preserve the product title while changing a component. Store one signed-off pack, its source listing or purchase record, and the outcome photos. At incoming inspection, compare samples from the new lot with that reference using the same pack and removal sequence. If failures cluster in one lot, keep the lot number and images before contacting the seller.
For a small run, an accessible consumer pack of strips may be enough to establish the method. A larger brand can then ask whether a consistent bulk format, precut pieces or pre-applied cards justify the order size. The sensible unit of comparison is a finished, releasable saleable set, not a headline price per roll or a claim of “extra strong” adhesion.
What the product page can promise
Do not describe a packaging strip as the product that makes nails reusable. The wear tab and the mounting strip do different jobs, and a customer who reads a vague “includes adhesive” line will assume the wrong one. Name the mounting material in the pack contents, and say whether extra wear tabs are included separately.
If reviews mention residue, treat that as a signal to re-check the release test rather than a reason to add a cleaning instruction. Publish a removal note only if it has been verified on your own finished nails: lift from the free edge, avoid twisting the card, and stop if the decoration starts to separate.
The decision before reordering
For now, compare two materials on one difficult finished SKU. Record assembly effort, pack movement and customer removal separately. Buy the next lot against the sample and written dimensions that actually passed. The customer sees a neat row of nails; the brand needs a mounting process that can be repeated without sending the customer an adhesive cleanup job.