A press-on nail sample answers one useful question: can this supplier make something close to the idea in your head? It does not, by itself, answer the more expensive question: what exactly must a production order reproduce?
That distinction matters when you are turning a set that looks good on a desk into a sellable SKU. A loose set may have the right colour, yet use a different size mix from the one you plan to sell. The nails may fit the tray, while the finished box does not protect raised details. A supplier may understand “short almond, pale pink, gold bow,” but still make reasonable-looking choices that are not your choices. None of those gaps is necessarily a defect in the sample. They are gaps in the approved specification.
This guide helps a small press-on nail brand turn an approved set into a short, versioned record that can be checked before production and again at receipt. That record gives your supplier something more reliable than a chat history, and gives you a fair basis for deciding whether an item matches what you bought.
The practical rule is simple: approve a retail-ready reference, then lock the details that make it retail-ready.
What a sample actually proves
A sample proves that a particular physical item existed on a particular date. It can show whether you like the overall silhouette, how the art reads at normal viewing distance, whether the chosen size range looks plausible, and whether the product belongs in your proposed collection. It is also the right moment to notice issues a product photo hides: a tip may sit too high over the cuticle, a chrome finish may look uneven, or a 3D decoration may catch on the tray.
It does not automatically prove that every later set will use the same components, size assortment, colour reference, packing sequence, or artwork file. It also does not convert a verbal preference into a pass/fail rule. “Make the bow smaller” may be clear to you after looking at the sample; it is not clear enough for someone working from a production instruction weeks later.
Treat a first sample as a discovery tool. Treat the final approved sample as one component of a controlled specification. When a change is made after approval, create a new version rather than relying on a later message to override an earlier one.
Start with the sellable unit, not the nail alone
Before you approve anything, decide what the customer receives when one SKU is opened. Write that unit down as a complete bill of contents. For example: one left/right nail set, a named size mix, one adhesive option, one prep tool, one instruction card, one tray or backing card, and one outer box. Your list may be shorter or longer. The point is that it must be finite and countable.
Then separate the work into three references:
-
Product reference: the nails, their shape, length, curvature, size mix, finish, art, and any raised elements.
-
Pack reference: the tray, card, adhesive items, tools, insert, outer box, labels, and how each item is positioned.
-
Production record: the SKU name, version number, approval date, files, photos, accepted deviations, and the person who signed off.
A sample is often approved as product reference only. That is acceptable during early development, provided it is labelled honestly: “nail appearance sample, not final pack approval.” Do not call it final approval until the references relevant to the order are present. If your order includes printed cards and a custom carton, those items need their own final check.
This resolves a frequent mistake in small brands: approving a beautiful loose set, then discovering that the set shown in product photos is not the unit a customer receives. The problem is not that the nails changed. The approval scope was too narrow.
Lock the geometry that customers will feel
Shape names are useful search terms, not complete specifications. “Almond,” “coffin,” “short,” and “medium” vary between moulds. For each planned SKU, identify the physical sample by a photograph and record the size system you expect to sell. If the supplier uses numbers, record which number belongs to each position. If you use a consumer-facing size chart, store the measurement table beside the supplier’s identifiers rather than assuming the two systems are interchangeable.
At minimum, confirm these points:
-
Intended shape and length, identified by the approved physical set rather than a catalogue name alone.
-
Size range and count of each size in a sellable set.
-
Accepted curve or profile, especially if customers with flatter or wider nail beds are part of the target customer.
-
Thumb options, including whether a wider alternative exists and how it is labelled.
-
Any trimming, filing, or edge treatment that changes the final outline.
Photograph the set from above and at a shallow side angle. Add a ruler photo only as a reference aid; it is not a substitute for an agreed drawing or measurement when a dimension is critical. If a difference would make the set unsellable, describe the permitted range in writing before approval. If you do not know what range is acceptable, do not invent a number. Ask for the supplier’s normal production variation and decide whether it works for the product.
Turn “the same colour” into a usable reference
Colour, gloss, chrome, glitter density, and translucency are easy to approve emotionally and hard to communicate vaguely. Screens, lighting, photography, and batch materials can make a shared image look more certain than it is.
Choose one primary reference for each visible surface. It might be the retained sample, a physical chip, a named colour system, or a print proof. Write which one controls when sources conflict. Add photographs in neutral light for orientation, but do not treat a compressed chat image as the only colour standard.
For art, record both what appears and where it appears. “White flowers on two nails” is incomplete. A more useful instruction identifies the affected nail positions, the intended orientation, approximate coverage, and whether the design should be mirrored between hands. For French tips, gradients, outlines, or chrome, include a close photo of the approved edge. For 3D pieces, note the placement and whether it must sit below the tray or carton clearance you approved.
Approve the complete pack before saying “go”
Your packing reference should be assembled exactly as a customer receives it. It is the only practical way to see whether long tips touch the carton, whether an elevated charm snags, whether the instruction card fits, and whether the accessories are correctly counted.
Open the final reference and list each component in opening order. Count it. Check that left and right sets are correctly positioned. Verify that the outer label, SKU, collection name, barcode if used, and size guidance agree with the product inside. Take photos of the front, back, interior, and side clearance. A single photograph of a closed box cannot show the parts that most often become confused during assembly.
If the nails and packaging are made by different partners, send the same versioned pack specification to both. Decide who is responsible for final kitting and who holds the approved reference. Do not assume that a nail supplier has seen a packaging printer’s final artwork, or that the packaging partner knows which nail height must fit inside.
Use a one-page approval record
A useful approval record is short enough to use. It can be a one-page PDF, a spreadsheet tab, or a shared document, with linked files stored alongside it. Give it a clear filename such as PON-ALM-01_V03_Final-Approval.
Include these fields:
-
SKU, collection, and version number.
-
Supplier name and item or mould identifier, if supplied.
-
Order scope: nail only, complete kit, or complete retail package.
-
Approved sample photos, including the label visible in at least one photo.
-
Shape, length, curvature notes, size system, and size mix.
-
Base colour, finish, art placement, and decoration notes.
-
Components and quantities per unit.
-
Tray, card, carton, label, and insert specifications.
-
Artwork filenames and approved-proof date.
-
Known accepted imperfections or deviations, if any.
-
Approval date, approver, and the sentence “No substitutions without written approval and a revised version.”
The last sentence is not a claim that a supplier will never need to substitute a material. It is a decision rule: when a change is proposed, you decide whether it is acceptable and update the reference if it is. That is much safer than learning about a difference after units have been packed.
Retain one physical approved set and one complete retail pack in a labelled protective sleeve or box. Keep one for your own comparison and ask the supplier whether it can retain an equivalent reference. Do not rely on an unlabelled set in a drawer. A golden sample only helps when someone can identify its version and compare the relevant feature.
Practical routes
These links are starting points for comparison. Confirm current product details, dimensions, material, pack configuration, pricing, and affiliate terms on the live destination before relying on them.
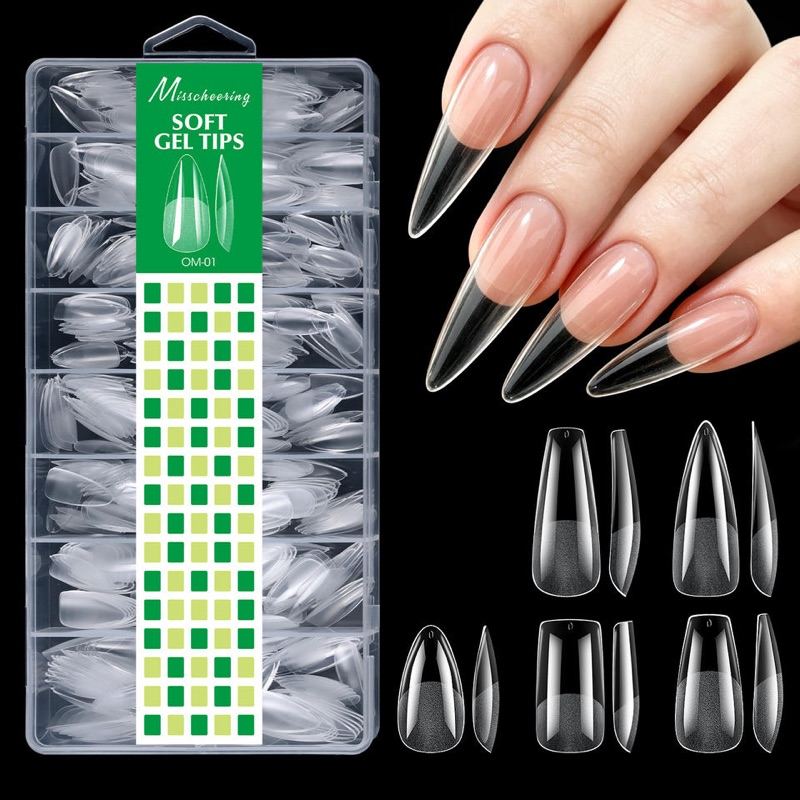
480-piece single-size nail tip refill pack — wholesale
The same single-size refill format, used here as the production reference to approve against. A sourcing route for investigating production references, supplier evidence, and the details that must be locked before approval.
Card photos are the current marketplace listing images and may differ from the delivered product; confirm details on the live listing.
Use a staged sign-off instead of one dramatic approval
A controlled sequence is usually faster than trying to judge every detail at once.
First, confirm the product brief: intended customer, shape family, size approach, finish, art, and target pack. Second, review a physical nail sample for fit and appearance. Third, approve the components that affect the sellable unit, including accessories and printed materials. Fourth, review the assembled retail package. Fifth, issue the final versioned approval record before the purchase order begins production.
If a meaningful element changes after the nail sample—new tray, new tool pack, altered 3D detail, revised art, different colour reference—move back to the appropriate stage. You do not need to repeat every check. You do need to avoid treating an earlier approval as approval of an item that did not yet exist.
Ask questions that create evidence
When the sample arrives, avoid questions that invite a reassuring but unusable answer. Instead of “Can you make this the same?” ask “Which files and sample do you use as the production reference?” Instead of “Will the sizes be consistent?” ask “Which size code and size mix will appear in each SKU?” Instead of “Is the packaging safe?” ask “Can you send an assembled pack photo and confirm the internal clearance around the tallest detail?”
Ask what a change would look like in practice. If a component is unavailable, who contacts you, what record changes, and whether a revised sample is required? If artwork is revised, which filename is controlled? If packaging is sourced separately, which party checks the final assembled unit?
Record the answer next to the relevant field. A supplier’s willingness to provide traceable answers is more informative than a broad promise of quality. It also tells you early whether the project is ready for custom complexity or better kept as a simpler stock-based test.
Match the purchase order to the approval record
Your purchase order should point to the final SKU/version and state that the relevant approved record is part of the order. It should restate quantity, variant mix, packing level, price basis, agreed delivery terms, and any inspection or sample-retention expectation you have actually agreed with the supplier. Do not quietly add a new requirement after a quote and assume it is included.
For component discovery or an early stock-based comparison, you can review a current Alibaba nail-tip listing here: Check available nail-tip options and inquiry details on Alibaba. This is an affiliate link. Treat the listing as a starting point, not proof that the seller can reproduce your specification, supply your size mix, accept a small order, or meet a particular sample timeline. Ask those questions directly and capture the answers in your approval record.
Once production begins, keep the final record available to the person who will receive the goods. At receipt, compare the delivered units to it before you make broad product claims or start packing customer orders. The goal is continuity: consumer fit feedback informs a better size system; the size system informs the sample; the approved sample informs production; and production is checked against the same reference.
The approval decision
Do not approve a sample because you are tired of revisions or eager to launch. Approve when you can answer four questions clearly: What is the sellable unit? Which physical and digital references control it? Which differences are acceptable? What happens when something changes?
If the answer is “we will work it out in messages,” you have a concept sample, not a production approval. That is not failure. It simply means the next task is documentation, not bulk purchasing.
A thoughtful approval record cannot make every order identical, and it cannot replace a supplier’s own quality system. What it does is remove avoidable ambiguity. For a small press-on nail brand, that is often the difference between a sample that looks promising and a SKU you can confidently photograph, sell, replenish, and improve.
Affiliate disclosure: This guide may contain affiliate links. If you use one, HerBrandKit may earn a commission at no extra cost to you.