A press-on collection often begins with one simple case. Then a second set arrives with a different shape, a few nails get misplaced, and the spare sizes start collecting in a small pouch. At that point, the question is no longer just where to put the nails. It is how to find the exact set and the correct replacement size without mixing pieces that only look alike.
A storage book and a box solve different problems. A book makes a collection easy to browse and display. Individual cases help keep each set together and can be easier to stack or carry. For many people, a hybrid arrangement works best: keep complete sets in their original cases, and use a book or organizer for sets that are worn often or need a visible index.
The key is to preserve information with the nails. A set should remain identifiable by brand or maker, style, shape, length, and its own size map. A nail marked "3" in one brand's set is not automatically the same width as a "3" from another brand. Storage can make a collection more orderly, but it cannot make different sizing systems interchangeable.
Choose storage by the job it needs to do
Before buying an organizer, decide what you want to reach quickly. If the goal is browsing designs, a book with visible pages can make the collection feel like a small sample library. If the goal is protecting complete sets, keeping each set in a closed case is usually the simpler starting point. If you travel with nails, adhesive, and tools, a compact case may be more useful than a binder that opens wide on a table.
Separate boxes are useful when each set has its own identity, size assortment, or application notes. The original package may already show the brand's size sequence, which matters when you need to replace one nail later. A box can also be easier to label on its edge. Its limitations are visibility and retrieval: a stack of identical cases becomes difficult to search unless each one has a clear label or an index.
A hybrid system avoids forcing one format to do every job. Keep untouched or occasional sets in their own cases. Put a small number of current favorites in a book or display organizer. Maintain an index that points to the exact box or page. This provides visibility without making every set vulnerable to handling or compression.
Do not sort only by the printed size number
The number printed on a press-on nail package is useful only inside the sizing system that produced it. Manufacturers may use different widths, shapes, curves, and numbering sequences. A number 0 or 1 can be wider in one line than in another. Even within a collection, different shapes can change how a nail sits across the sidewalls of the natural nail.
For that reason, avoid pouring every spare nail into one container marked "size 3." Store replacement nails with their original set whenever possible. If you separate them, label the storage compartment with enough context to restore the match: brand or maker, style or SKU, shape, length, and the original position or number. If several sets share the same style name, add a purchase date or a short set ID.
For a handmade brand, the problem is more important. A buyer who needs a replacement should be able to identify both the design and its size mapping. Keep a master record of the actual measured width for each size in each product line, and identify the measurement method. For example, record the widest point across the nail in millimeters, measured consistently with a ruler or caliper. Do not compare a curved nail by measuring along its arc in one batch and straight across in another.
The measurement does not replace a fit test. Nail shape, curve, and sidewall coverage affect fit as well as width. A person can have a nail that is wide enough on paper but still feels pinched at the edges. Treat the size chart as a starting reference, then validate it on the actual wearer or a representative sample.
Build a simple inventory that survives a growing collection
An inventory does not need special software. A spreadsheet, index card, or printed label can capture the details that stop mix-ups. Give every set a short ID, such as PN-024, and use that ID on the case, the storage page, and the record. The ID should remain stable even if you rename a design for a shop listing.
For each set, record the maker or brand, style name or SKU, shape, length, date acquired, and storage location. Note the original size sequence and how many nails remain in each size if you use the set repeatedly. Add a brief condition note when a nail is missing, chipped, or has a decoration that makes it unsuitable for a flat page. For handmade inventory, record batch or sample version too; otherwise a later remake can be mistaken for the original.
Keep the record short enough that you will actually update it. A useful label might read: "PN-024 | almond, medium | Rose Glass | case B2 | size map inside." The detailed measurement table can live in a spreadsheet. You do not need to measure every nail in a retail set on the day it arrives. Start with the size positions you use most often, then add measurements when a fit question, replacement order, or product-development decision makes them useful.
Keep loose spare nails useful instead of anonymous
Loose spares are valuable only if you can identify what they belong to. First, check whether the original set includes extra nails and whether the package gives a reliable size label. Keep the spare with the set when possible. If an organizer separates it, use a small compartment or pouch inside the same labeled case rather than a shared bowl of mixed extras.
When you genuinely need a central spare library, create compartments by product line and shape before sorting by size. Add the product ID and the maker's size label to each compartment. A practical label could say "PN-024 / almond / size 3," not simply "3." Record the actual width only when you have measured it using the same method as the rest of that product line. Do not silently relabel an unknown nail based on visual similarity.
When a nail is lost, look for a replacement in this order: the original set's spare, the same product and size from the maker, then a confirmed sample from the same product line. Avoid assuming a close-looking nail from another set will match. A different curve or sidewall can make it look wrong even when the nominal width is similar. If you sell sets, tell customers how to request a replacement and what identifying information they should send, such as the order number, design name, and size label.
Check how the organizer handles shape and decoration
Organizer listings often use attractive product photos, but a photo cannot tell you whether the storage geometry suits your collection. Check internal dimensions rather than only the outside footprint. Consider nail length, page depth, pocket opening, divider height, and the room needed to lift a nail out without scraping its edges. Long stiletto or coffin shapes may need more length than short oval sets. Raised charms, pearls, or layered decorations need vertical clearance and protection from pressure.
For a book, inspect the page material and attachment method. If nails adhere to a sheet, find out whether the sheet is intended for repeated removal and whether the display surface leaves residue. Do not assume that a nail holding securely on a sample page will remain clean after repeated handling. Test one sample nail first. If a pocket page is used, verify that the opening is wide enough for the shape and that the nail cannot slide out when the book is turned vertically.
For boxes, check the usable interior space, lid closure, divider layout, and whether each nail can be removed without bending or prying. A two-layer case can separate items, but the extra layer is useful only if the trays are accessible and the inner dimensions fit the nails you intend to store. Ask the supplier for inside measurements and photos with a ruler or a sample nail in place.
Avoid claims that a particular material is scratch-proof, non-yellowing, or safe for every adhesive unless the manufacturer provides evidence relevant to that product. For your own collection, use a low-cost test: place one representative nail in the organizer, close it gently, carry it as you normally would, and inspect for contact marks or pressure on decorations.
Retail and sourcing references
The two links below cover different buying roles: a consumer organizer for keeping individual sets and their spares together, and a wholesale case for a brand that wants to include storage in the customer experience. Both are affiliate links, which may earn a commission if a qualifying purchase is completed through them, at no additional cost to the buyer.
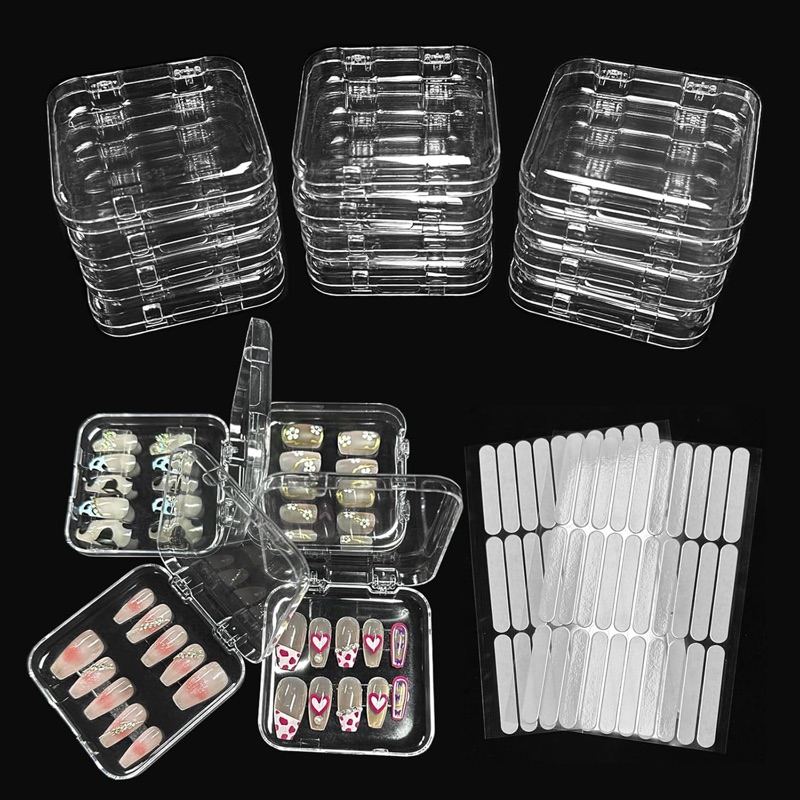
Press-on nail storage boxes, 12 pcs, clear
A 12-piece set of clear storage boxes with adhesive double-sided tape, suited to keeping individual sets and their spares together. Check the live listing for the internal depth and how much room a long stiletto or a raised decoration leaves above the insert.
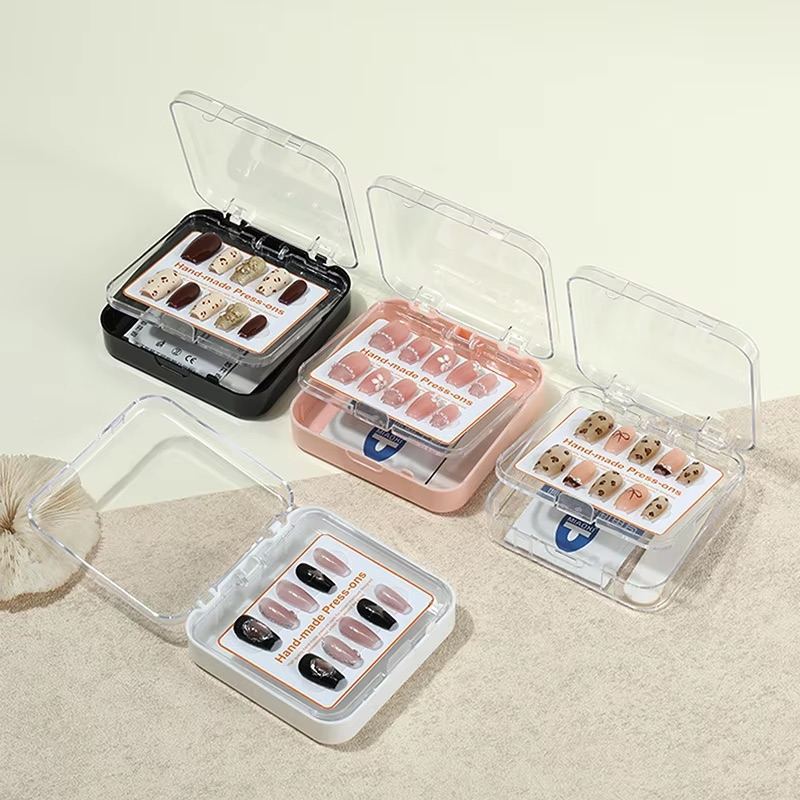
Two-layer clear nail storage case
A two-layer clear case with a hinged lid and a lower compartment for tools or adhesive, listed for press-on and nail-tip storage. A sourcing starting point for a branded package — ask for inside measurements, material details and sample terms rather than assuming the layout suits your shapes.
Card photos are the current marketplace listing images and may differ from the delivered product; confirm details on the live listing.
The Amazon option is a retail candidate for readers comparing storage formats, and this article does not claim it has been physically tested with long or embellished nails. Treat the wholesale case as a starting point for a supplier conversation, not as confirmation that it fits every press-on shape or that a sample will match a production run. If you are buying a single organizer for personal use, a consumer listing is usually more convenient; wholesale sourcing makes more sense when you have a genuine repeat or branded-packaging need.
A practical setup in under an hour
Assign each complete set an ID. Label the case and add a small record with the brand or maker, design, shape, length, and location. If you have a printed size chart, keep a copy with the set. For homemade sets, save the sample card or sizing worksheet that describes the intended mapping. If an existing set has no reliable chart, record the size sequence as printed and note that actual fit still needs confirmation.
Next, choose one location for complete sets and another for unmatched or damaged items. Keep unmatched nails separate and clearly labeled. Move only your most frequently used designs into a display book, and put the matching set ID beside each page. This allows you to browse the designs without treating the book as the only record.
Finally, test the arrangement. Close the organizer, turn pages, lift several nails, and return them to their assigned positions. If a nail catches, shifts, or presses against an embellishment, change the location or storage format. Take a quick photo of the finished index. That photo can help restore the system if labels come loose or a box gets moved.
What small brands should sample before placing an order
If you sell press-on nails, storage accessories can become part of the customer experience, but do not choose packaging based only on its appearance. Order a sample and test it with your actual nail shapes, lengths, decorations, instruction card, and any included tools. Confirm usable inside measurements, page or tray layout, closure, and whether the set can be removed and returned without damage.
Prepare one sample with the final product contents. Include the exact size card or fit instructions that customers will receive. Check whether the organizer has room for the card without covering the nails. If you are selling replacement sizes, determine where the extra nails will sit and how the customer can identify them later. A package that looks polished but separates the size guide from the product can create avoidable support questions.
When comparing a sample with a production batch, define observable acceptance points. For example: the lid closes without contacting the tallest decoration; dividers stay in place when the case is gently turned; labels remain readable; and each size position matches the approved layout. Photograph the approved sample from above and from the side. Keep a dated record and compare incoming units against it. For color or material differences, establish which variations are acceptable before ordering.
Ask the supplier to confirm the inside dimensions, material, available colors, logo options, sample cost, minimum order quantity, production lead time, and shipping terms in writing. Do not assume customization or a particular material is available because a listing image shows it. Keep conversations and order terms on the marketplace if you are relying on platform protections. The sample is evidence about the sample; it does not guarantee every unit in a later order will match.
Make the system easy to maintain
The best choice is not universally a nail book or a box. It is the format that keeps each design recognizable, protects its shape, and makes the right spare easy to find. Start with complete sets in labeled cases, add a visible book only for the designs you handle often, and keep every size number tied to its maker and product line. That small bit of discipline turns a growing pile of press-ons into an organized collection — and gives a nail brand a repeatable system for samples, fulfillment, and replacement requests.