A wide thumb is one of the fastest ways for a press-on nail size system to fail. The rest of a set can look accurate on a sizing card, yet the largest available tip can leave exposed nail at both sides, pinch at the cuticle, or sit on top of a flatter nail instead of following it. For a seller, that is not a minor styling issue. It creates exchanges, contradictory fit advice, and a size chart that works only for part of the customer base.
The hard part is that “wide thumb” is not a reliable sourcing specification. It does not tell a factory where the width occurs, how much curve the wearer has, whether the cuticle area flares, or whether the proposed tip can cover the natural nail without forcing it. A 00, 000, XL, or “wide fit” label may be useful within one product family, but it does not transfer between moulds.
That is why a buyer should sample and measure before approving a wide-thumb solution. This guide is for press-on nail sellers and product developers choosing blank tips or setting a custom size system. It does not promise that a larger tip will fit every wearer. Instead, it gives you five measurements that make a sample decision repeatable, plus a simple way to document what passed.
Why wide thumbs need their own sampling rule
A standard 10-size box distributes material across ten numbered options. It may include only one or two tips that are remotely suitable for the widest thumbs. When customers have broad or flatter thumbs, the jump between the largest two sizes can be the difference between edge-to-edge coverage and visible side gaps. Tapered shapes make this harder: two tips with a similar maximum width can lose coverage at different points near the cuticle.
Do not infer a wide-thumb fit from the largest number alone. A tip that is wide enough at its broadest point may still be too narrow at the cuticle. Another can be wide enough but excessively curved, so its sidewalls lift even though the outline looks correct. You need the profile as well as the number.
Before you ask for a sample, define the role of the wide option in your range. Are you filling a gap for existing customers? Developing a separate extended-size kit? Or checking whether a new mould offers a better baseline for every size? The answer affects the sample quantity and the acceptance standard. A top-up has to match your current system closely. A new version can be assessed more broadly, but its size chart and fit testing must be rebuilt rather than copied.
Set up a one-page sampling record. Give each sample a supplier name, product or mould reference, shape, stated length, stated size count, order date, and internal version code. Photograph the largest two or three tips front, side, and underside beside a millimetre ruler. This record is more useful than a verbal recollection when you return to the supplier months later.
1. Internal width at the widest usable point
The first measurement is the maximum internal width, not the visible outside width. Turn the tip over and measure the inside surface where the natural nail actually contacts it. Use a millimetre ruler, digital caliper, or a flexible measuring tool that can be placed accurately against the curve. Record the point you used, because “widest” can mean different locations on a tapered or arched tip.
Measure the original control tip and the proposed sample using the same method. For a new system, measure the largest three sizes rather than only the largest. That shows whether the range has usable steps or just one oversized outlier. A customer whose thumb sits between two options needs a neighbouring size that is meaningfully different, not a duplicate label.
Do not publish a universal “wide thumb equals X millimetres” rule from one sample. Your site can explain the measurement method and state the range you tested, but a millimetre cut-off must be tied to a named mould and shape. Width alone does not describe fit, and different brands place the same size label on different physical dimensions.
2. Cuticle-edge width and flare
The maximum width does not tell you whether the tip covers the nail where customers notice gaps first. Measure the internal width close to the cuticle end, at a consistent distance from the base of the tip. Record that distance in your sampling sheet. A tip may be broad across the middle yet narrow sharply at the base; another may have a wide, rounded cuticle that overhangs a smaller nail. Neither outcome is automatically wrong, but they serve different nail shapes.
Look at the outline from above. Does the sidewall widen toward the cuticle, stay parallel, or taper inward? For a thumb that is broad near the base, a tapered cuticle can leave exposed corners even when the widest-point measurement is adequate. Filing a slightly too-wide tip can be a legitimate final adjustment, but filing cannot create material where the cuticle is already too narrow.
Use the same sample on a nail stand or practice finger after you have completed ruler measurements. Place it at the cuticle without glue and check both corners under normal light. Note whether the tip can be centred while still covering the sidewalls. This is a better test than holding it in the air over a finger, where curve and edge gaps are easy to miss.
3. Curve depth and sidewall contact
Two tips with identical widths can fit completely differently because one is flatter and the other more arched. Measure curve depth by placing the tip, open side down, on a flat reference surface. Measure the height of the centre above the surface at the widest section, and record the width at which you took it. This does not create a universal curve rating, but it lets you compare samples from the same point of view.
Then perform a contact check. With no adhesive, gently place the sample against a representative wide-thumb form or tester. Look for three things: a centre gap showing the tip is too curved, side gaps showing the tip is too flat or too narrow, and pressure at the sidewalls showing the tip is forced outward. A correct result should sit close to the natural curve without pressure, rocking, or an obvious open channel.
Do not solve a curve mismatch by telling customers to use more glue. Extra adhesive may fill small irregularities, but it does not correct an incompatible mould. It can also make the application messier and obscure the reason a tip lifted. Your product instructions should distinguish ordinary application preparation from a structural fit problem.
If you sell both square and almond options, repeat this test for each shape. The same size label can use different geometry after the shape changes. A long tapered almond may be narrower through the upper contact area than a short squoval even when the factory uses the same number. This is why a wide-thumb record must identify shape and length, not merely size.
4. Length of the contact area
A tip can cover a wide thumbnail and still fail because the usable contact area is too short or too long. Measure from the inner cuticle edge to the point where the natural nail would end under the tip. Do not confuse the overall extension length with the contact area. For long styles, the decorative free edge can add a large amount of length without adding any fit information.
Check where the apex and curve begin. On a short natural nail, a long contact area may force the artificial apex into the wrong position, making the finished press-on look bulky or creating leverage near the free edge. On a longer nail bed, a very short contact area can leave the tip unstable. The purpose of this measurement is not to match every customer to a single number; it is to identify whether your sample system creates obvious conflict for the people it is meant to serve.
Use the contact-area measurement when comparing “wide” and standard lines from the same supplier. An extended-size option may be wider but have a different overall design. If you introduce it into an existing product catalogue, your customer-facing size guidance must explain that it is a distinct fit system. Do not silently substitute it for a standard line just because the largest size has more coverage.
For a practical Amazon route to a measuring accessory, use the product link supplied for this project before you create or mail a sizing kit. It is a purchasing route only; check the listing and current availability yourself before relying on it: Press On Nails Sizing Kit Cards for Nail Business
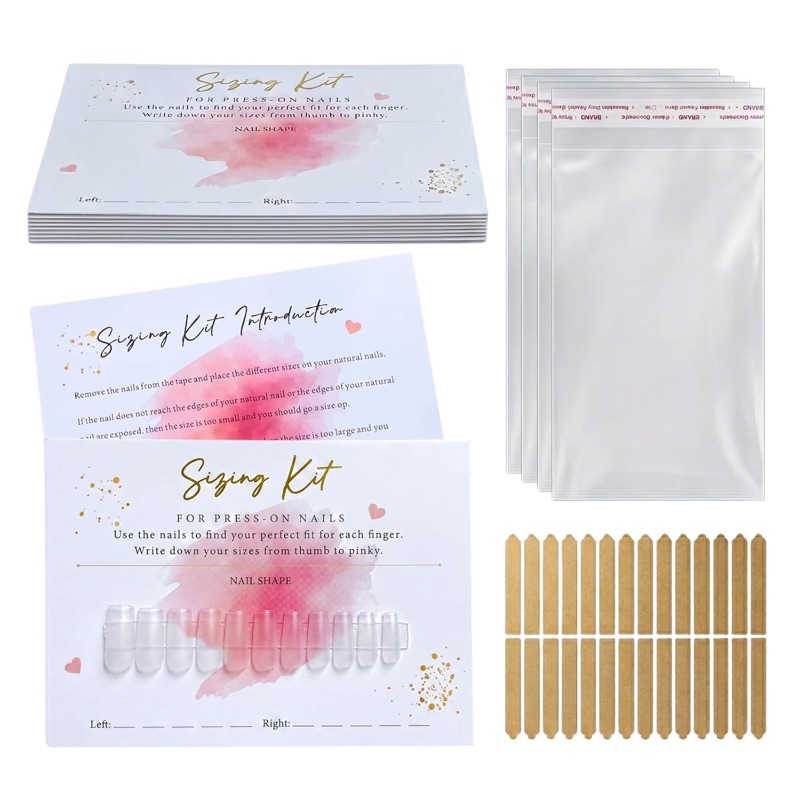
Press-On Nails Sizing Kit Cards for Nail Business — 5x7, Pink & Gold Foil
Printed 5x7 sizing kit cards that come with an instruction card, clear bag and adhesive tape. A practical measuring accessory route before you create or mail your own sizing kit.
5. The size-step gap above and below the proposed thumb size
The final measurement is not one tip; it is the sequence around it. Measure the proposed wide size plus the next smaller and next larger size. Calculate the difference in internal width at the same measurement point. You are checking whether the system offers practical choice, not merely a dramatic maximum.
A range with one oversized thumb tip and a large jump down to the next size can still exclude customers. A range with several neighbouring widths is easier to use, easier to explain, and less likely to force a customer to choose between exposed sidewalls and overhang. Record the size label, internal width, cuticle-edge width, curve-depth note, and contact-area length for all three tips.
Be cautious with labels such as 00, 000, XL, or “extra wide.” They are inventory identifiers, not evidence of inclusivity. A 000 tip is valuable only if the recorded dimensions and curve solve a documented fit problem in your system. If the supplier cannot supply measurements, a physical sample becomes more important, not less.
When you build a size chart, give customers a path for an edge case. This can be a sizing-kit request, a customer-service email route, or an explicit note that a style has a narrower cuticle line. Avoid implying that every shape will suit every thumb. Clear limits reduce returns more honestly than an overbroad “fits all” claim.
How to approve a sample without creating a hidden mixed system
Use an approval checklist before ordering production. The sample should have a traceable product or mould reference. Its three width measurements should be recorded. The curve should be compared against the intended tester or control tip. The contact area should be suitable for the stated product shape. Finally, its adjacent sizes should give a usable progression.
If the sample passes, save the photos and measurements with the supplier conversation. Put the mould or product reference on the purchase record and repeat the same inspection when the first production carton arrives. Pull samples from more than one inner pack. Check the largest sizes first, because an unnoticed change there affects the customers most likely to have no replacement option.
What to ask a supplier before ordering
Keep the request concise, but make it hard to misunderstand. Ask whether the sample and production tips come from the same mould; how many sizes the line contains; the internal width, cuticle-edge width, and length of the largest three sizes; the material and finish; the minimum order quantity for samples and bulk; the size difference between two adjacent sizes; and request help when the thumb is beyond the published range or has an unusual curve.
Keep a physical sizing kit aligned with the final sales product. If you change the mould, shape, or material, review the kit and the chart together. A size card created from an old tip system is worse than no card because it produces confident but wrong orders. The same rule applies to your product photography and customer-service macros: update them when the system changes.
Do not promise that filing or heat will turn a narrow tip into a wide-fit option. Small edge adjustments can help a correctly sized tip look neat, but they are not a substitute for coverage. If a design is too narrow at the cuticle, the honest answer is a different shape, a larger-size system, or a custom option.
The practical decision
Approve a wide-thumb option only when its width, cuticle flare, curve, contact length, and neighbouring size steps are documented against the same mould system.
Approve a wide-thumb sample only when the five checks agree: usable internal width, adequate cuticle-edge coverage, compatible curve, appropriate contact area, and sensible steps around the size. Any one of those can invalidate an otherwise attractive sample.
This method also gives you better evidence for restocking. Instead of asking a supplier for “the biggest thumb tip,” you can reference a documented mould and state the measurements and neighbouring sizes you need. It protects your inventory from silent substitutions and protects customers from a size chart that assumes every largest tip is interchangeable.
A wide-thumb fit problem will not disappear because a factory adds another label. It improves when the label, physical measurement, curve, and customer instructions all describe the same nail-tip system. That is the standard worth sampling for before you place the order.