Side lifting is one of the fastest ways for a press-on nail set to look unfinished. A customer may see a fine line along one edge, catch hair on it, or notice that the tip moves when pressure lands on the opposite side. The complaint often arrives as "the glue did not hold." Sometimes that is true. Often, however, the adhesive is being asked to bridge a fit problem that was visible before any glue was applied.
For a press-on brand, the useful question is not simply whether a sample stays on for a certain number of days. It is whether the selected tip sits comfortably from one natural sidewall to the other, follows the intended curve without force, and leaves a clean adhesive contact area around the edges. Those are product decisions. They need to be checked while choosing a blank tip, approving a shape, or reviewing a supplier sample.
This guide explains how to investigate side lifting without turning every failure into a vague instruction to use more glue. It is for brands and makers developing retail press-on sets. It does not claim that one shape, curve, or size range will fit every nail.
The sidewall is a fit boundary, not a decorative edge
The sidewalls are the left and right boundaries of the natural nail plate. In a well-fitted press-on, the tip should visually cover the nail from sidewall to sidewall without resting on skin or requiring the wearer to force the sides downward. That sounds simple, but it is easy to misjudge from a top view.
A tip can appear the correct width across the middle and still fail at the edges. The natural nail may be wider near the cuticle than at the free edge, or it may flare slightly forward. A tapered press-on can therefore leave a gap near one side while looking acceptable in a flat photo. Conversely, a wider tip may seem to solve the gap but extend onto the side skin, creating a different lifting risk.
Side fit also interacts with the C-curve. A very curved tip placed on a flatter natural nail can touch at the center while the edges resist contact. A flatter tip on a more curved nail can produce the opposite impression. This is why a width number by itself cannot diagnose a side-lifting complaint. The sample record needs to show width, curve, and the exact place where contact is lost.
Consumer conversations make the distinction visible. Some users describe side lifting after a short period of wear; others say the tip looks acceptable from above but wrong from the side. Those reports establish that the problem exists. They do not prove that a particular glue, material, or supplier mold is the cause. A brand still has to test the physical relationship between its selected tips and real nail plates.
Separate four different failures before changing the product
"The sides lift" is a symptom, not a specification. Start by sorting the observation into one of four patterns. Each one points to a different corrective action.
- A visible side gap. The tip is too narrow at a particular point, or its outline does not follow the nail plate. This is an outline and size-range question. Adding more adhesive can fill a gap temporarily, but it does not create a clean edge.
- Side overhang. The tip reaches beyond the natural nail and sits on skin. The piece may be too wide, incorrectly positioned, or shaped for a different sidewall line. A wearer may describe this as uncomfortable, bulky, or prone to catching.
- Edge spring-back. The cuticle and central portion appear to sit down, but the side edges want to rise after the tip is released. This often indicates that the curve is not relaxed on the natural nail. The same width can behave differently in a flatter or more arched tip family.
- Late lifting after a clean initial fit. The tip looked flush at application but later opens at one side. Preparation, moisture, adhesive amount, contact time, daily wear, and fit can all contribute. This is the only pattern where it makes sense to investigate process first, after confirming that the dry fit was genuinely clean.
Do not let the customer-service label decide the diagnosis. A return tagged "glue failure" may be valuable product-development evidence if several people report the same finger, shape, or edge. Record the location: cuticle-side left, cuticle-side right, middle sidewall, or free-edge side. "Side lifting" without that detail is hard to act on.
Test the dry fit before any adhesive is involved
The most useful part of a sidewall test happens before glue. Ask the tester to place each selected tip at the cuticle line on a clean, bare nail and hold it in its intended position with light finger pressure. The tester should not squeeze the sidewalls down to make the fit look better.
Inspect the tip from above, at a low side angle, and from the front edge. Take consistent photos. A top-down image is good for checking outline and symmetry; the low side angle shows whether an edge is floating; the front view can reveal a curve mismatch that is hidden by the design.
At this stage, record:
- tip family, shape, stated length, and marked tip number;
- natural-nail width at the cuticle and widest point;
- whether either side has a gap, overhang, or spring-back;
- whether pressure is needed to keep the edge down; and
- whether the issue changes when the tip is centered at the cuticle line.
The last point matters. It is tempting to slide a too-narrow tip sideways so one edge looks better. That simply moves the failure to the other side and can distort the cuticle position. A sample cannot pass because it looks good only when it is deliberately off-center.
If your brand sells a sizing kit, test the kit tips and the final retail tips together. A customer can receive a correct size number from a kit but experience a different edge fit if the production set uses a different blank-tip family or a noticeably different curve. The kit is part of the fit promise, not just an accessory.
Decide whether filing is a reasonable correction
Filing is useful when it corrects a small amount of overhang on a tip that otherwise sits comfortably. It is not a universal answer for a mismatch. Filing a wide tip can preserve a usable size when the curve and cuticle profile are right. It may be better than sending the customer down a size that leaves a gap.
But the operation has limits. Removing a large amount from both sidewalls changes the visual shape, can disturb art placement, and makes the brand dependent on the customer's filing skill. If every tester needs to reshape the same tip number, that is not a styling preference. It is evidence that the size or mold selection needs review.
Write the filing rule in concrete language. For example, "lightly refine a small overhang before application" is a different promise from "file the sides until it fits." The second shifts a design problem onto the customer and makes results difficult to reproduce. In product testing, log how much modification was needed and whether the edge stayed flush after the adjustment.
The same principle applies to heating or reshaping a press-on. A tester may be able to change the curve of an individual tip, but that does not mean a retail product should rely on that intervention. Treat it as a clue: the existing tip family may not be the right starting geometry for the customers you intend to serve.
Build a sidewall panel instead of testing one ideal hand
One hand can help you identify an obvious flaw. It cannot prove that the set has a useful size range. Assemble a small try-on panel with deliberately different nail outlines: relatively straight sidewalls, nails that widen forward, narrower pinkies, wider thumbs, and different levels of natural curvature. You do not need to label any one profile as normal. The purpose is to see where the selected mold stops working.
Keep the test conditions boring and consistent. Use the same version of the tip family, the same cuticle alignment, and the same photo angles. Separate the dry-fit observation from the adhesive-wear observation. If a tip has a gap before application, do not let a successful short wear test erase that result.
Review the panel by tip number as well as by person. A repeated issue on the thumb may show that the assortment lacks a useful width or curve. A repeated issue on the ring finger may point to the taper of the shape. If failures appear across several fingers on one tester, compare the nail's curve and outline with the tip family before you add more sizes.
A simple result field is enough: pass without change, pass with light filing, fails with side gap, fails with overhang, or fails with edge spring-back. Add a note for location. This gives the supplier and your own future team something more useful than "fit was bad."
Retail options
These Amazon links are retail references for a try-on comparison and small edge refinements. They do not establish that either product will fit every nail or solve a side-lifting problem on its own.
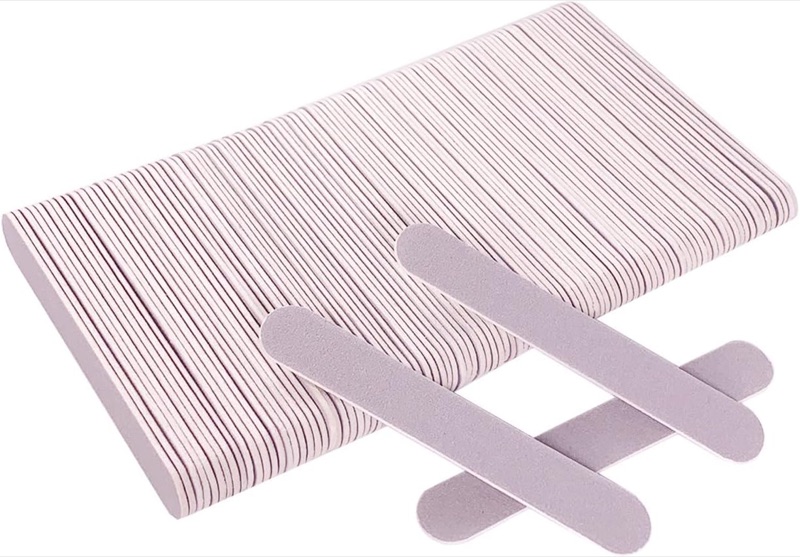
Mini nail files, double-sided emery boards, 100 pc
A bulk pack of 100 double-sided emery-board mini files, for the light sidewall refinement described above. Check the stated grit and file shape on the listing before relying on them for a specific adjustment.
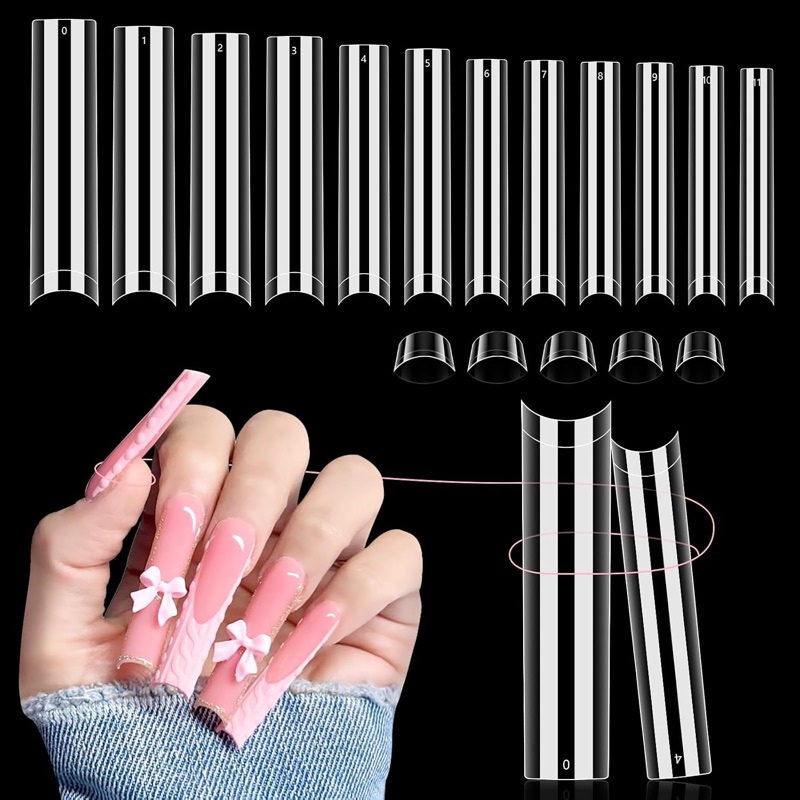
3XL square nail tips, no C-curve, 504 pc
A 504-piece extra-long square tip set listed as a no C-curve profile. Useful for comparing how a flatter tip family behaves at the sidewalls against a more arched blank, on a dry fit.
Card photos are the current marketplace listing images and may differ from the delivered product; confirm details on the live listing.
What to ask when comparing supplier samples
Supplier descriptions such as "full cover," "natural fit," or "no C-curve" are starting terms, not measurements. Ask for physical samples from the exact tip family under consideration, then inspect them yourself. A product photo cannot tell you the sidewall line on every size.
For a blank-tip comparison, request the following information where the supplier can provide it:
- the count of marked sizes in the specific tip family;
- a size chart or dimensions for representative tips, including widths at more than one point where available;
- confirmation of whether the proposed shape and length use the same mold geometry as the supplied sample;
- inside and top-view photos of representative thumb and small-finger tips; and
- a sample pack drawn from the version proposed for production.
Then make your own comparison sheet. Note where each tip family begins to taper, how far its sidewalls travel before tapering, and whether the curve changes across sizes. Do not state that a supplier offers a particular curve, material, or customization option until the actual listing, sample, and conversation support it.
If you are choosing between two shapes, do not compare only their visible silhouette. Place both on the same tester at the cuticle line. A square, squoval, oval, or tapered shape can place usable width in different parts of the nail. The right question is not which one looks best in a product photo. It is which one gives your target customer the cleanest dry fit with the least modification.
Turn customer feedback into a better assortment
Once the product is live, treat edge complaints as structured feedback. Add a support tag for "side gap," "overhang," "side lifting after wear," and "side catches." Ask for the shape, length, chosen size, finger affected, and a photo before removal when appropriate. Do not ask customers to diagnose curve mismatch; that is the brand's job.
After a meaningful pattern appears, compare it with the approval sample and your try-on record. You may find that a set performs well with one nail outline but has a predictable gap at a particular tip number. The next decision might be a new tip family, a revised size assortment, a clearer sizing-kit instruction, or a limited made-to-order option. It should not automatically be "use more glue."
This is also where a size-system tool becomes valuable. A tool can preserve each brand's measured widths, shapes, and try-on notes. It should not tell a consumer that a universal number will solve every sidewall issue. The durable value is the record behind the recommendation: which blank tips were approved, on which profile, and with what modification.
The approval decision
Approve a press-on tip only after it passes a dry-fit sidewall check on the people you intend to serve. The tip should not need force to stay down, should not extend onto skin, and should not leave an unexplained edge gap. Adhesive testing comes next; it does not replace that first step.
For a small brand, this discipline is practical rather than elaborate. Keep the sample, the exact tip numbers, measured dimensions, photographs, and any filing notes together. When the next supplier sample arrives, repeat the same test. That is how a complaint about a lifted side becomes a specification your product can actually improve.