A press-on nail can be the right width, the right length, and still announce itself as a false nail the moment someone looks at the cuticle. That usually happens at the join: the back of the tip sits proud of the natural nail, produces a hard plastic line, or carries enough colour and top coat to make the first few millimetres look swollen. For a small press-on brand, this is not a minor finish complaint. It is a sample-approval problem that can be caught before the design, instructions, and packaging are locked.
The useful question is not simply whether a tip is "thin." A finished set has a shape, a raw cuticle edge, a design build, an adhesive method, and a customer's own nail-bed geometry. Those parts can create similar-looking bulk for different reasons. Treating every complaint as a sizing issue leads to the wrong fix.
Start by locating the visible step
Look at an unglued tip placed on a clean natural nail before evaluating it on a photographed hand. View it from above, then from the side at normal conversational distance. A large, obvious line at the back may come from the tip's edge. A tip that looks clean unglued but heavy after application may instead be sitting too high because of the adhesive or because the selected size is too broad.
Width is the first thing to rule out. A nail that overlaps either sidewall does more than look oversized: its back corners can sit on skin rather than nail plate, making the whole cuticle end read as a thick cap. A better size is usually one that covers the nail plate without forcing its side edges outward. The customer still needs enough coverage to avoid a visible gap, but coverage and overhang are different conditions.
Then look at the tip's back contour. Natural cuticle lines are not identical from finger to finger. A smooth, shallow curve on a tip can appear abrupt on a nail with a deeper or more rounded proximal curve; a strongly curved back edge can leave exposed space on a flatter nail. This is a visual-fit question, separate from the front-to-back curve of the tip. Do not try to solve it by telling customers to push a mismatched tip farther into the cuticle. That can place the back corners against skin and make the result less convincing.
Finally, inspect the profile. Rest the tip against the nail without adhesive and see whether the back edge settles down or remains suspended. A high point at the cuticle can come from a curvature mismatch even where the perimeter looks correct from above. The set should be assessed on more than one nail-bed shape during sampling. One model hand is not enough evidence that the back edge will read cleanly for the intended customer.
The raw cuticle edge deserves its own inspection
The cuticle end of an unfinished full-cover tip is a component, not a cosmetic afterthought. Its transition is set by the mould, material, and trimming quality before any art team adds colour. A very thick or abruptly cut edge gives a maker little room to create a refined join later. Conversely, a tip can have a slim-looking edge yet still feel rough, uneven, or inconsistent between sizes.
Ask to see the back edge in close-up, against a contrasting background and in side profile. Photographs should include several sizes, not only the most flattering centre size. The thumb, index, and smallest finger sizes often reveal whether the transition changes across the range. A factory sample that is acceptable in one nail size cannot stand in for the whole size set.
What you are checking is simple to describe:
- Does the edge taper into the nail surface, or does it finish as a flat wall?
- Are the two back corners symmetrical and free of mould flash or ragged trimming?
- Does the thickness change abruptly from the cuticle area to the body of the tip?
- Does the tip stay neat when it is turned over, not merely when photographed face-up?
Avoid setting a universal millimetre target unless the supplier can document how and where it was measured. Marketplace listings frequently advertise an "ultra-thin cuticle" edge, but the phrase does not tell a buyer how a finished decorated set will look. A useful approval standard is visual and comparative: this production candidate should match the approved sample at the back edge across the specified sizes and shapes.
It is also worth separating tip edge from tip profile in the product specification. The edge concerns the last portion that meets the natural nail. Profile concerns the arch and body of the nail. They interact, but they are not interchangeable. Keeping both fields in the sample sheet prevents a later dispute in which a supplier changes one feature while assuming the other is unchanged.
A finished design can add bulk after the blank tip passes
Blank tips are necessary for selecting a base, but they are not the product a customer sees. Paint, gel colour, chrome treatments, decals, encapsulated elements, and top coat can all alter the perceived thickness at the back of a press-on. The effect is particularly easy to miss in white, pale nude, or high-gloss designs, where a raised edge catches light and outlines the cuticle.
For hand-finished or small-batch designs, insist on judging the completed set. Ask for a side-view photo of the sample applied to a nail form or model hand, plus a close view of the cuticle zone before and after the finishing coat. This is not a request for a beauty photograph; it is a production check. The relevant question is whether the design remains controlled at the point where the press-on meets the natural nail.
The art brief should identify areas that must remain clear of raised components. A pearl, charm, or heavily textured gel element may be visually appropriate in the centre or toward the free edge, but the same placement near the cuticle changes the silhouette of the whole set. If the design relies on a bold proximal accent, approve it under normal lighting and at arm's length, not only under a ring light. A detail that reads crisp in a macro image can look like a lump in ordinary wear.
Colour placement matters too. A full opaque coat that reaches the very back of every tip may be right for the design, but it leaves no visual forgiveness if the edge is inconsistent. In contrast, a design with a deliberate margin or a cuticle-shaped feature needs accurate placement from nail to nail. Neither approach is automatically more natural. The decision should follow the product concept and the capability demonstrated in the completed sample.
This is where brands often approve the wrong evidence. A supplier sends a clear base tip, a separate painted example, and a styled image of the final idea. None of those proves that the exact selected tip, in the selected sizes, can carry the exact finish without a thick-looking join. Approve the assembled result, not a collection of adjacent examples.
Adhesive can disguise—or exaggerate—the same problem
Customers do not see the empty space beneath a press-on; they see the edge that meets their nail. Adhesive choice changes that meeting point. A tab can add height when it is too large, folded, or positioned close to the back edge. Liquid glue can create a visible ridge if too much is used or if the tip is pressed down unevenly. Neither observation proves that one adhesive category is always better. It means the kit and instructions need to be tested with the tip that will actually be sold.
During sample review, apply a few nails using the intended retail method rather than a technician's preferred method. Test the smallest and widest tips as well as a typical middle size. Photograph the result from above and from the side after the adhesive has settled. If tabs and glue will both be included, test both; the customer should not discover that the only natural-looking result requires a method the kit does not explain.
The application card should be specific without pretending to solve every fit issue. It can tell customers to choose a tip that covers the nail without sidewall overhang, to keep adhesive off skin, and to press from the cuticle area toward the free edge. It should not promise that any tip will lie flush on every nail bed or imply that visible lift is always user error. A concise sizing and prep instruction is more credible than a broad "seamless salon finish" claim.
Keep adhesive feedback coded separately from tip feedback. "Bulky at the cuticle" could mean a customer chose a tip that was too wide, used a thick tab, received a thick finished design, or encountered a particular size with a poor edge. If all of those reports are placed in one generic quality bucket, the next production order will be difficult to correct.
Retail options
These Amazon retail references are included for readers who want to compare tip construction and the stated contents of a finished set. Check the current listing before relying on availability, included components, or any manufacturer claim.
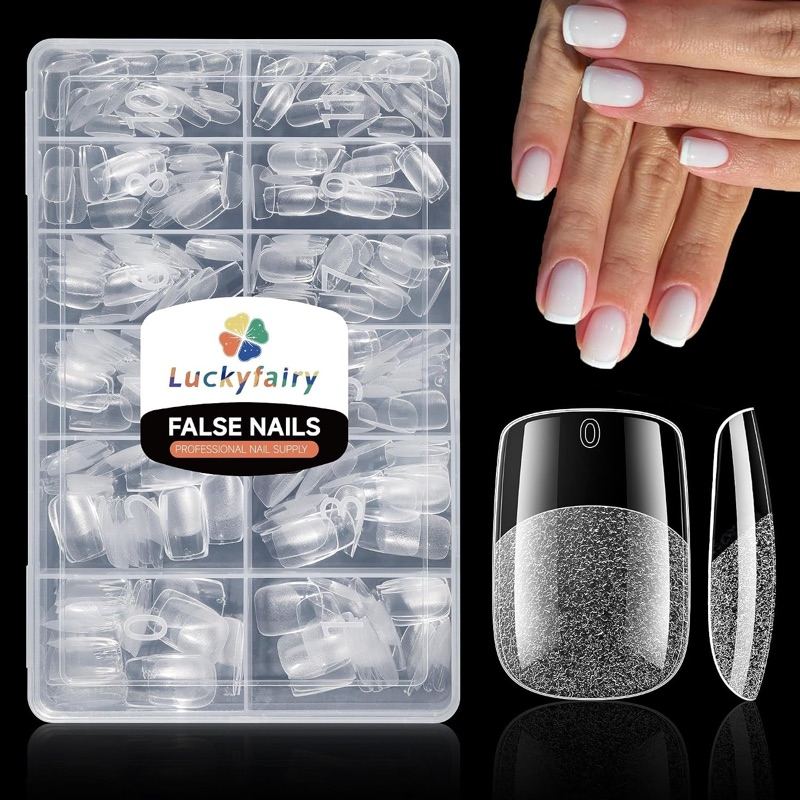
Short squoval nail tips, X-soft gel, 240 pc
A 240-piece pre-etched X-soft gel tip set in a short squoval shape. Use it to check how a thinner, softer tip reads at the cuticle join before approving a finished design.
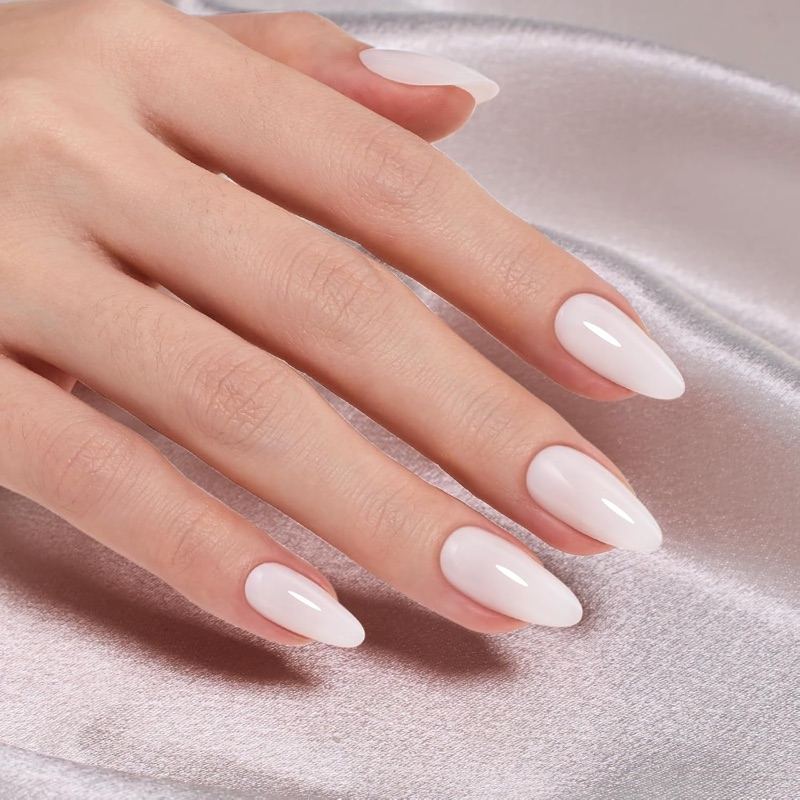
Milky white press-on nails, medium almond
A ready-made medium almond press-on set in milky white. Useful for judging how an opaque finish behaves at the back edge — the point where bulk is easiest to see in pale, high-gloss colours.
Approve a set with a repeatable cuticle check
The most reliable approach is a short approval routine applied to every new tip family and to any design that changes the back of the nail. It does not require laboratory equipment, but it does require the same evidence each time.
First, retain an approved reference sample. Record the tip family, shape, length, colour/design version, and the individual sizes inspected. Include front, side, and underside photographs. A written phrase such as "thin cuticle area" is not an adequate reference on its own; two people can use it to describe very different transitions.
Second, compare a new sample directly with that reference rather than reviewing it in isolation. Put both tips on the same neutral surface and photograph their back edges under the same light. Check whether the new version has a sharper lip, a changed back contour, roughness, or a visibly heavier finish. Comparison makes gradual specification drift easier to see.
Third, apply representative nails. A practical minimum is a thumb, a middle-sized nail, and a small nail, because a set can look consistent in its centre sizes while the extremities tell a different story. Use the intended adhesive and finished design. If the product will be sold as a made-to-order set, inspect a completed customer-order simulation rather than only a display sample.
Fourth, make the acceptance decision at the right moment. Do it before production artwork, printed instructions, and packs are committed. Once packaging refers to a particular application experience, changing tip families or the adhesive method can create costly rework. The cuticle check belongs alongside size-range, colour, decoration, and pack-component approval—not after the shipment arrives.
Turn customer language into useful development data
Customer reviews are most valuable when they describe where the issue occurred. A comment saying "they looked fake" is a signal, but it is not yet a diagnosis. Follow-up fields can ask whether the concern was at the cuticle, sidewall, free edge, or overall curve; which nail size was used; and whether glue or tabs were used. A photograph is helpful when the customer is comfortable sharing one, but the form should work without it.
Those details reveal which action belongs to the brand. Repeated reports on a single thumb size may call for a size-range correction or a revised back contour. Reports concentrated among tab users may point to the adhesive instruction or supplied tab dimensions. Complaints following a new decorated collection may show that the finish, not the underlying tip, has changed the silhouette. Do not tell customers that a visible edge is normal before this distinction has been made.
There is a commercial benefit to handling the problem precisely. A customer who understands how to choose a size and where an adhesive should sit is less likely to make an avoidable application error. A product team that can separate fit, edge, finish, and adhesive signals is less likely to order another batch with the same fault. Clear inspection notes also make supplier conversations more concrete: share a close-up, identify the nail size and view, and compare it with the approved reference.
The approval standard is the finished join, not a marketing phrase
Press-on nails look most convincing when the cuticle area appears intentional from more than one angle. That outcome does not come from a single feature advertised on a product listing. It comes from a compatible tip, a controlled raw edge, a completed design that has not piled material at the back, and an adhesive method that the customer can realistically use.
Before approving a collection, inspect the actual finished set on representative nails. Record what passed. If the cuticle end looks heavy, identify whether the cause is width, contour, profile, edge quality, decoration, or adhesive before requesting a change. That small discipline turns an imprecise "bulky" complaint into a product-development decision a brand can act on.