A leak at the side is not automatically a capacity failure. It can happen because the absorbent zone is narrow for that wearer, because the gusset shifts or folds, because the leg opening gaps, or because liquid reaches a seam before it has spread through the core.
Each of those needs a different fix — pattern, grading, layer layout, seam construction, edge finish or an absorbency claim — which is why "make it wider" is a poor brief. This guide covers what a small brand can measure, wear and test on real samples, and how to turn the result into an acceptance rule a supplier can work to.
For the garment-care side of the same product, see how a bra wash bag fits without folding the cups — the closing and loading logic transfers to any shaped garment. This page stays with gusset geometry and sample testing.
A side leak is an outcome, not a diagnosis
The useful question is where the liquid left the garment and what was happening at that point — not which product claims the widest panel.
A panel can be adequately wide and still fail: it may sit off-centre, wrinkle at the crotch, or lose contact with the body as the wearer walks or sits. A gapping leg opening offers a route around the absorbent zone. A seam can become the first point of escape. And if the core has reached its tested capacity, the side is simply where the excess exits.
Widening also has costs. A wider panel can add bulk between the legs, push a seam into a high-friction area, or still follow the body badly if the leg opening is wrong. Conversely, a narrow but close-fitting gusset can work for one wearer and cut into another.
Treat fit, absorbency, wet feel and leakage as separate observations. They are measured differently, and a sample can pass one while failing another.
Write gusset geometry you can measure
Work from the finished, sewn garment — not the paper pattern or a verbal description. State the style, size, fabric, construction revision, wash condition and measuring method on the tech pack. A number without those controls cannot be compared at reorder.
Record at least four geometry details for every size and style:
- Narrowest crosswise width: the minimum finished width across the gusset, measured perpendicular to the front-to-back direction.
- Front-to-back panel length: the length of the absorbent zone along the centreline, with start and end points marked.
- Front and rear coverage: distance from the crotch reference point to each end of the absorbent or leak-resistant layer. Measure the actual layer edge, not only the visible top fabric.
- Side-edge and seam position: distance from the narrowest point to each absorbent-layer edge, seam or barrier termination, and whether the panel is symmetrical.
Also record the condition of measurement: relaxed and laid flat, and — if it matters for the claim — after a defined laundering sequence. Use the same table, orientation, caliper or ruler, tension rule and endpoint marks every time. If the fabric stretches easily, say whether it was measured without tension or at a stated extension, and never pull one sample taut while leaving another relaxed.
Build the size table instead of assuming grading
Do not assume the gusset scales with the waistband or hip. Ask the supplier which components change by size: gusset width, absorbent-zone length, barrier dimensions, leg-opening circumference and panel placement.
Measure the smallest and largest sizes as well as the base size. Grading often changes coverage and fit differently from the body pattern, and the extremes are where a claim like "wide gusset" stops being true.
Record actual measurements from several samples and calculate the range you are getting, not the range you asked for. If you set a tolerance, label it as your own product specification and check that it preserves fit and the leak screen — no published protocol or consumer report hands you a tolerance that works for every construction.
Check body contact before pouring anything
A flat measurement cannot tell you whether the panel stays where it is needed on a body.
Fit-check samples in every target size range and across the cuts you sell, with participants whose measurements map to your chart. Record hip measurement, chosen size and fit notes; keep personal detail to what the decision needs.
Ask participants to wear the sample through ordinary movement — stand, sit, walk, stairs, bend — and, for a sleep style, lie in the positions the product is meant to support. Note whether the gusset stays centred, folds or twists, whether the leg opening gaps or bites, and whether seams or edges press into the inner thigh.
Keep the response scale small and consistent: no shift / slight shift / repeated shift; no gap / occasional gap / persistent gap; no fold / temporary fold / fold that remains. Record where the panel sits after movement and whether the wearer adjusted the garment.
Do not tell participants to size down to force contact. An uncomfortable fit is not leak control. If the waistband fits but the leg opening does not, revise the cut or the leg shape before touching the absorbent panel.
Run a repeatable edge-leak screen
Separate three questions in the test: does fluid enter the top layer, does it spread before reaching the edge, and does it pass through the side construction? A pass or failure is only useful if it can be reproduced.
Write down the fluid type, temperature, dose volume, dose location, interval between doses, garment orientation, support surface, applied pressure or loading, observation time and number of replicate garments. Use identical variables for the approved sample and the pre-production sample.
A practical in-house setup:
- Put the garment on the same shaped support or tensioned form for every run.
- Mark the narrowest point and dose at the same location each time.
- Photograph the dry garment, then each leak point, with a scale in frame.
- Stop at the first visible edge escape, barrier breakthrough or defined endpoint.
- Record the volume applied and whether the centre stayed visibly unused.
Be explicit that a form cannot reproduce every body's pressure, movement or temperature, so it does not replace the wear trial. Label a simplified method as an internal screen and describe the deviations; do not present its result as protocol-compliant performance.
Run enough specimens to see whether the result repeats. One garment can reveal a defect but cannot establish production performance. Keep results filed by size and construction revision.
If the claim has to hold after washing, repeat the screen after the care sequence you will print: define detergent, cycles, drying and inspection points, then check shrinkage, twisting, seam opening, barrier delamination, puckering and any change in gusset width.
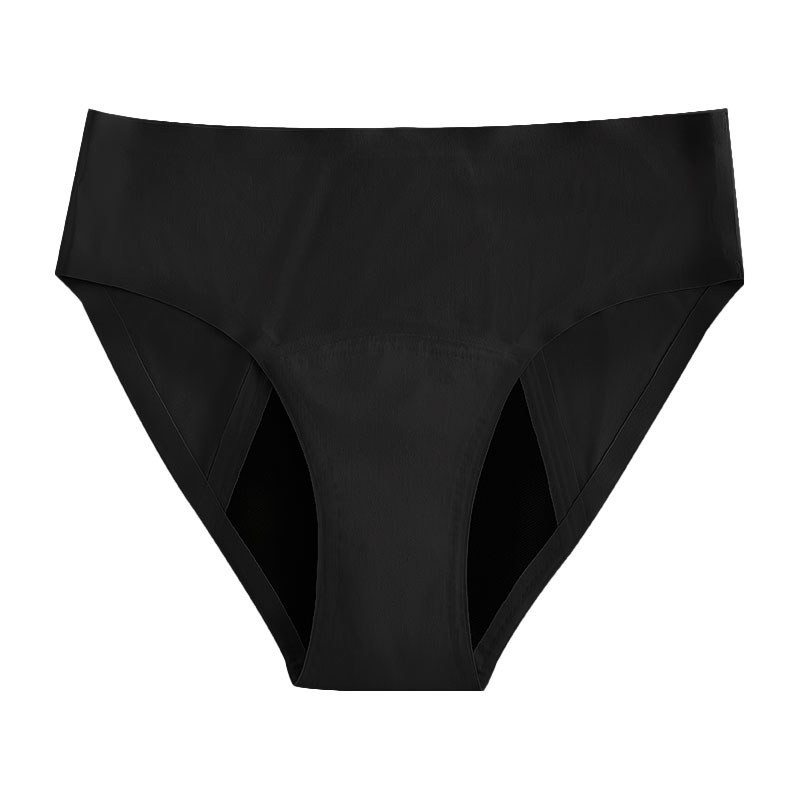
Reusable washable four-layer period underwear, wholesale
A wholesale listing in the absorbent-underwear category, shown as a sourcing candidate rather than a verified specification. The page does not state gusset width by size, so request the measurement chart and a size set before comparing it with your brief.
Listing photos show the outside of the garment; layer order and gusset geometry have to come from the supplier's technical documents.
Set pass, revise and fail before production
Tie the geometry to outcomes. Approve only when the sample matches the written size-specific measurements, stays in position in the fit checks, and passes the edge screen under the stated conditions.
Then separate the failures, because each one points somewhere different:
| Result | Likely cause to investigate |
|---|---|
| Passes the bench screen, shifts on bodies | Pattern, leg opening, panel placement |
| Correct width, leaks at the seam | Seam type, stitch, barrier termination |
| Contains fluid, feels bulky | Layer thickness, panel extent, cut |
| Fine new, changes after washing | Shrinkage, delamination, seam stability |
Write the agreed limits onto the purchase specification: style and size, gusset length and narrowest width, absorbent and barrier boundaries, material and layer order, seam type and allowance, wash condition, test setup, replicate count and pass criteria. Attach a dated reference sample or annotated photos.
Require written approval before a supplier changes fabric, panel supplier, pattern, stitch type or layer layout. A promise that a design is "extra wide" is not a measurable substitute.
What to request from the supplier
Send a short request that makes the decision testable:
We are sourcing reusable period underwear in [sizes] and [cuts]. Please confirm: finished gusset width at the narrowest point by size; front-to-back absorbent length; layer diagram and order; leg-opening measurements; seam type at the side; care instructions; whether sample and bulk use the same pattern, materials and factory; and the method and report behind any absorbency or leak claim.
Ask for a size set rather than one base size, plus a finished-garment measurement chart. If the supplier cannot provide the fields, record them as not stated and make independent sampling part of the purchase plan.
At pre-shipment inspection, pull garments from the production lot rather than a prepared sample, measure against the frozen spec, repeat the screen on representative sizes, and keep specimen IDs, lot numbers, dates, raw observations and photos with the disposition decision.
Close the loop at reorder
The specification worth having is the one you can reproduce. Decide where width is measured, keep layer boundaries in the document, and test whether each size holds body contact and contains fluid at the side under the conditions you will claim.
Compare every reorder against the frozen reference — including after the care process the product claims to tolerate. That gives the supplier a concrete correction target and gives you an acceptance decision that does not depend on remembering what the first sample felt like.